Complete text and all illustrations for the monograph [2e] by Dr Jan Pajak,
"The Oscillatory Chamber, Arkway to the Stars" (1994, ISBN 0-9583380-0-0)
Links to illustrations and related texts:
Labels: The label "E" marks the web page with text of English-language version of this monograph.
The label "1st, 2nd, 3rd Figures" mark the web pages with illustrations for subsequent volumes and chapters.
The label "P" marks the web page with text of a Polish-language equivalent of this monograph.
The label "X" marks the web page with the text of English-language version of this monograph
which is designed so as to load much faster because it does NOT show graphics at the loading
stage but only after the user clicks on subsequent Figures to display them.
Chapter G:
 [2e] Figure G1: Principle of tilting the magnetic propulsor. [2e] Figure G1: Principle of tilting the magnetic propulsor.
 [2e] Figure G2: The magnetic propulsion unit of the Magnocraft. [2e] Figure G2: The magnetic propulsion unit of the Magnocraft.
 [2e] Figure G3: Two alternative flight postions of the Magnocraft: upright and inverted. [2e] Figure G3: Two alternative flight postions of the Magnocraft: upright and inverted.
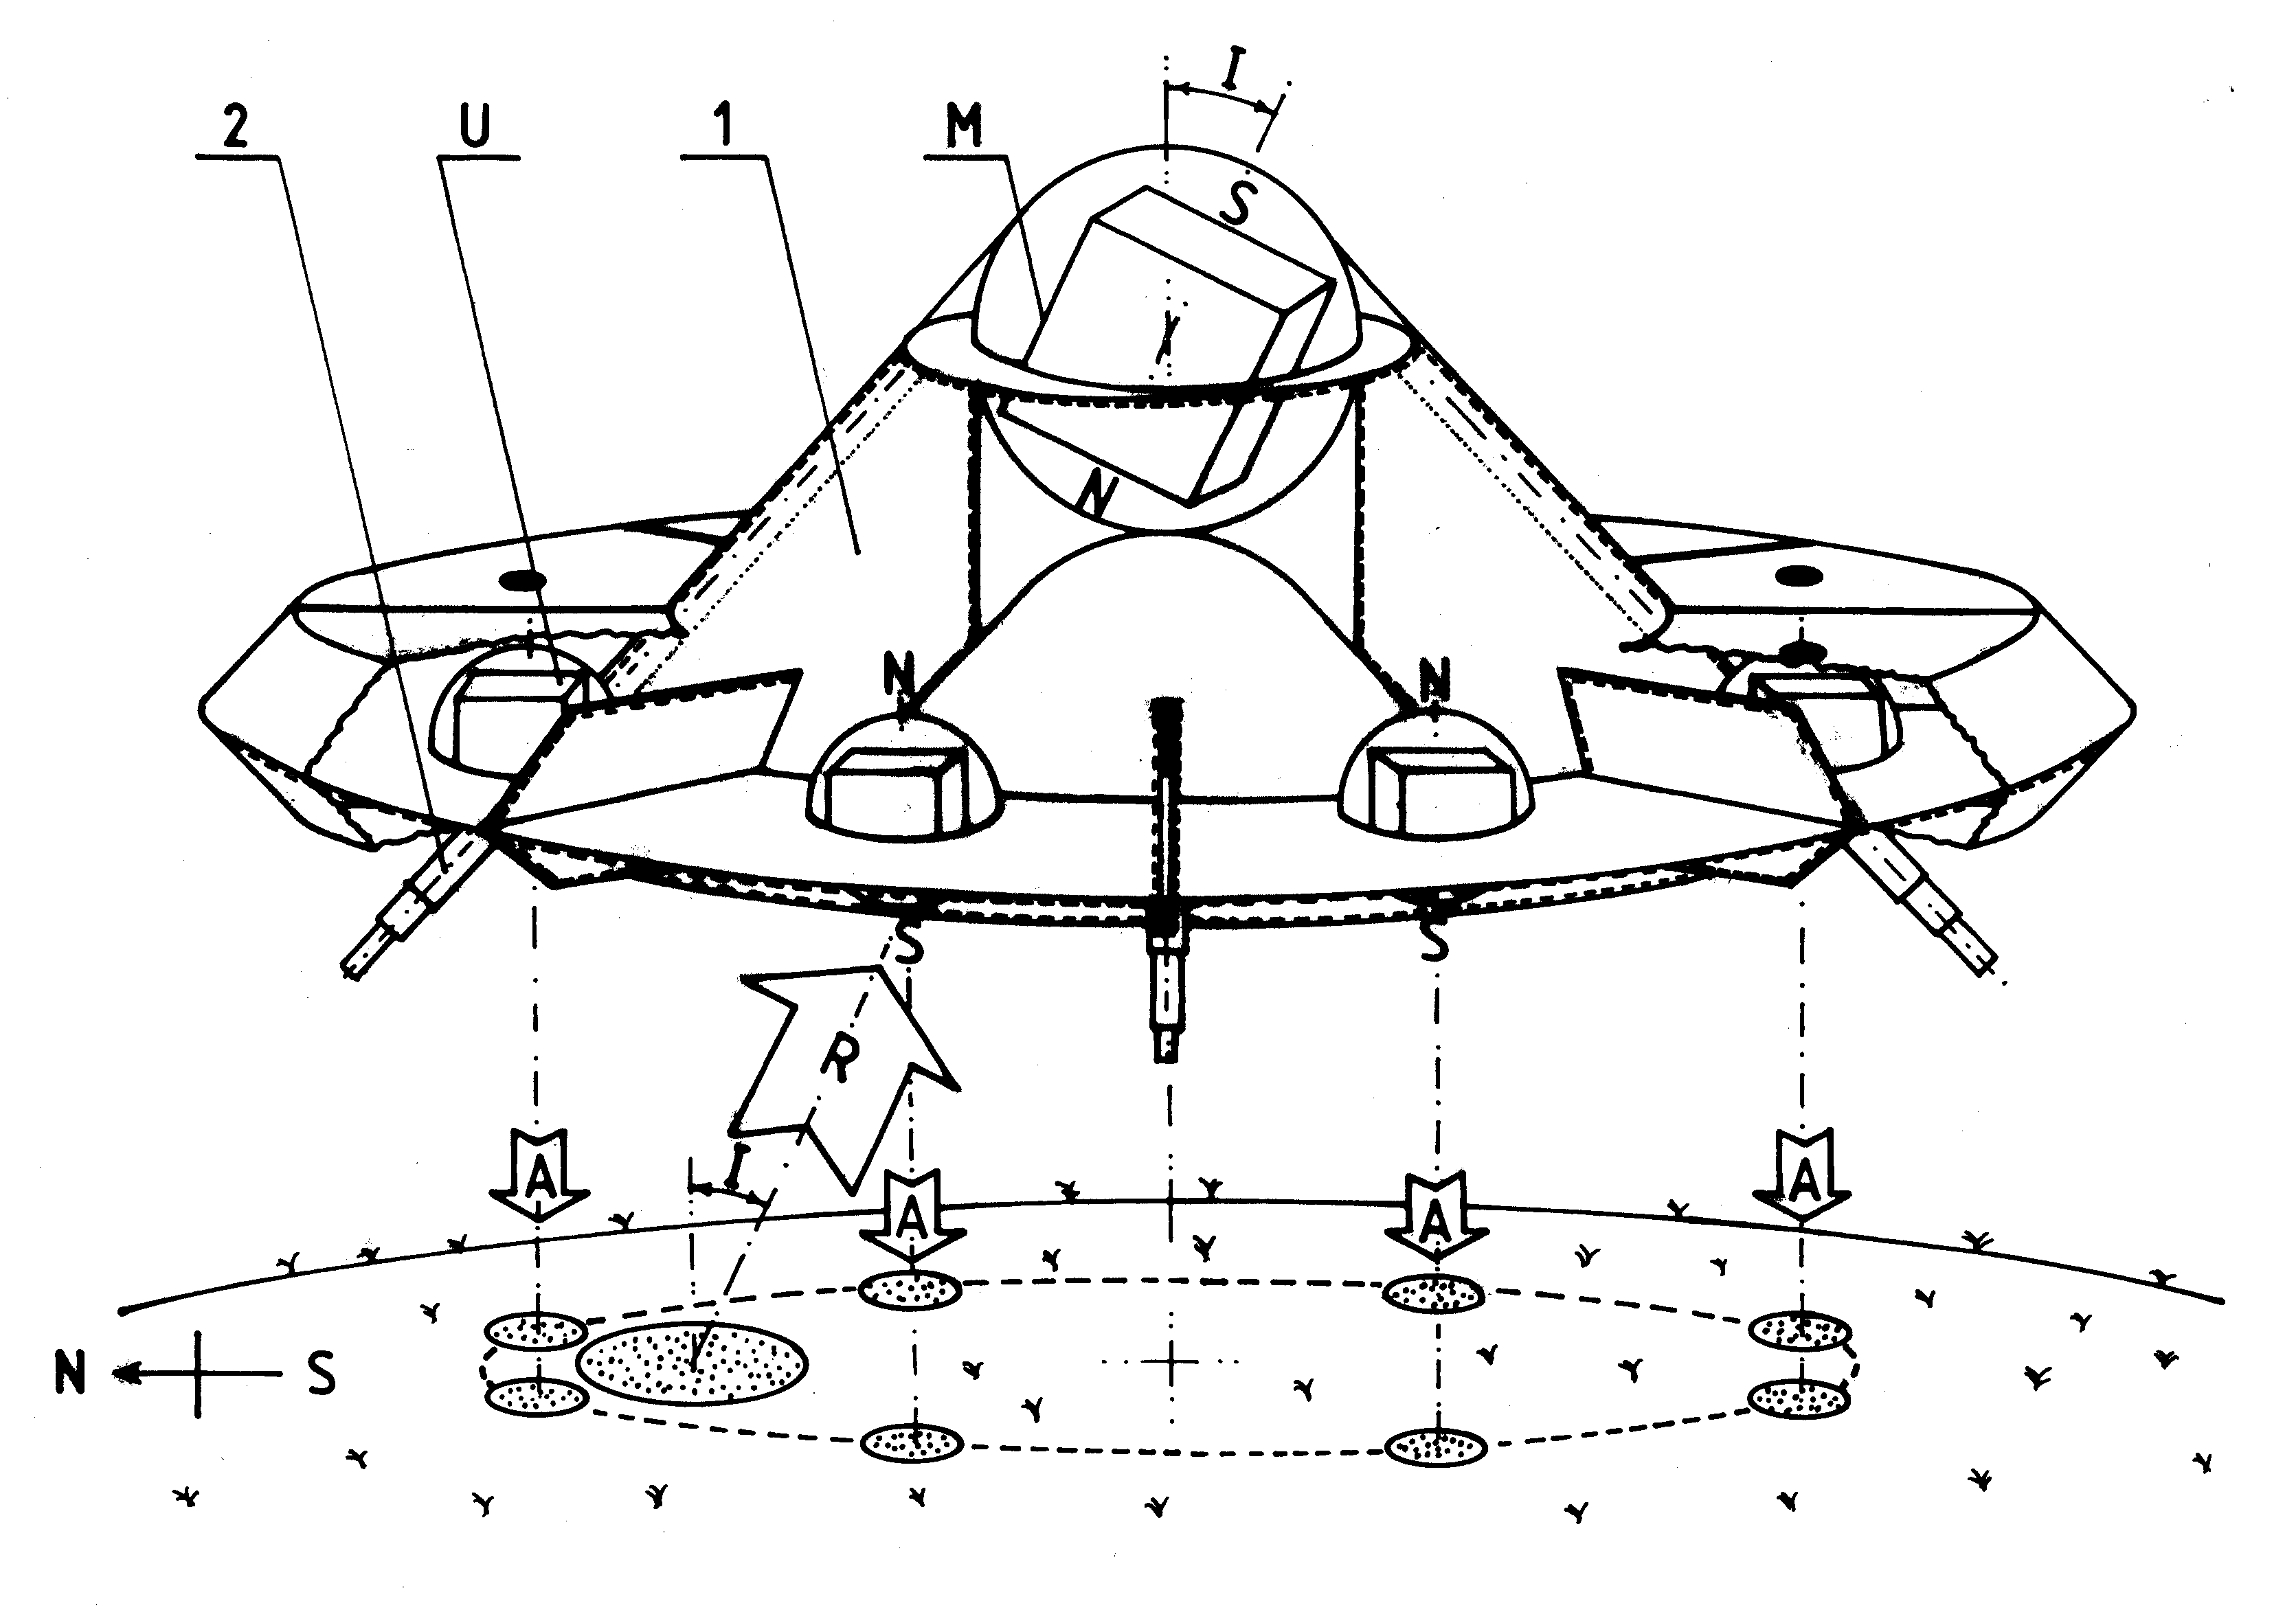 [2e] Figure G4: A side view of the Magnocraft and UFO type K3. [2e] Figure G4: A side view of the Magnocraft and UFO type K3.
 [2e] Figure G5: The Magnocraft type K3 cross-section that shows the design and main features. [2e] Figure G5: The Magnocraft type K3 cross-section that shows the design and main features.
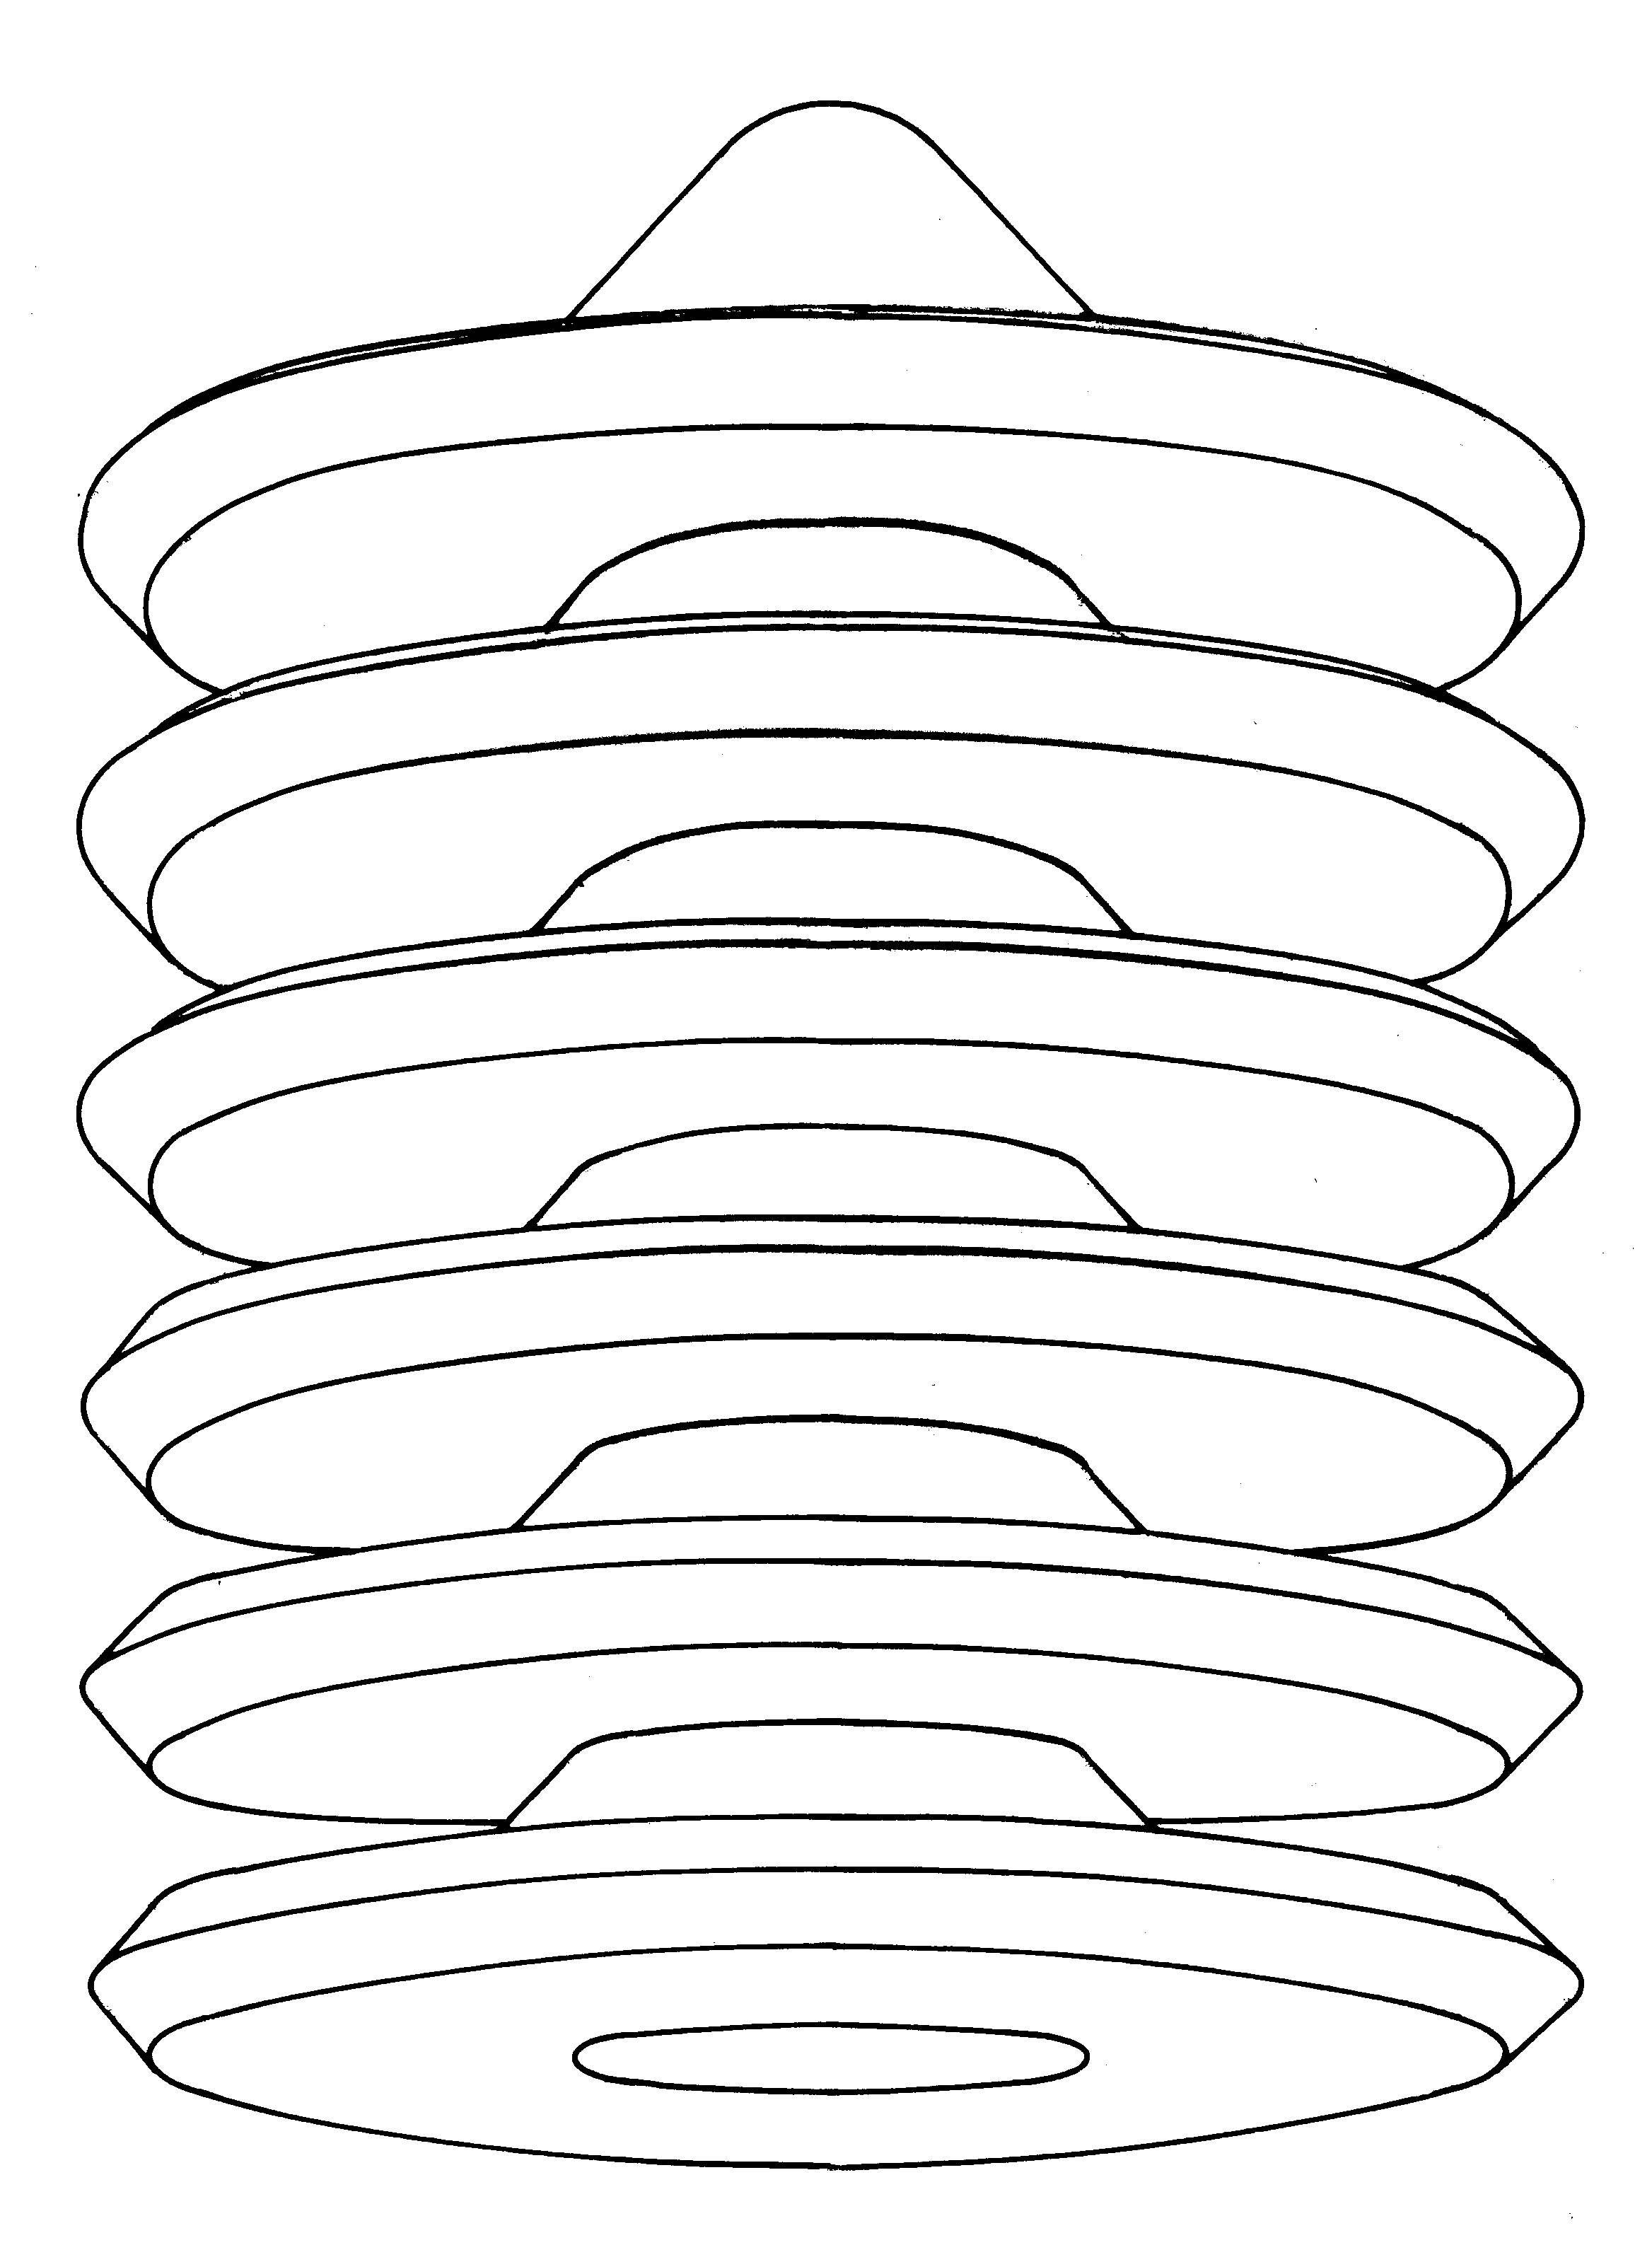 [2e] Figure G6-#1: Flying complexes (cigar shaped)of UFOs and Magnocraft. [2e] Figure G6-#1: Flying complexes (cigar shaped)of UFOs and Magnocraft.
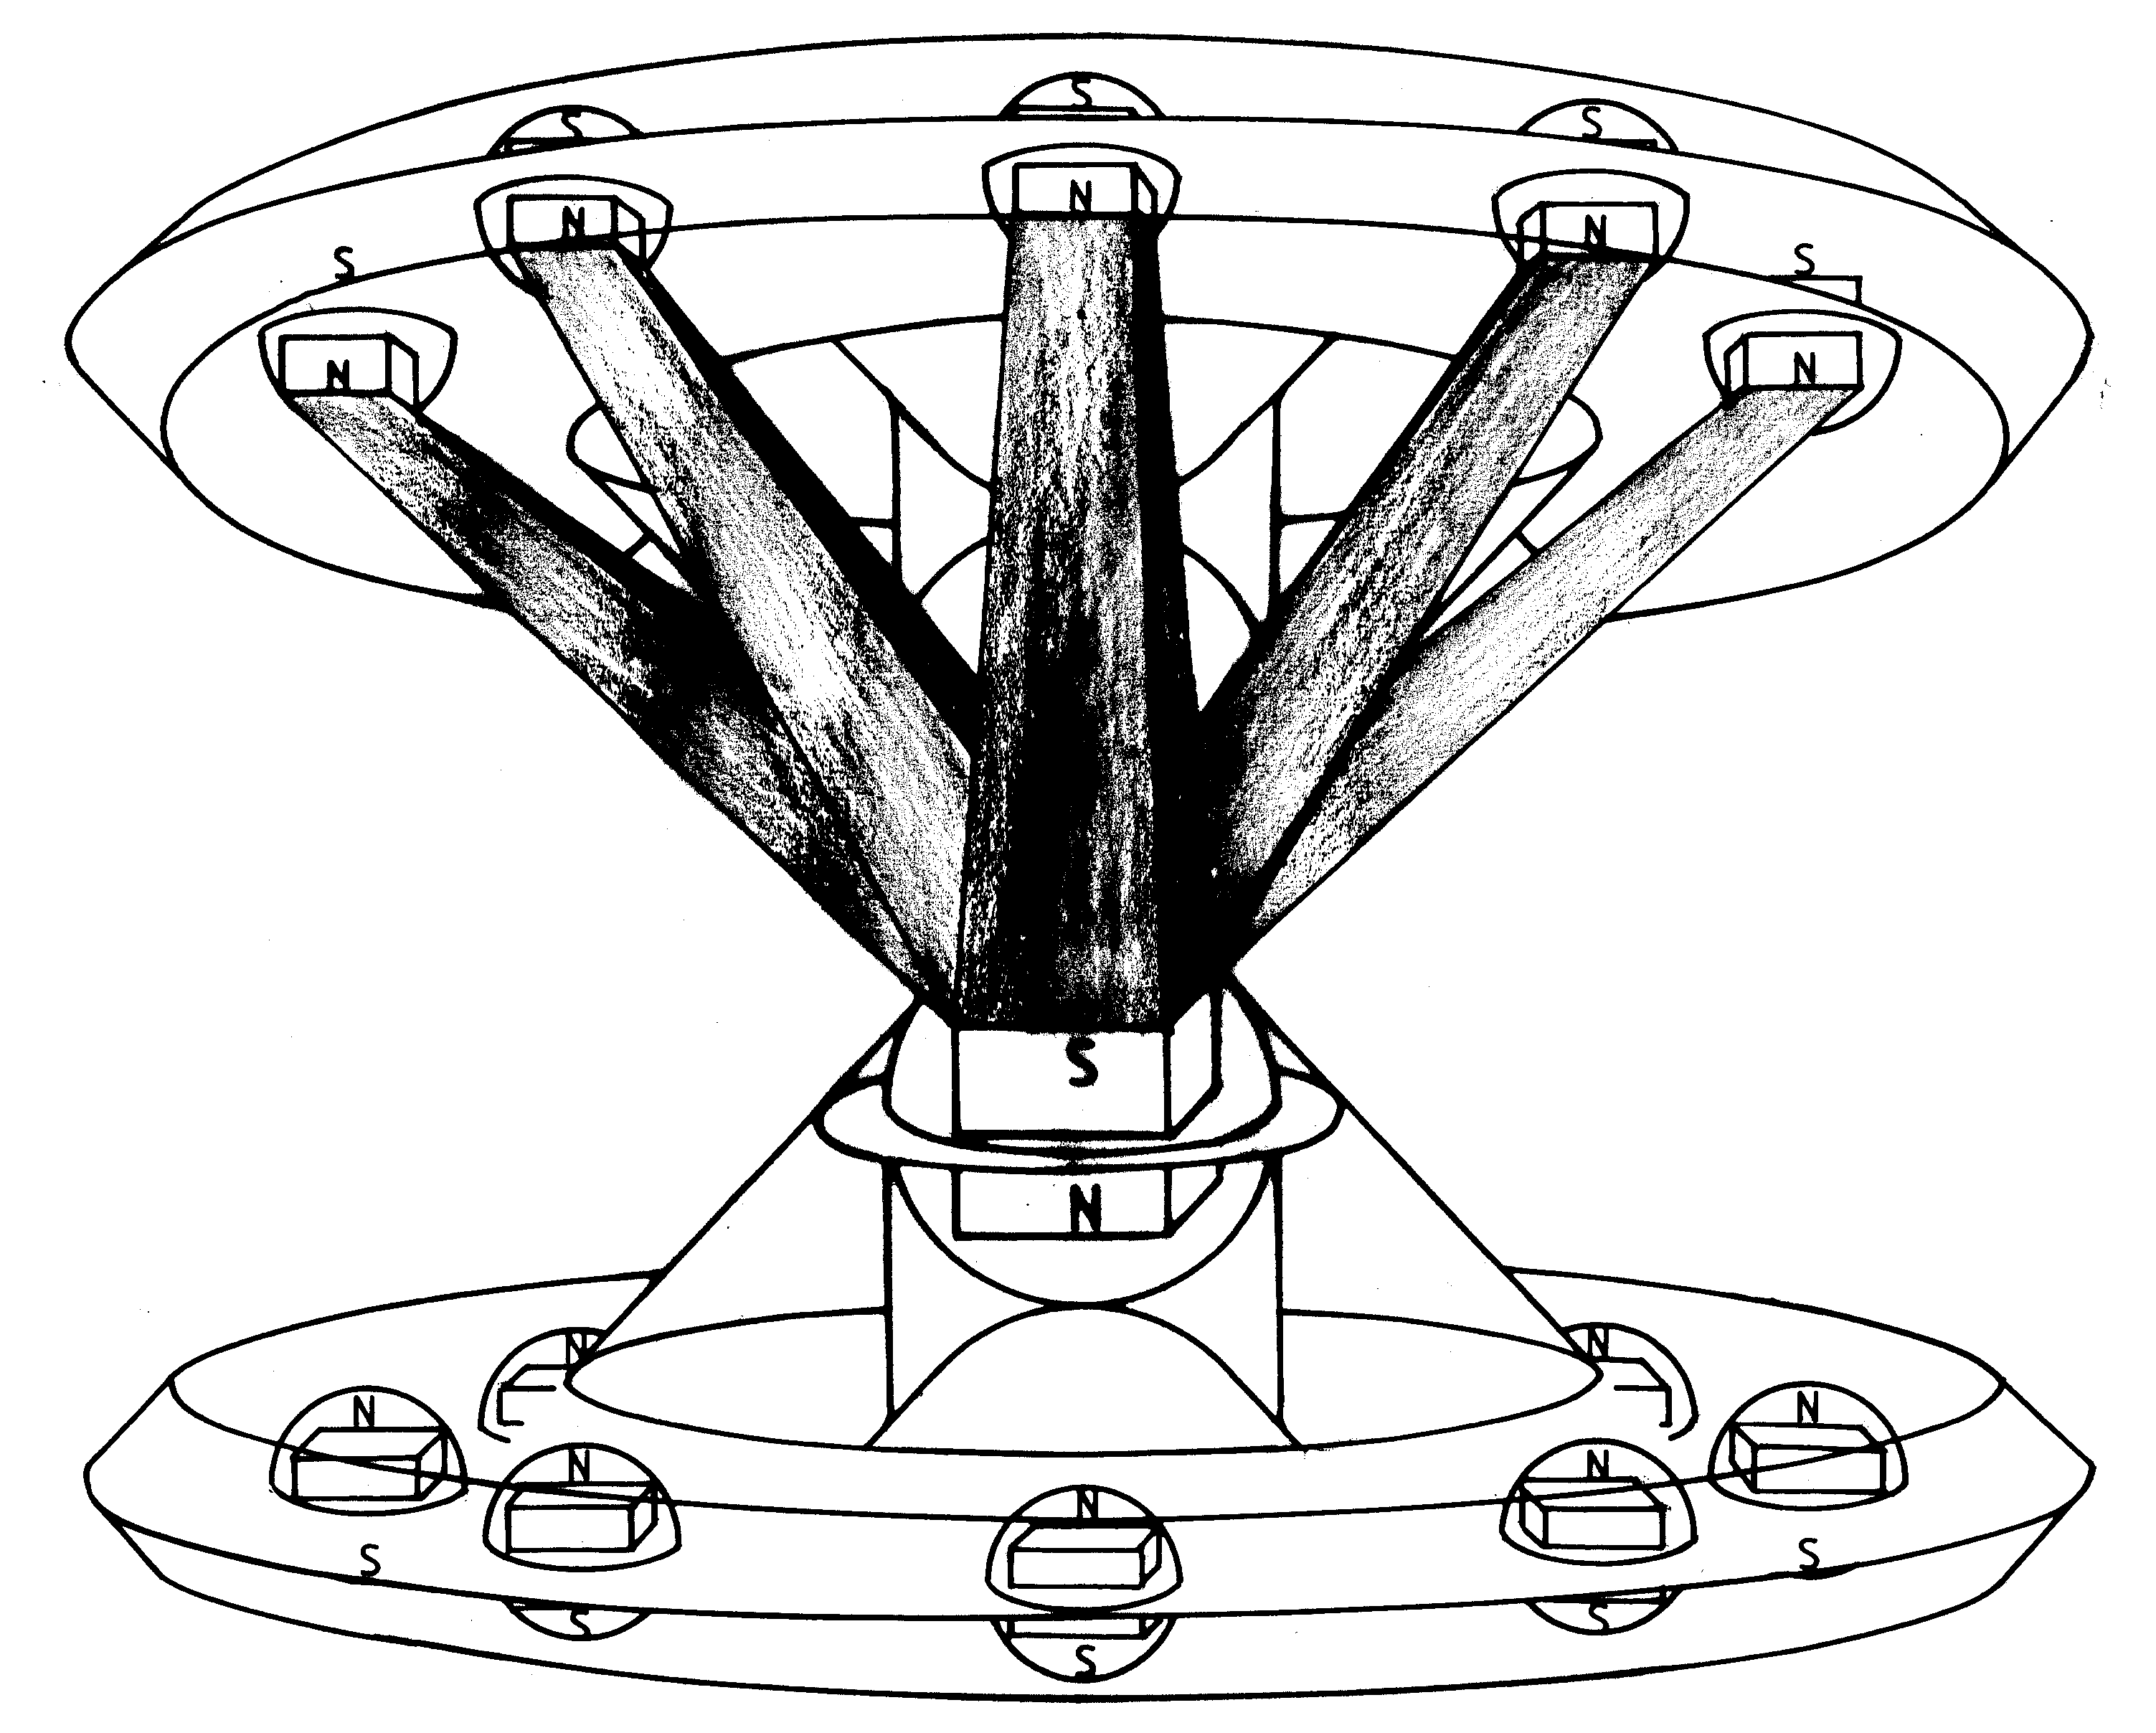 [2e] Figure G6-#2: Semi-attached configuration. [2e] Figure G6-#2: Semi-attached configuration.
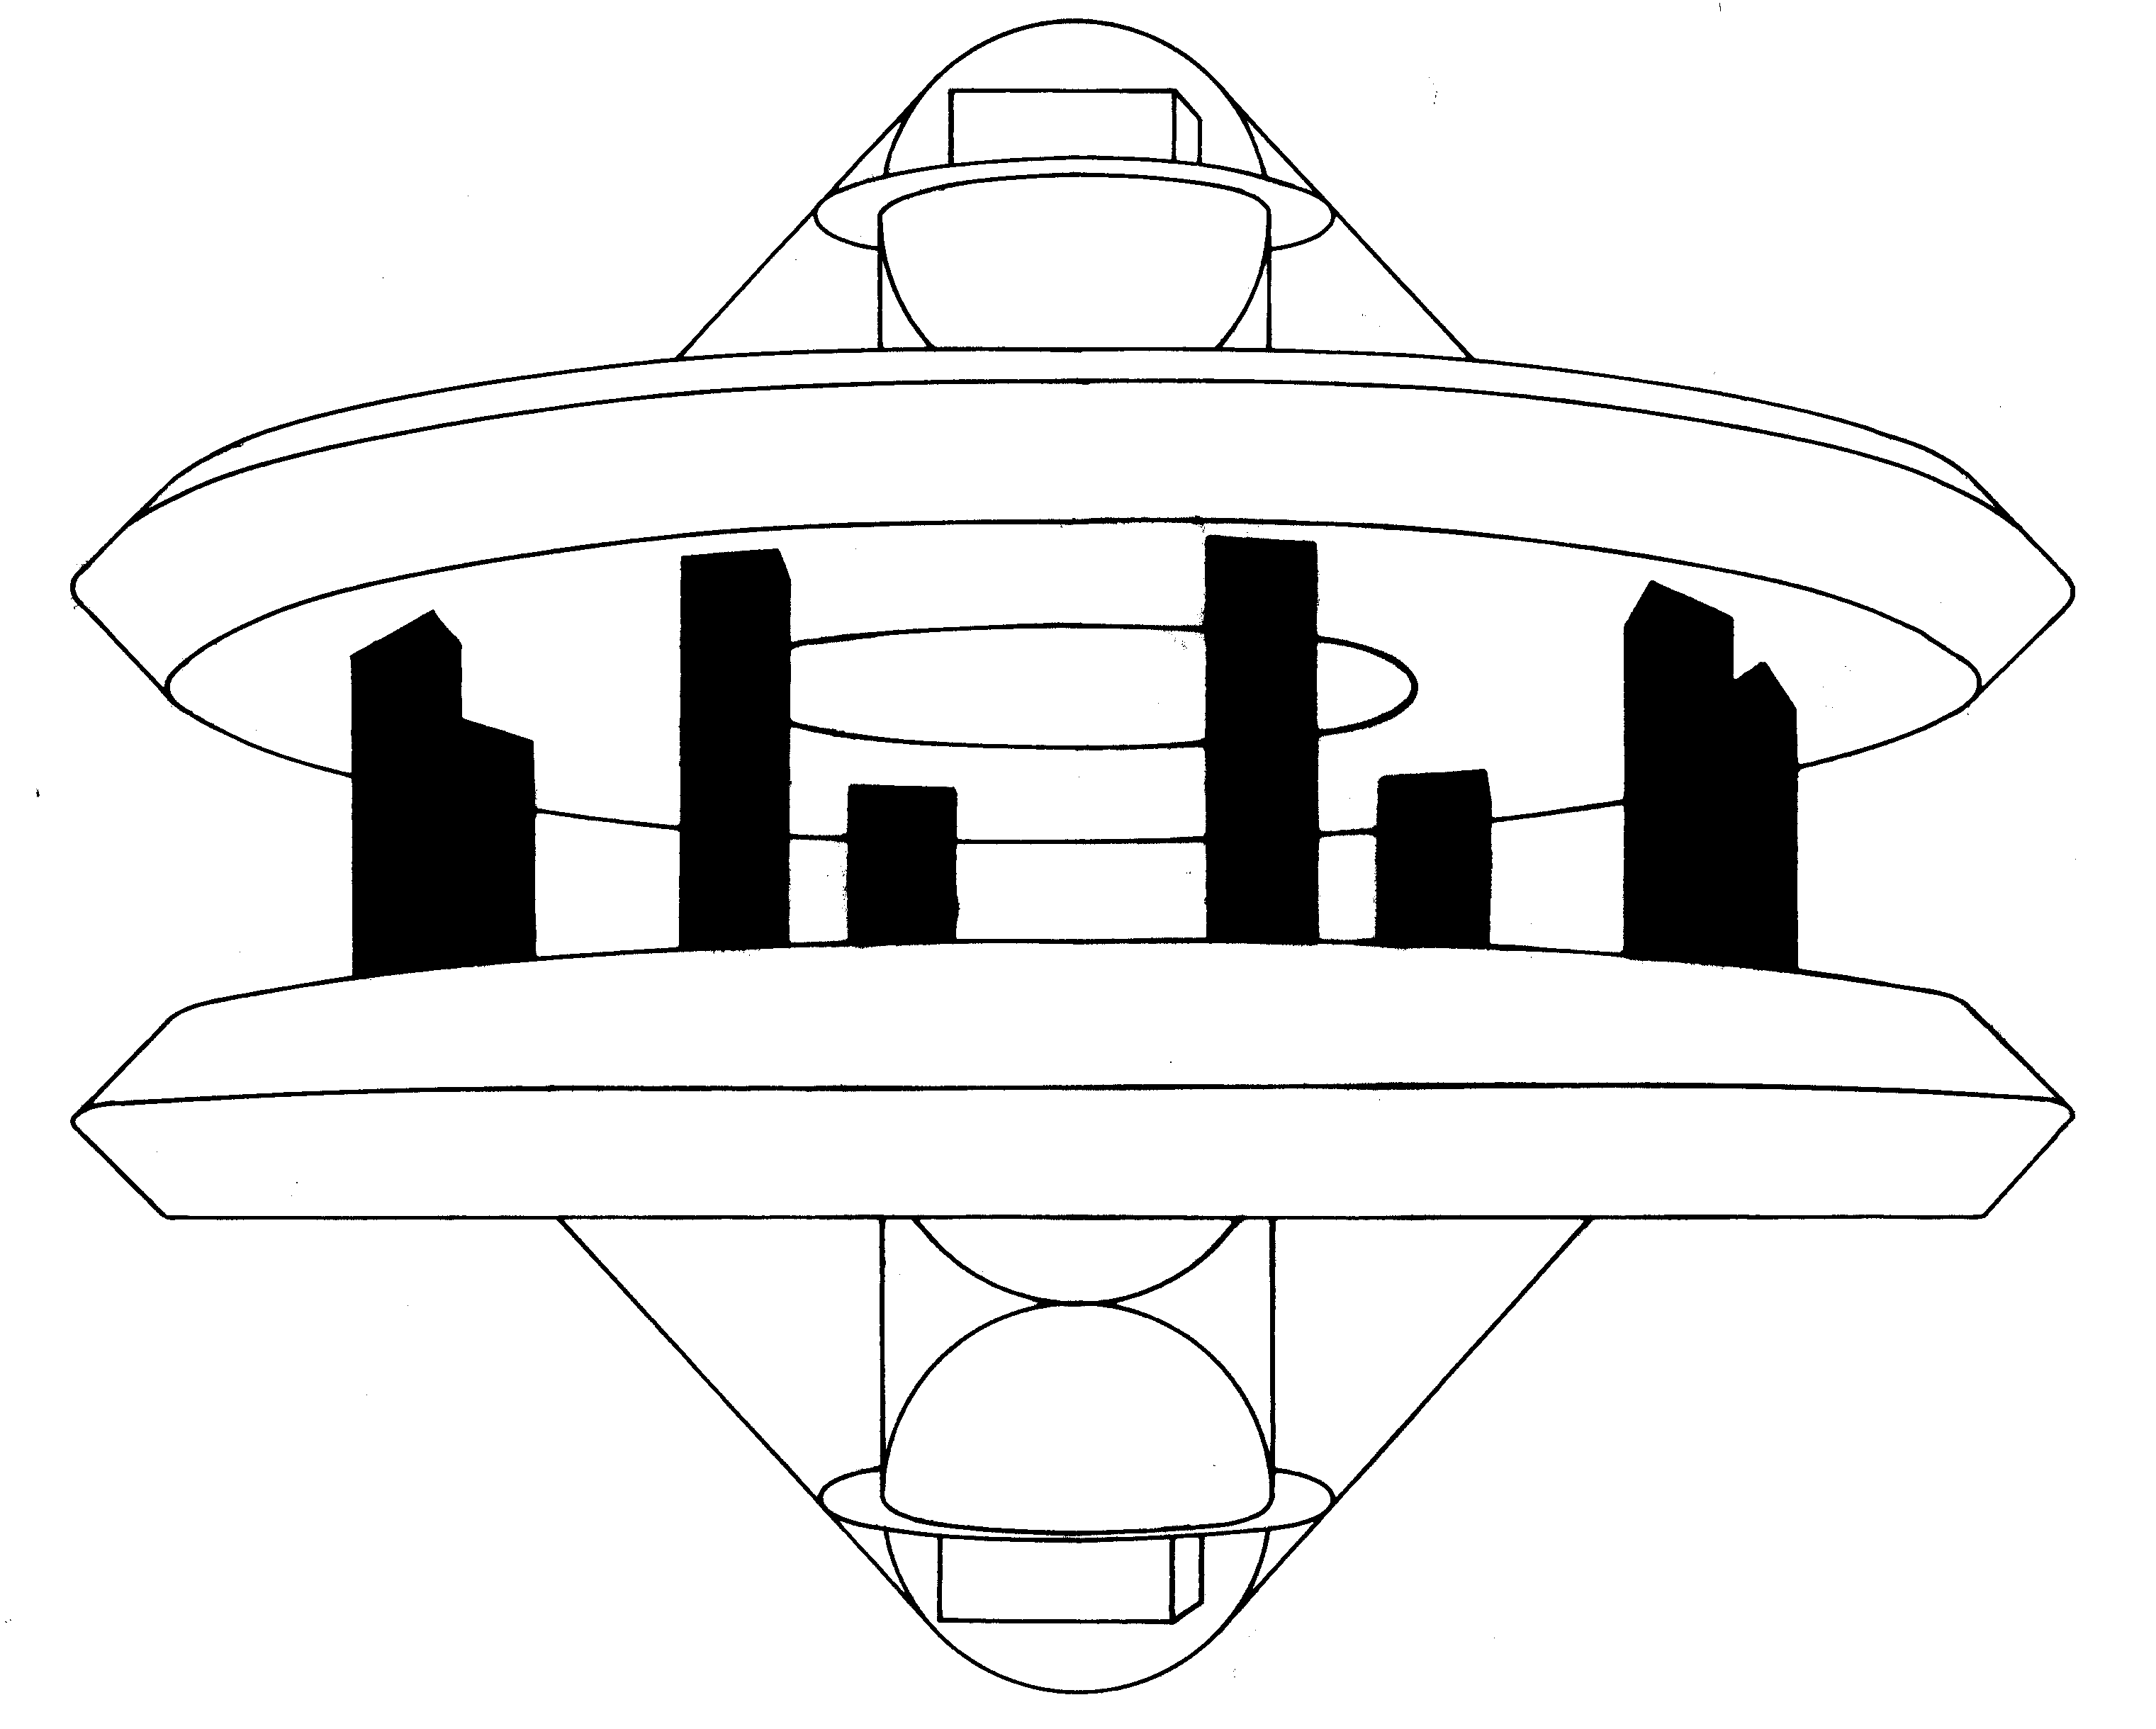 [2e] Figure G6-#3: Detached configuration. [2e] Figure G6-#3: Detached configuration.
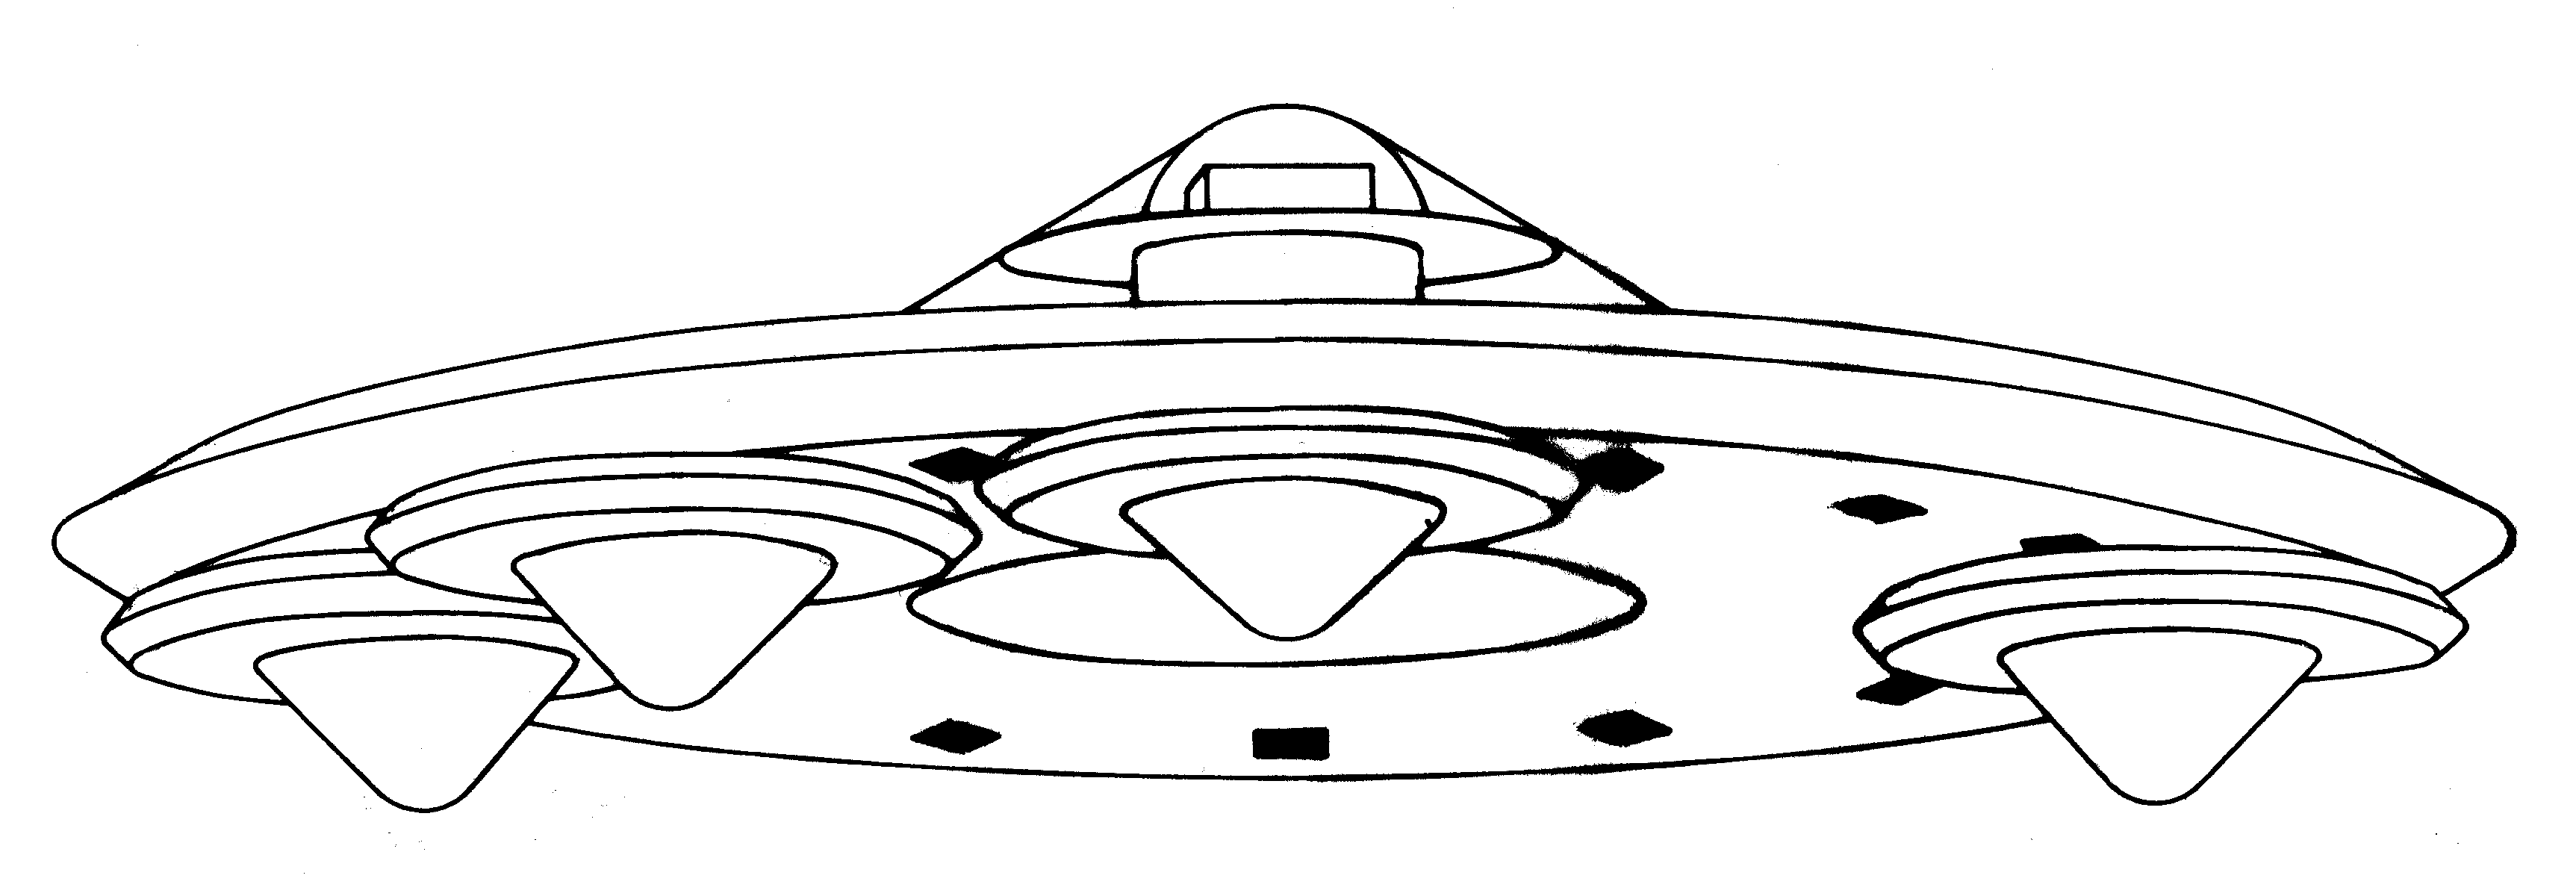 [2e] Figure G6-#4: A carrier platform (a mother ship). [2e] Figure G6-#4: A carrier platform (a mother ship).
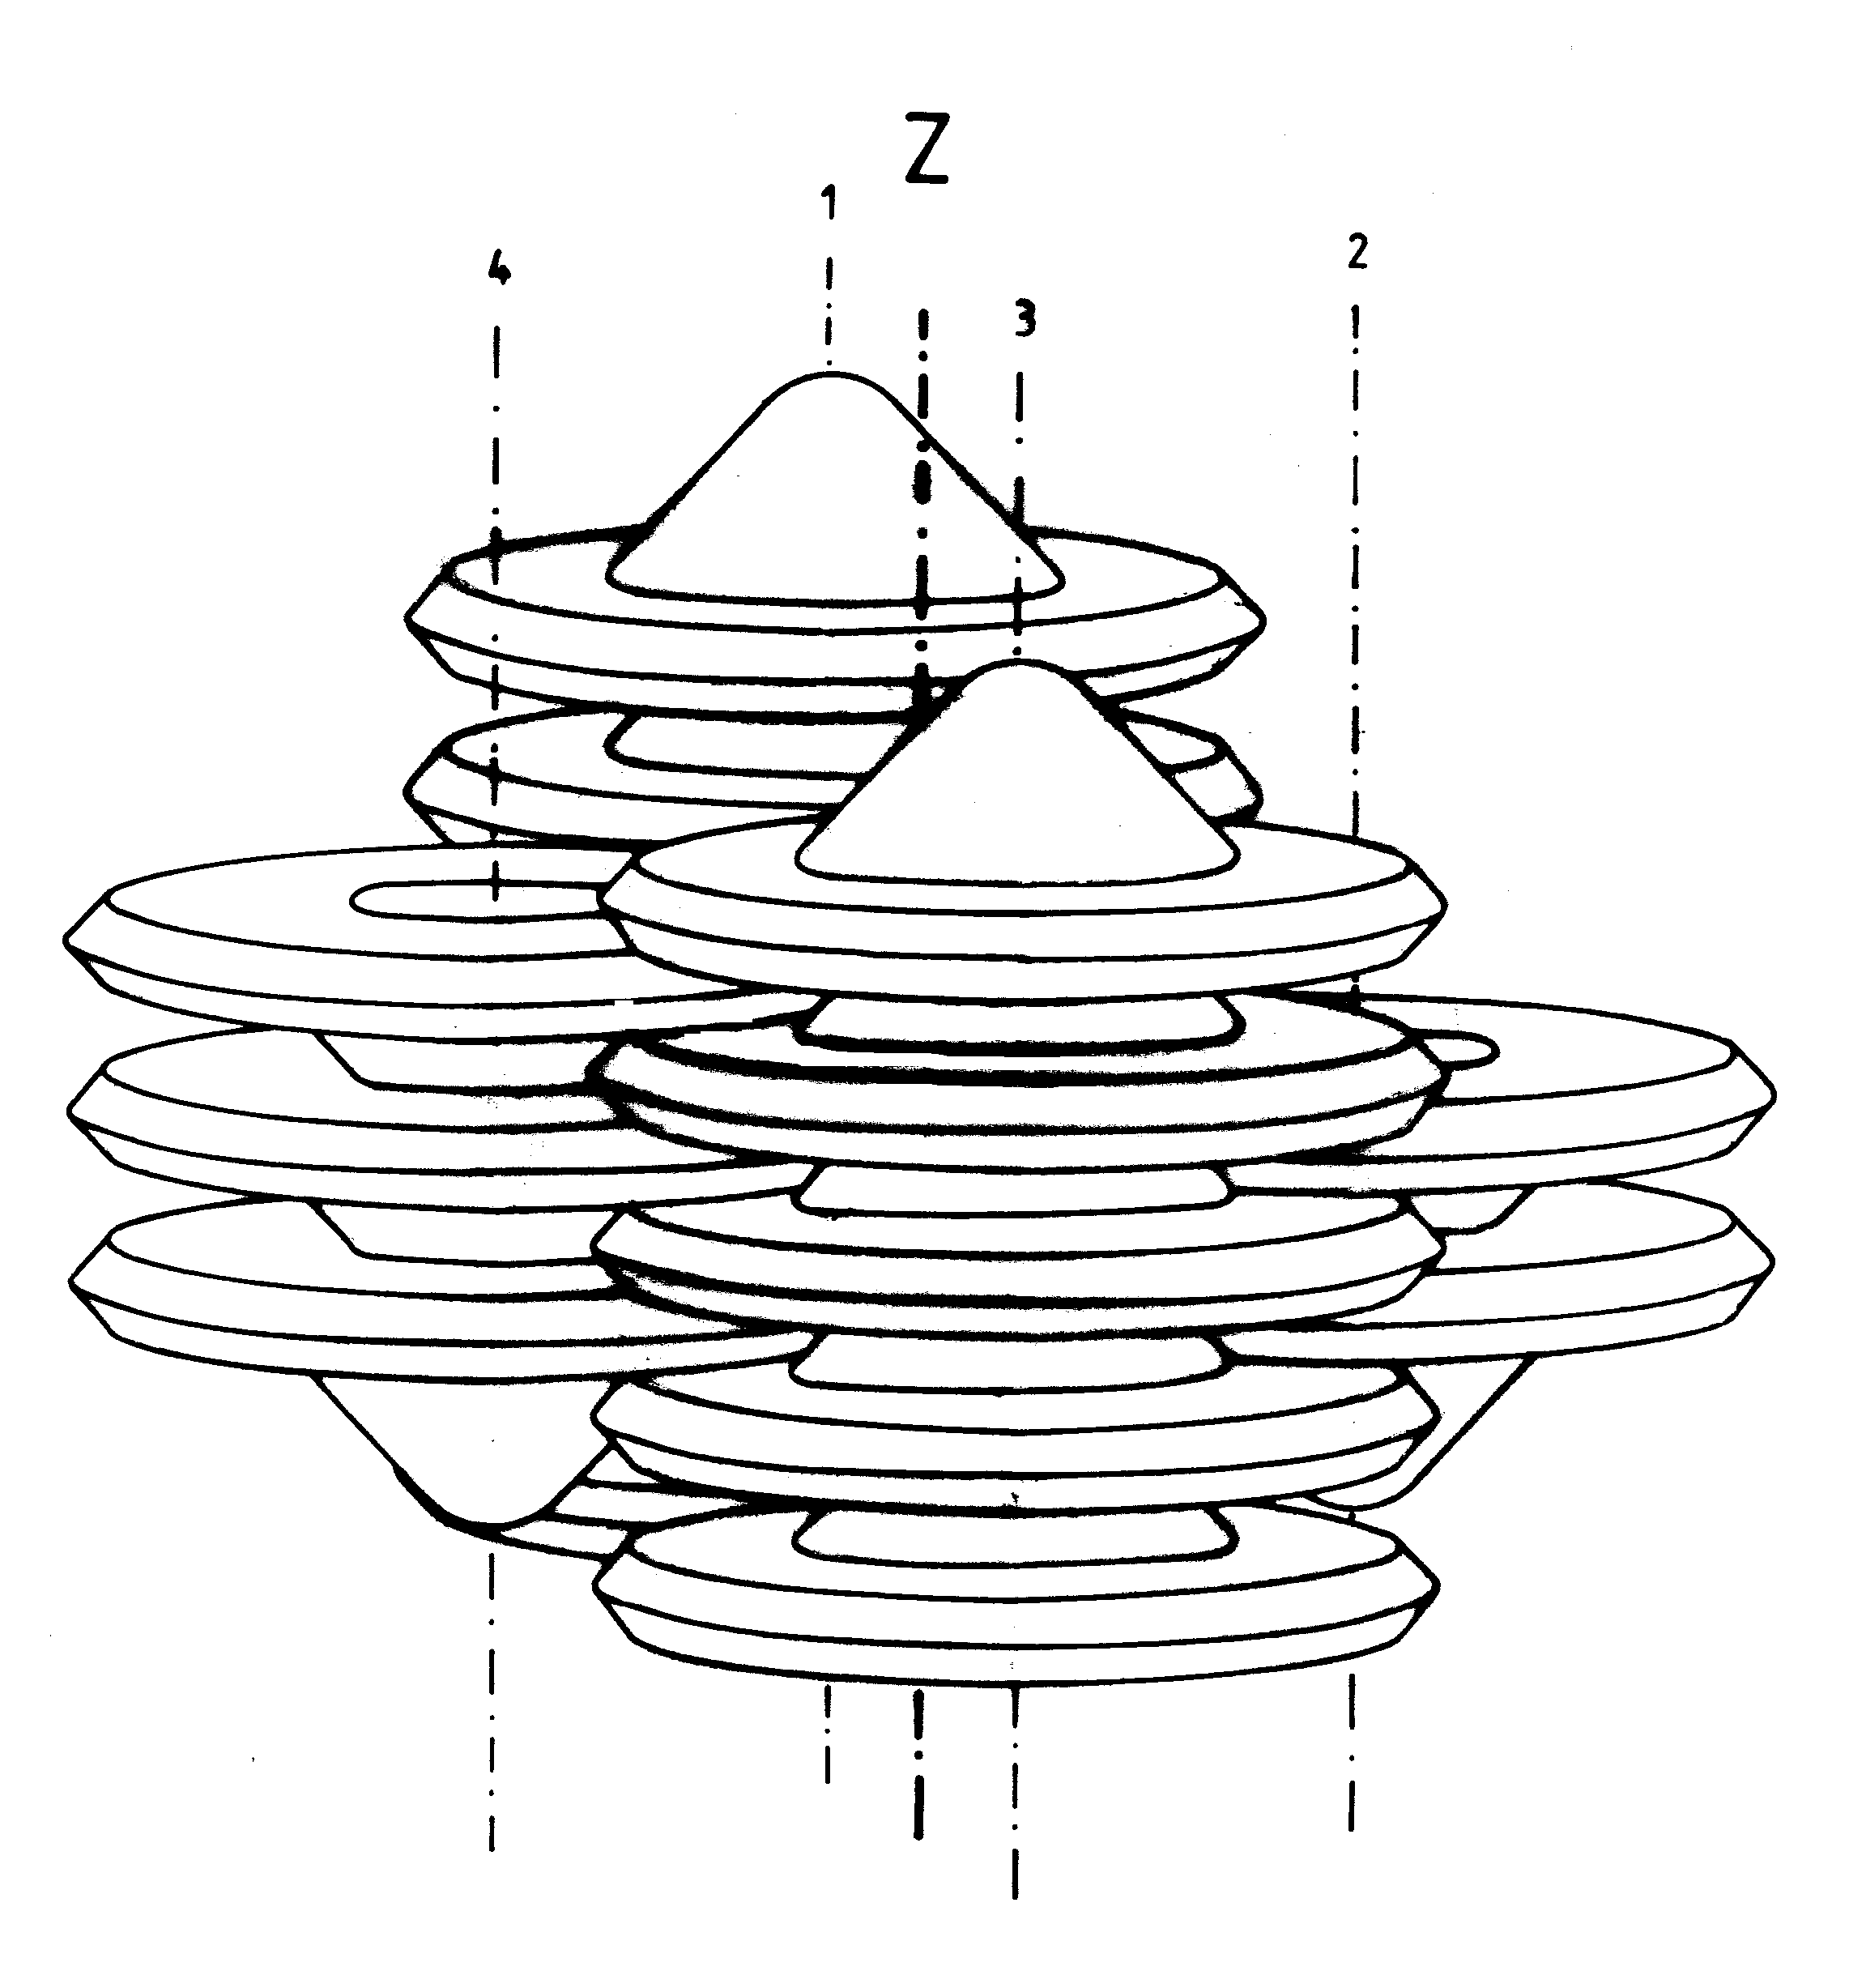 [2e] Figure G6-#5: A flying system of UFOs and Magnocraft. [2e] Figure G6-#5: A flying system of UFOs and Magnocraft.
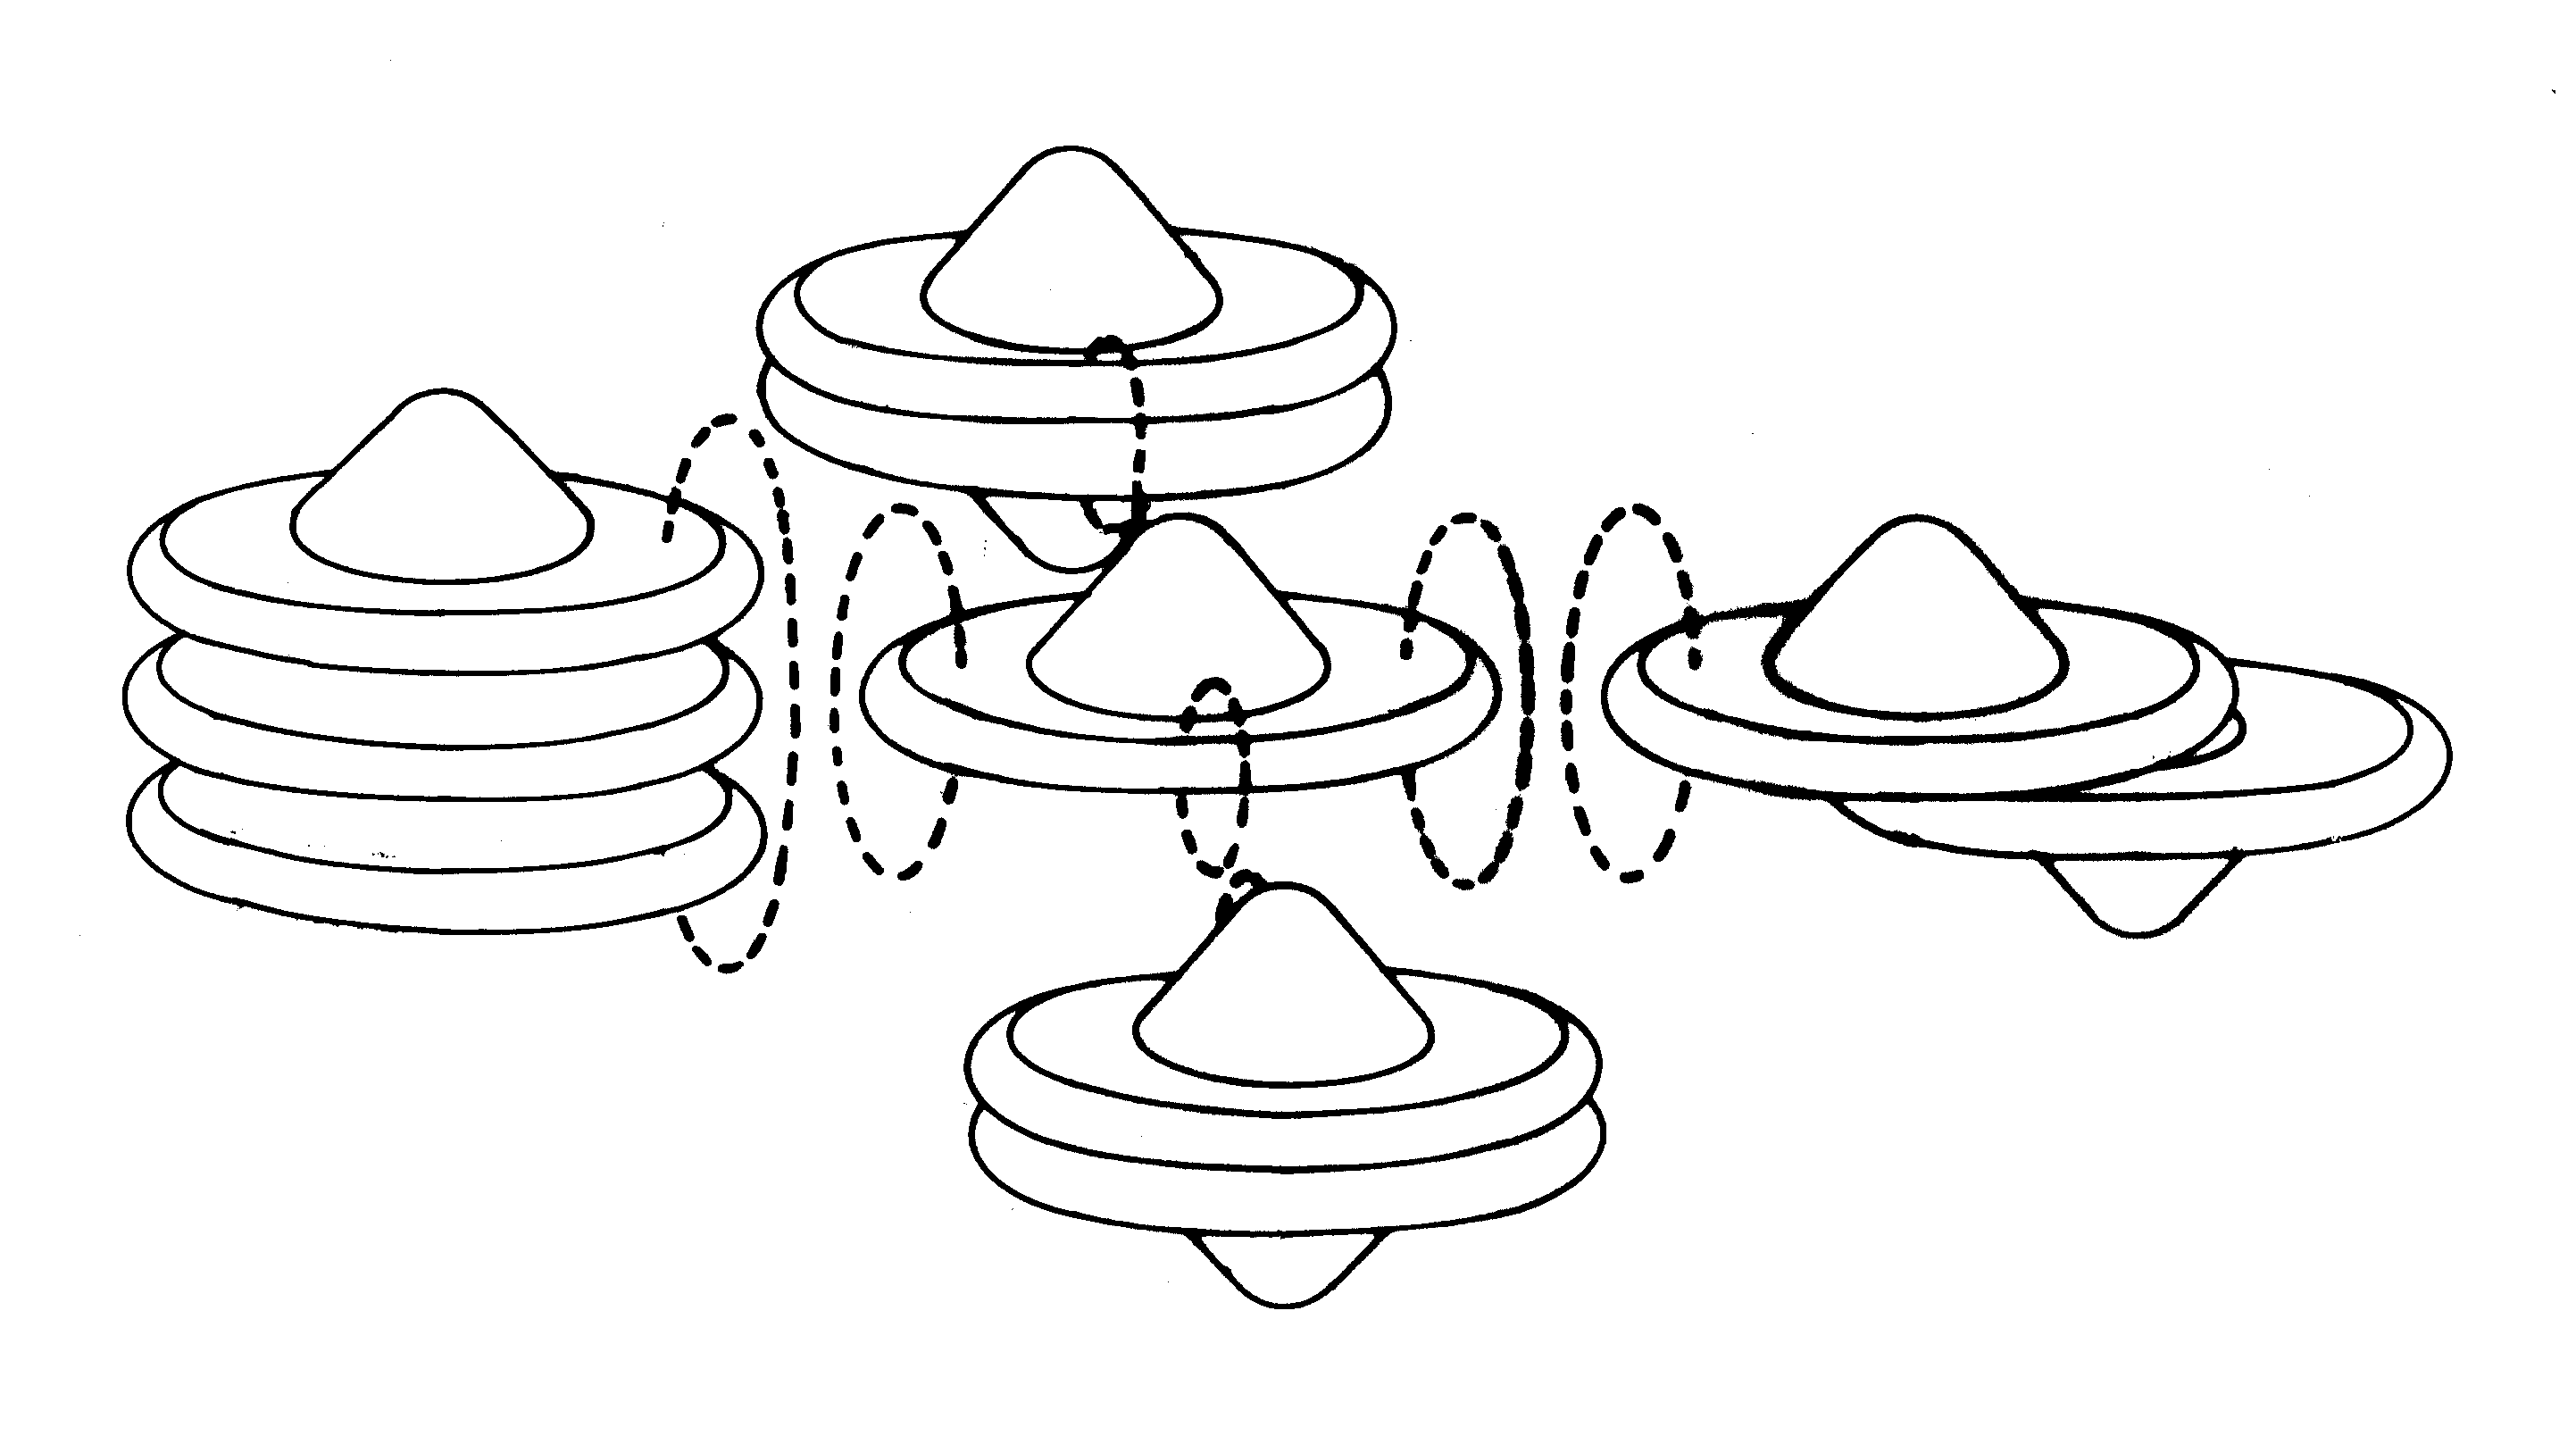 [2e] Figure G6-#6: A flying cluster of several UFOs and Magnocraft. [2e] Figure G6-#6: A flying cluster of several UFOs and Magnocraft.
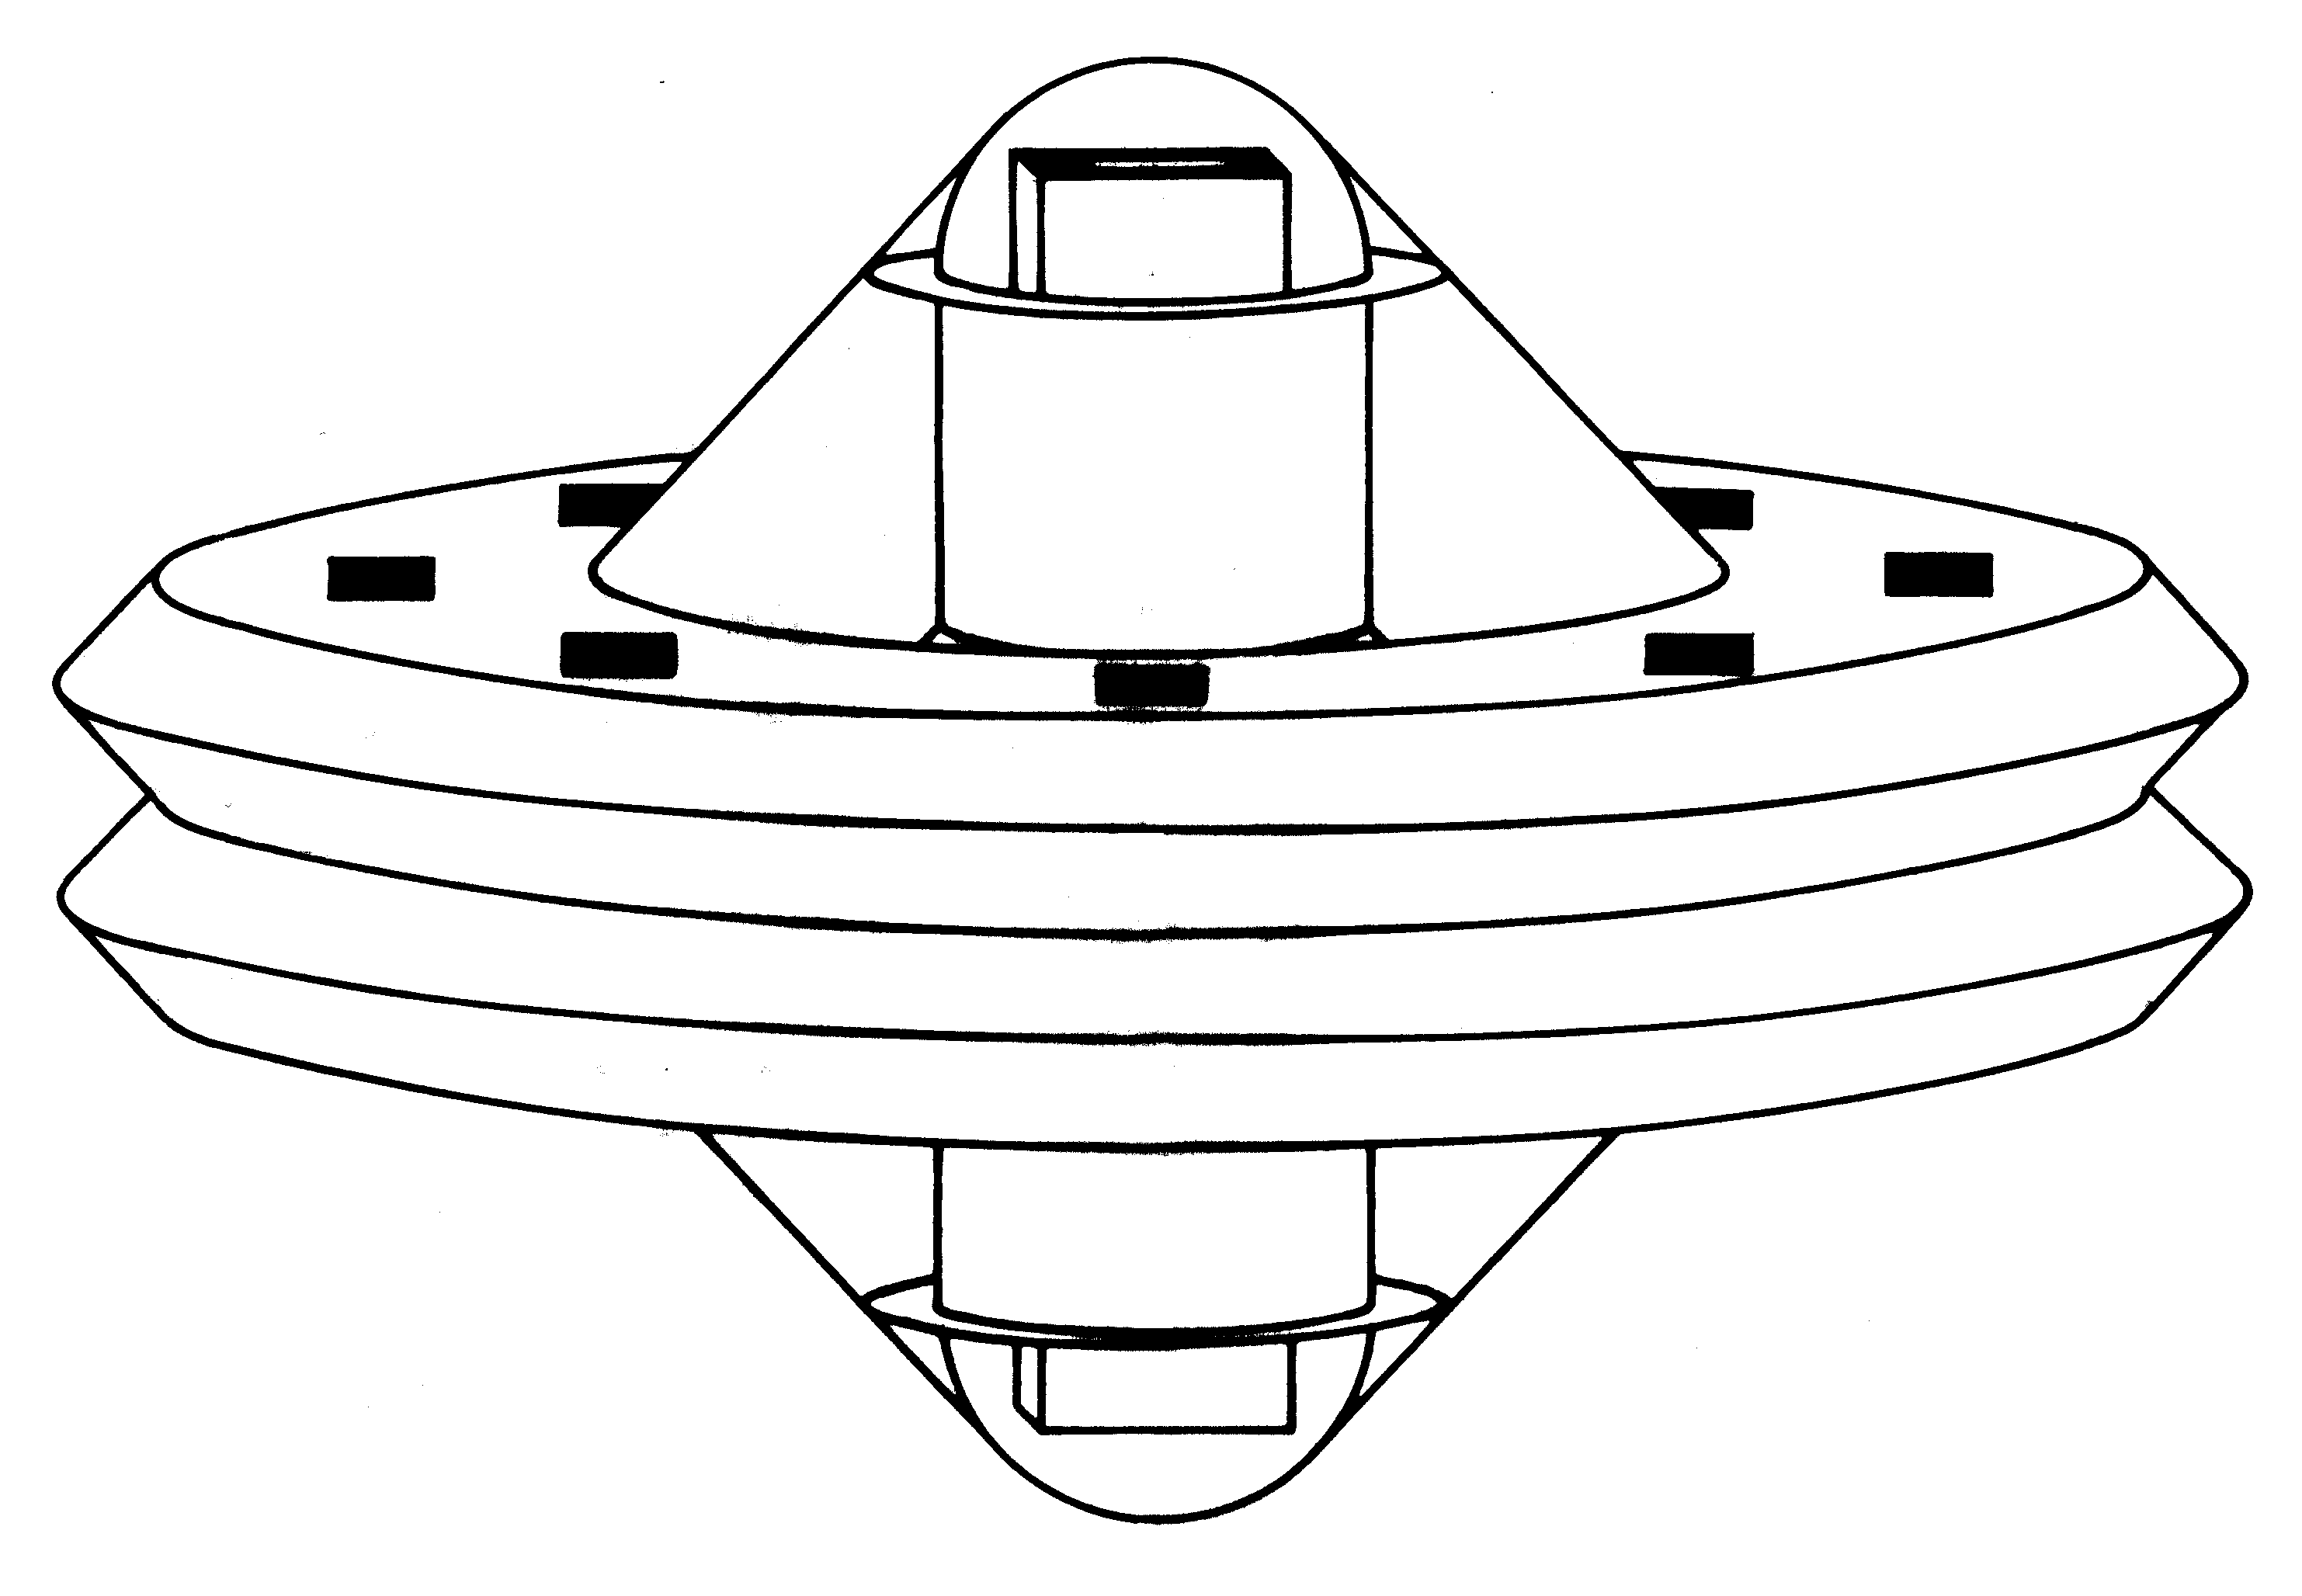 [2e] Figure G7: A spherical complex of K3 type Magnocreaft. [2e] Figure G7: A spherical complex of K3 type Magnocreaft.
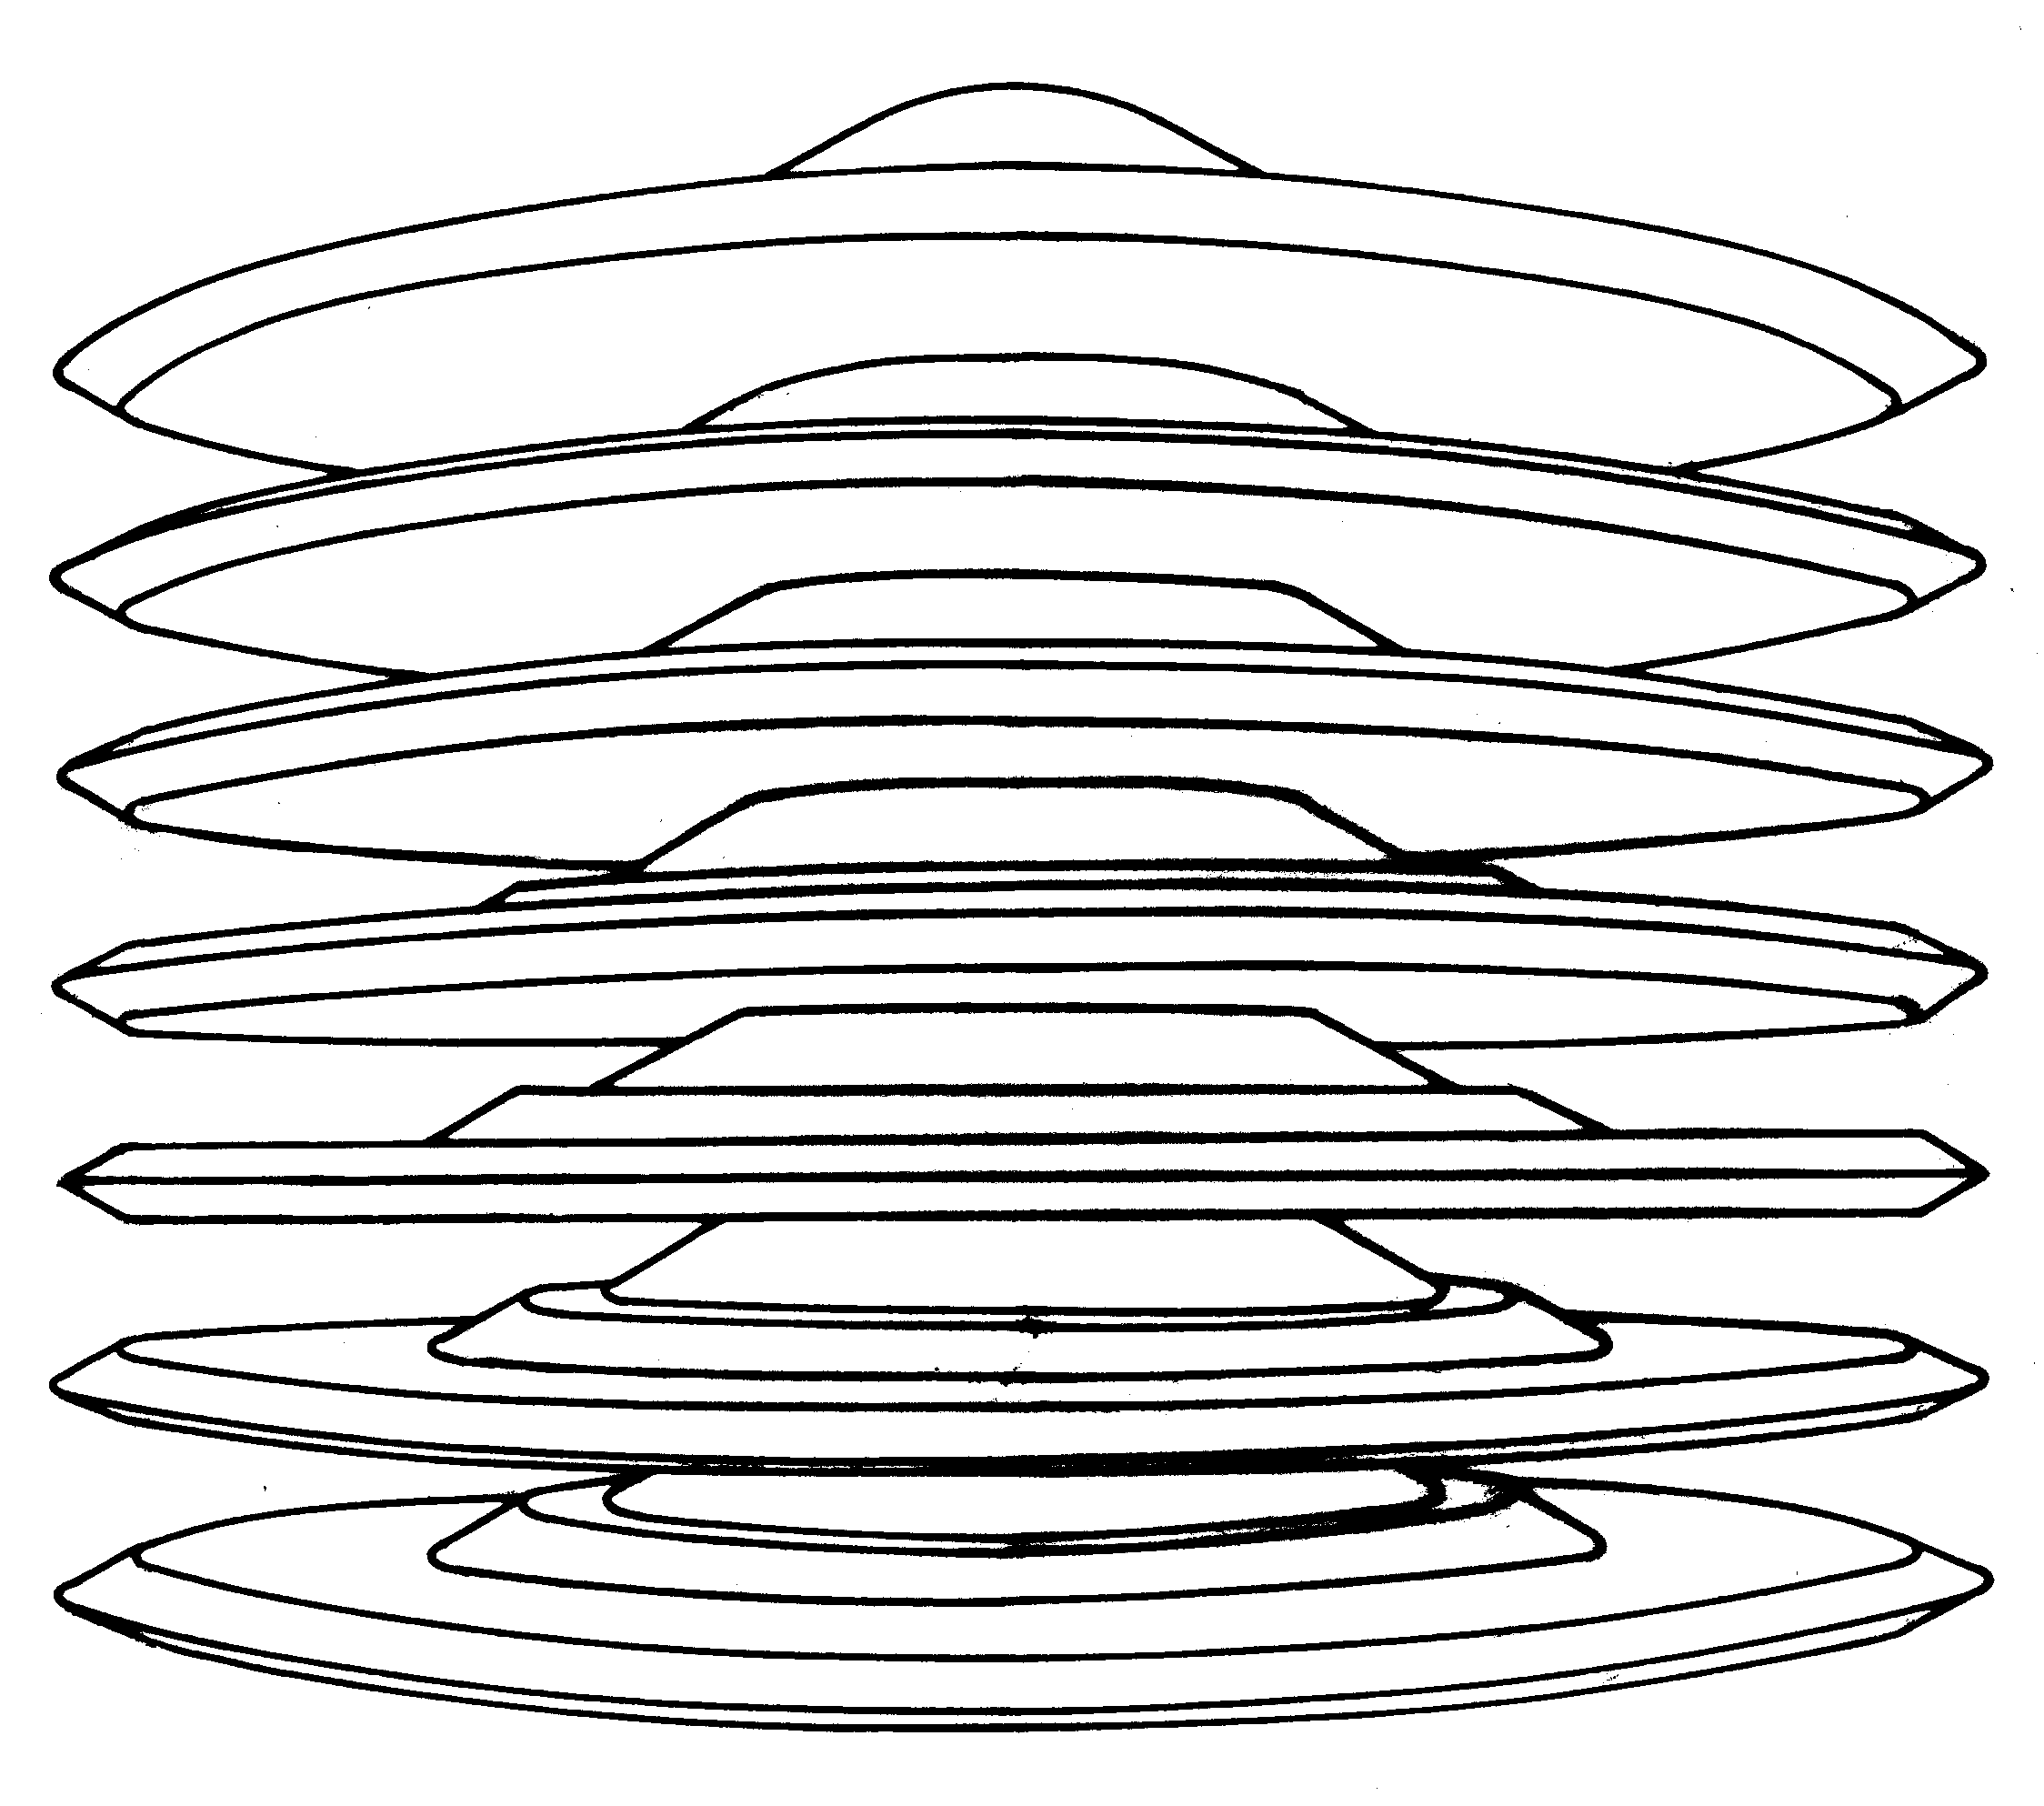 [2e] Figure G8 (a): A "stacked cigar-shaped flying complex" composed of six Magnocraft/UFOs type K6. A side view of the entire complex. [2e] Figure G8 (a): A "stacked cigar-shaped flying complex" composed of six Magnocraft/UFOs type K6. A side view of the entire complex.
 [2e] Figure G8 (b): Axial cross section showing the location of magnetic propulsors. [2e] Figure G8 (b): Axial cross section showing the location of magnetic propulsors.
 [2e] Figure G9: A double-ended cigar shaped flying complex. [2e] Figure G9: A double-ended cigar shaped flying complex.
 [2e] Figure G10 (a): Example of a "fir tree" shaped flying complex. (a) vertical cross section. [2e] Figure G10 (a): Example of a "fir tree" shaped flying complex. (a) vertical cross section.
 [2e] Figure G10 (b): Side view. [2e] Figure G10 (b): Side view.
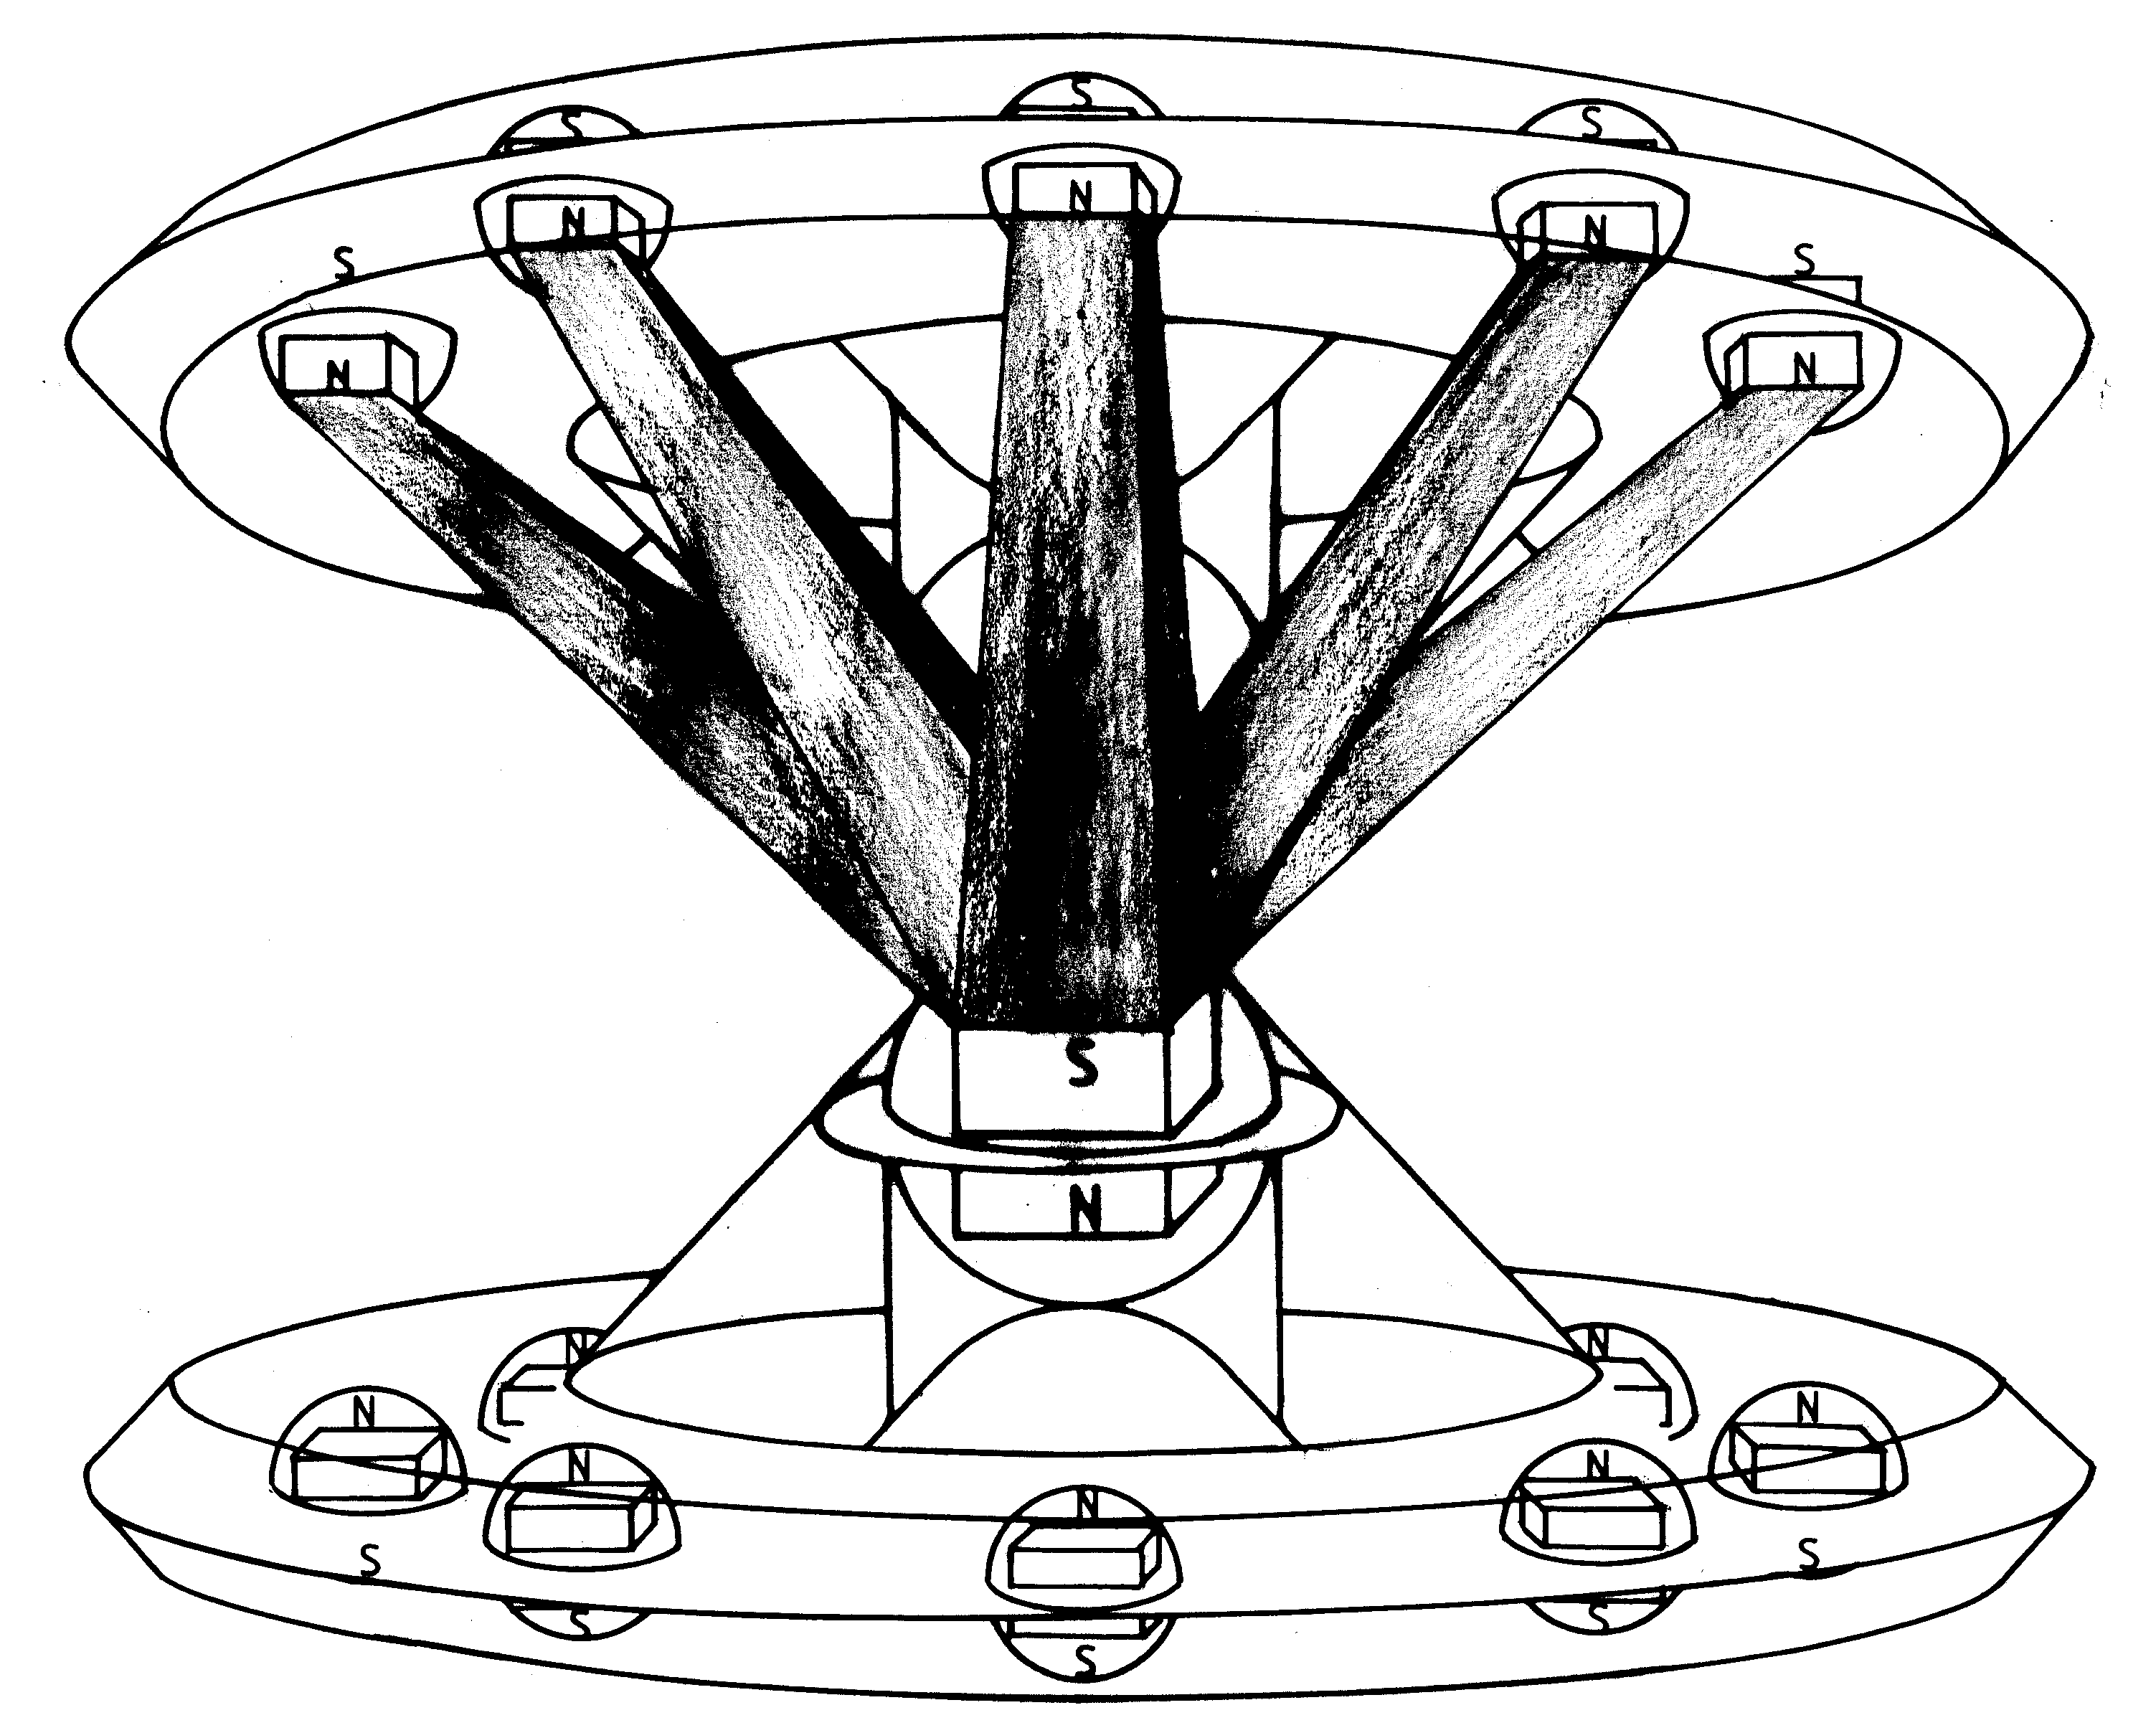 [2e] Figure G11: A very simple semi-attached configuration of K3 type Magnocraft. [2e] Figure G11: A very simple semi-attached configuration of K3 type Magnocraft.
 [2e] Figure G12: A "flying necklace" semi-attached configuration. [2e] Figure G12: A "flying necklace" semi-attached configuration.
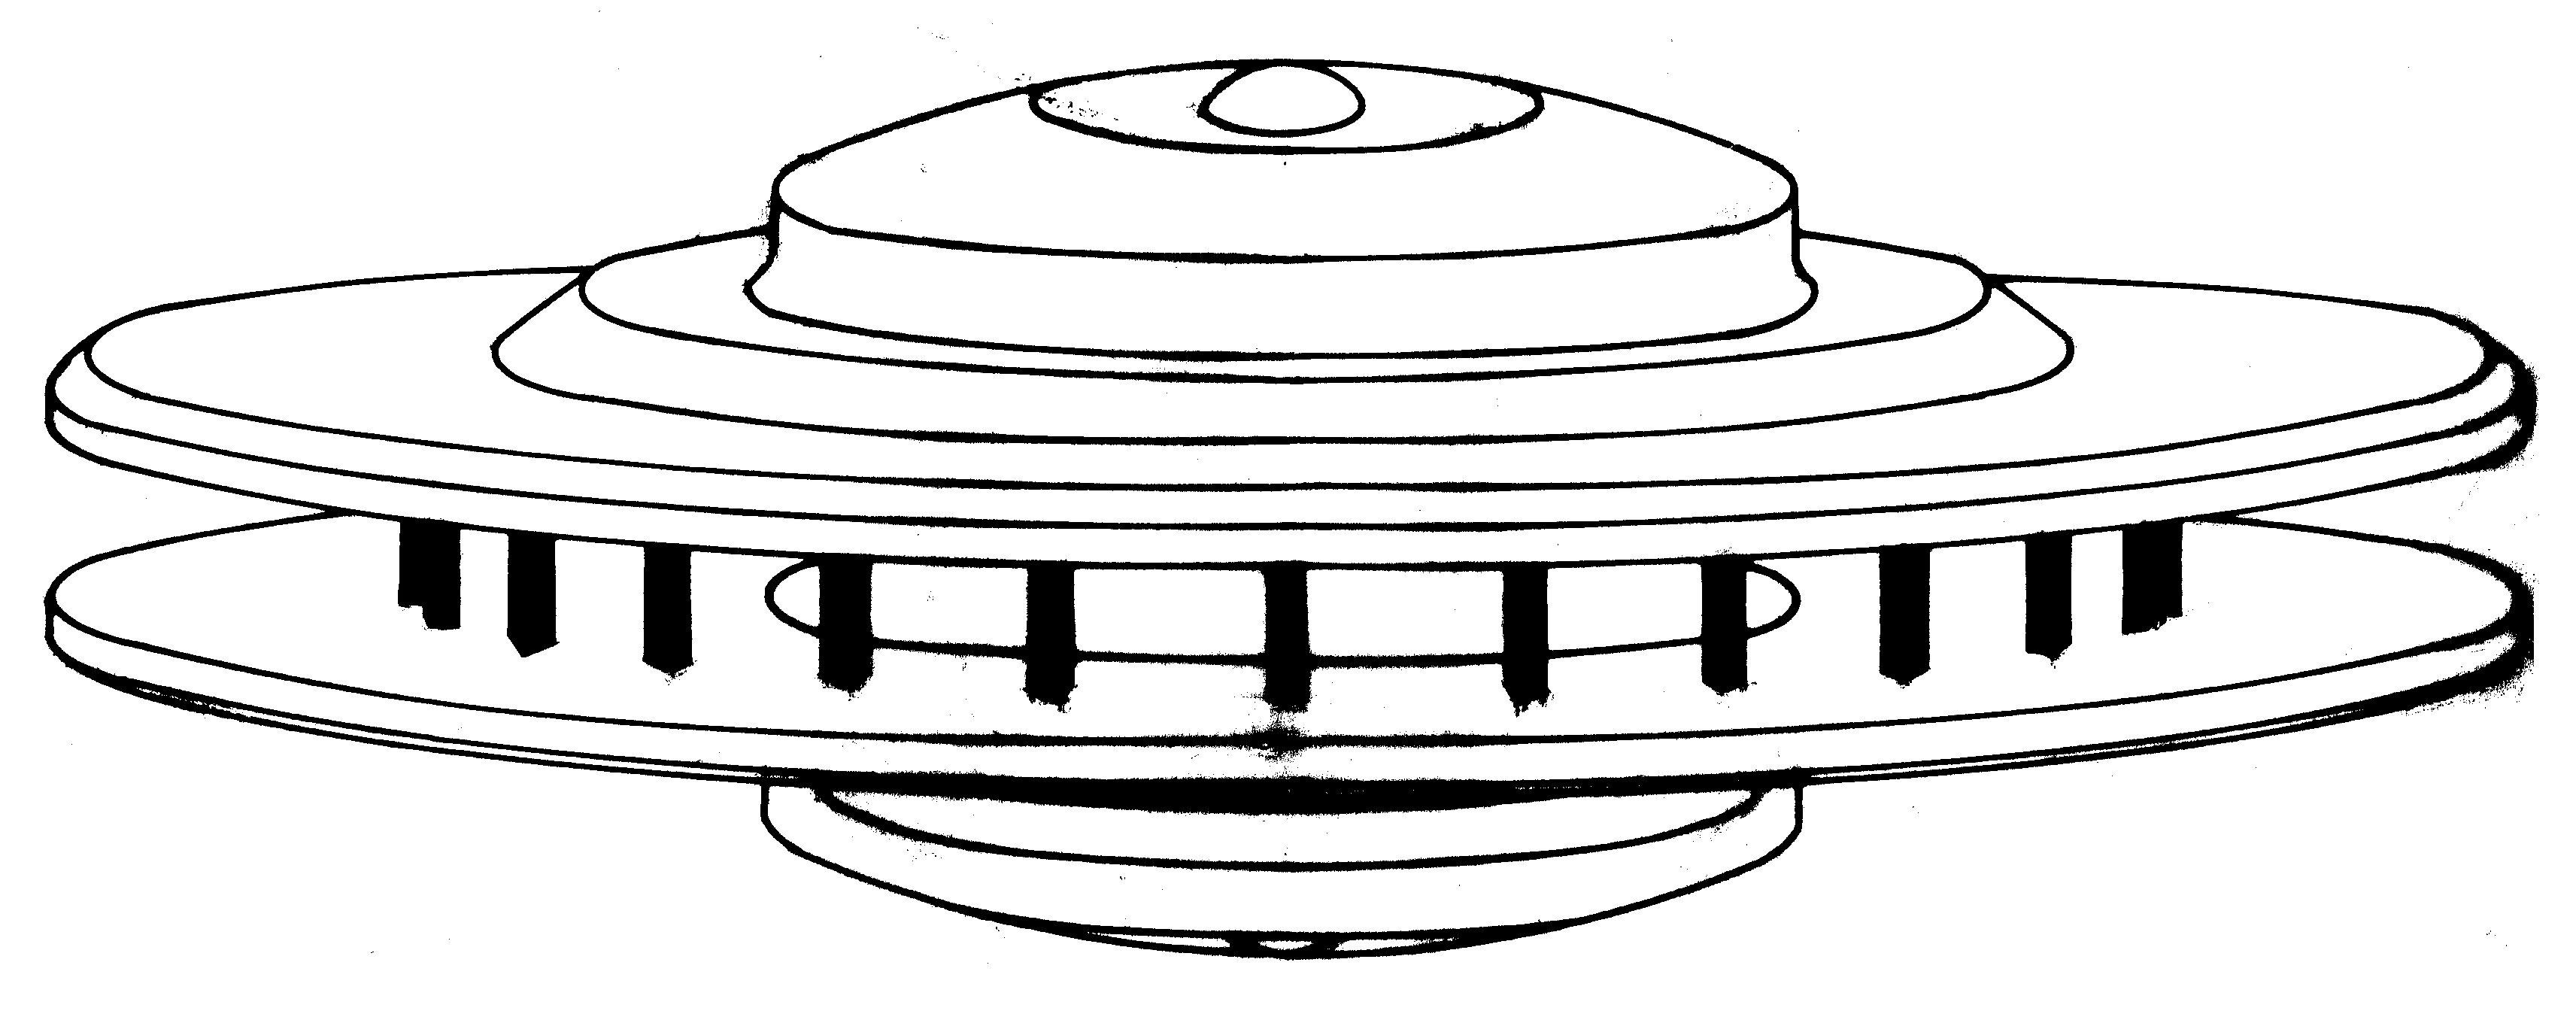 [2e] Figure G13 (high): An example of K7 detached configuration. (a) External appearence. [2e] Figure G13 (high): An example of K7 detached configuration. (a) External appearence.
 [2e] Figure G13 (low): Vertical cross-section shopwing the location of propulsors. [2e] Figure G13 (low): Vertical cross-section shopwing the location of propulsors.
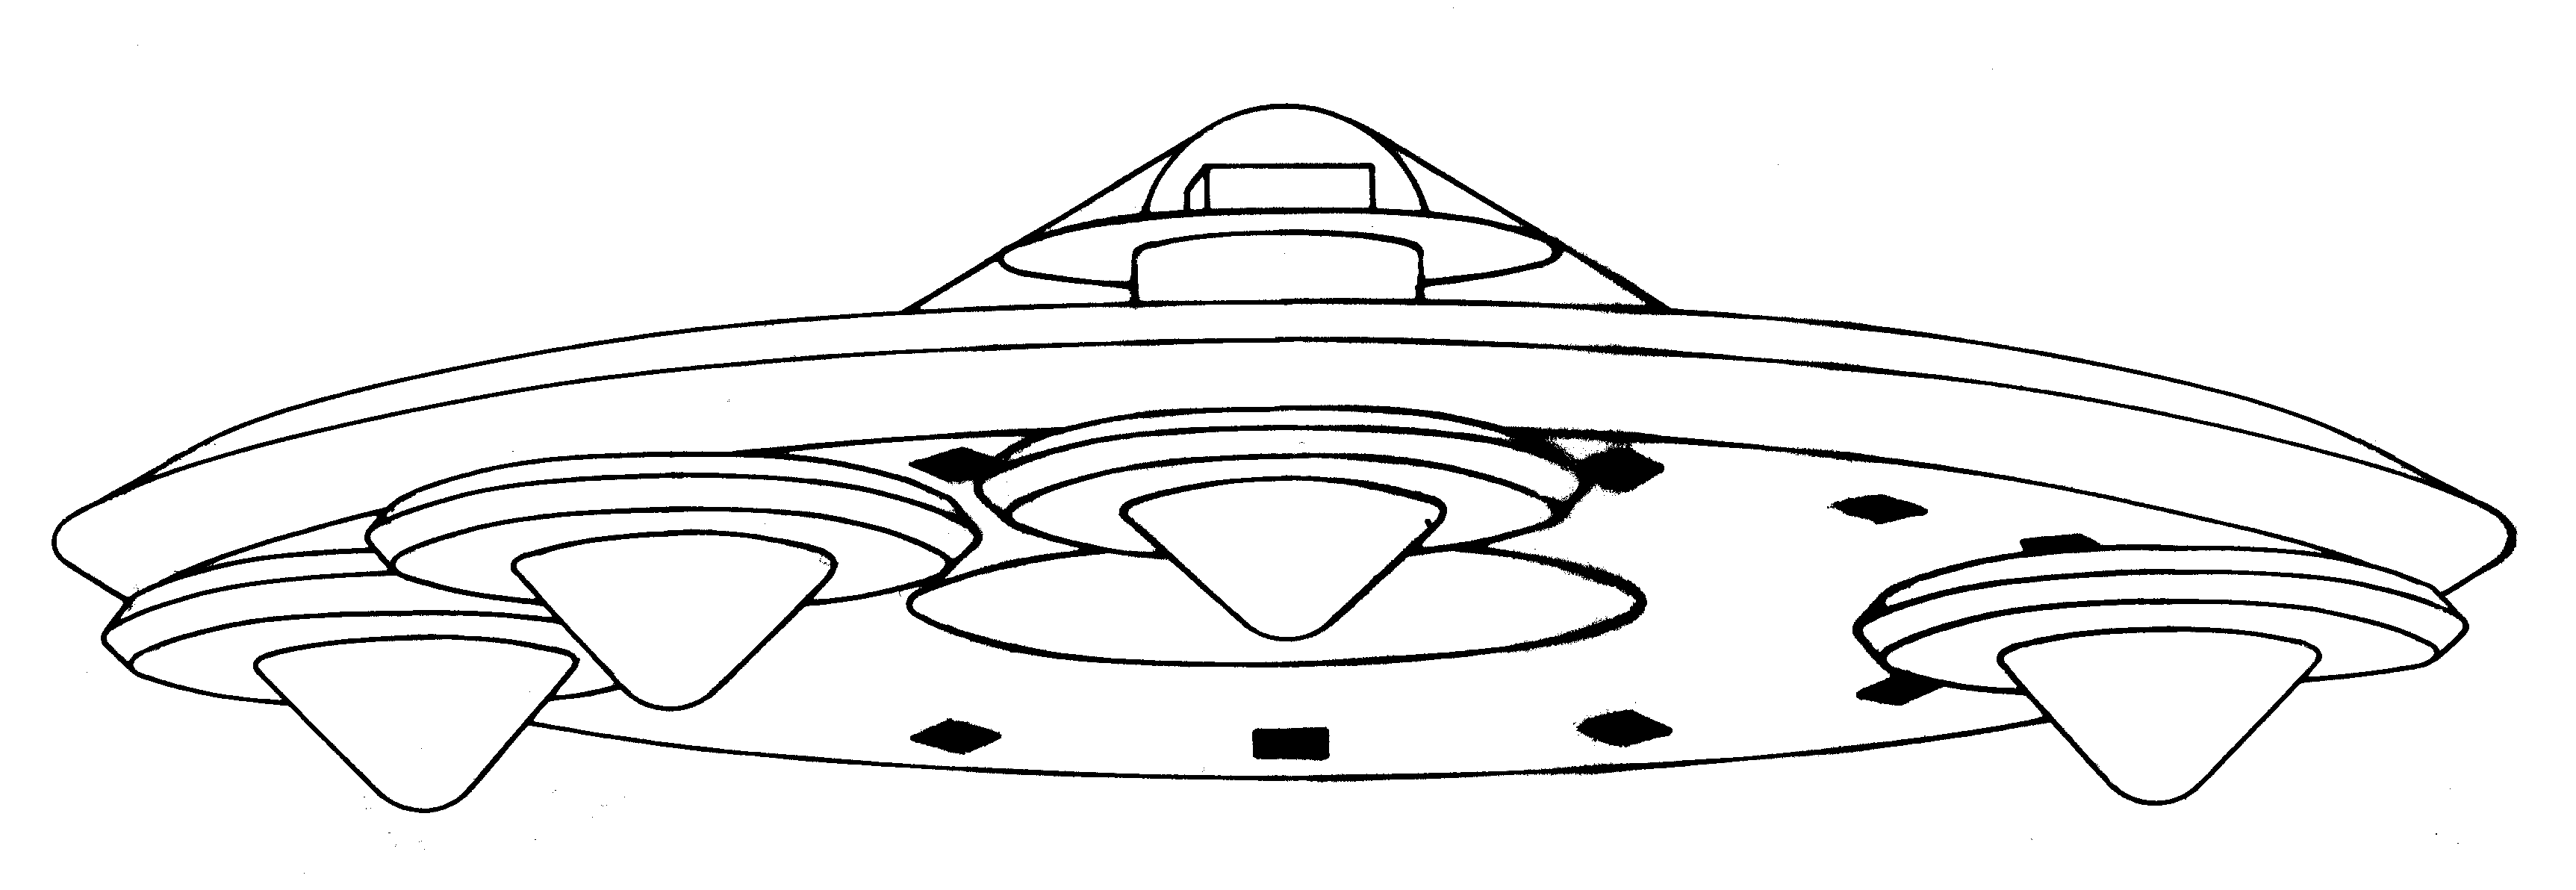 [2e] Figure G14: An example of a carrier platform. [2e] Figure G14: An example of a carrier platform.
 [2e] Figure G15: A "zig-zag" carrier configuration. [2e] Figure G15: A "zig-zag" carrier configuration.
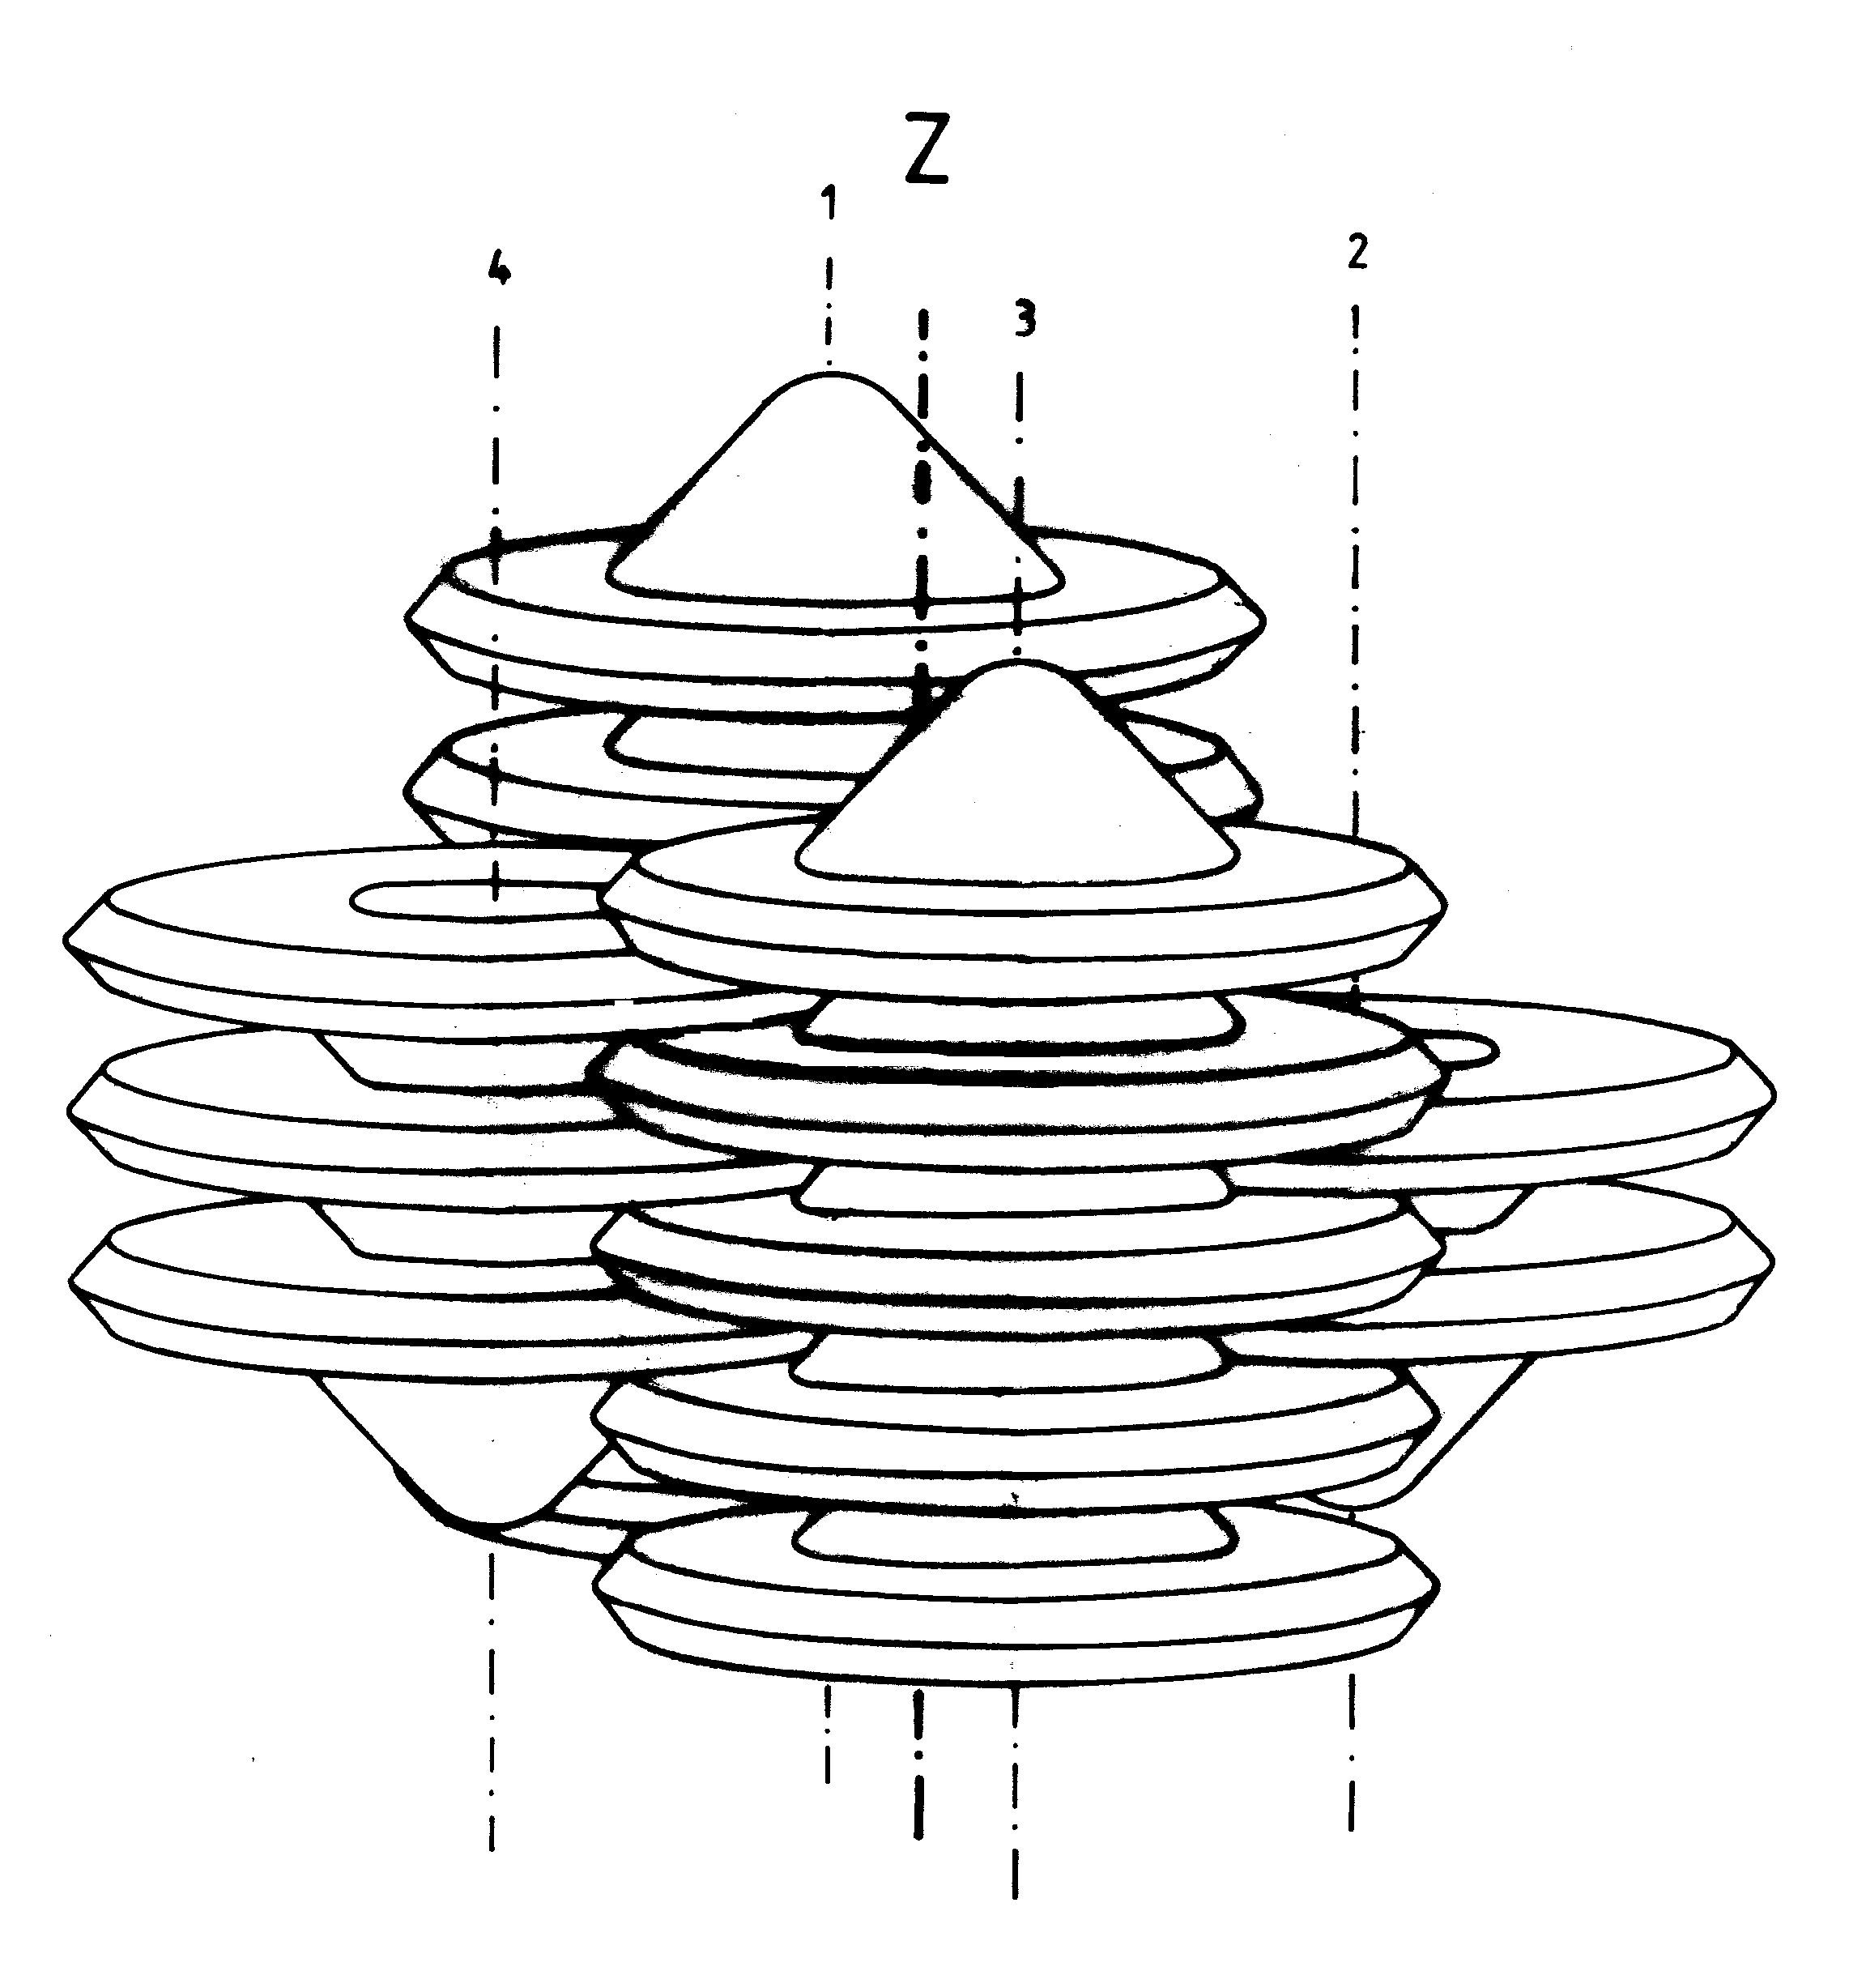 [2e] Figure G16 (a): Examples of flying systems. (a) A single cell composed of 16 K3 type Magnocraft. [2e] Figure G16 (a): Examples of flying systems. (a) A single cell composed of 16 K3 type Magnocraft.
 [2e] Figure G16 (b): Flying system shaped as "flutes". [2e] Figure G16 (b): Flying system shaped as "flutes".
 [2e] Figure G16 (c): Flying system shaped as a "honeycomb". [2e] Figure G16 (c): Flying system shaped as a "honeycomb".
 [2e] Figure G16 (d): Flying system shaped as a "platform". [2e] Figure G16 (d): Flying system shaped as a "platform".
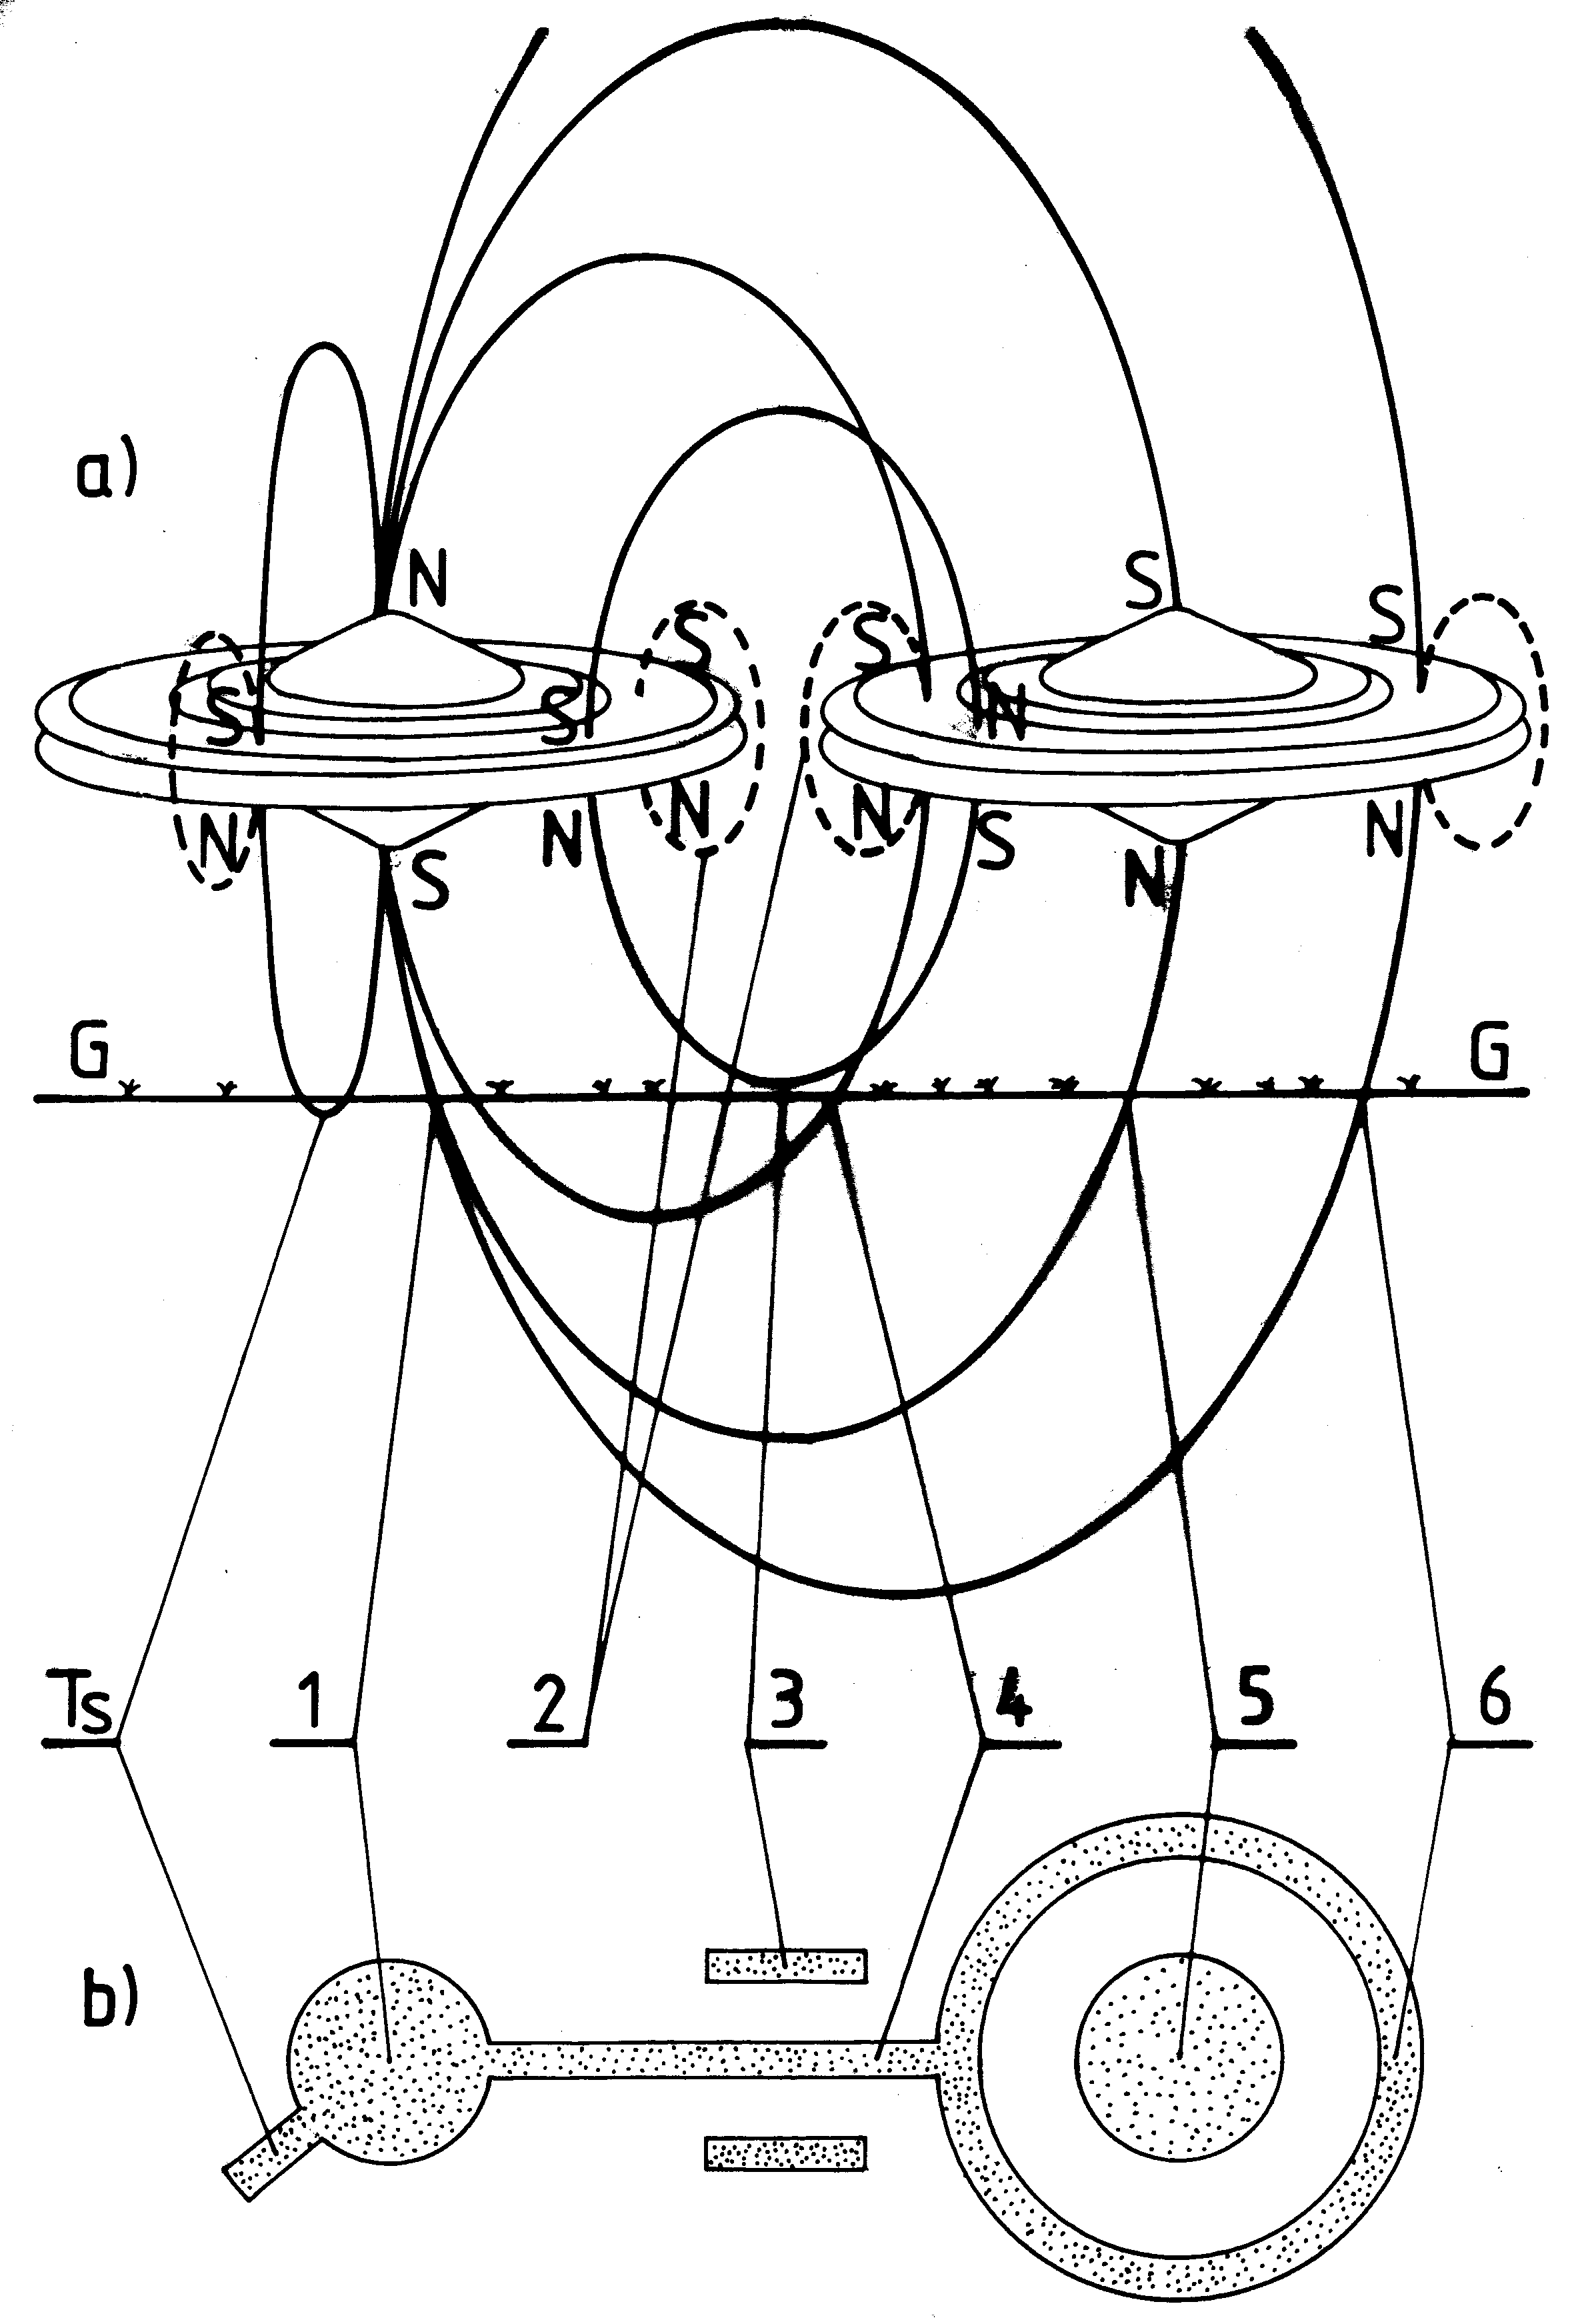 [2e] Figure G17: An example of a flying cluster composed of two spherical complexes type K6. [2e] Figure G17: An example of a flying cluster composed of two spherical complexes type K6.
 [2e] Figure G18: Coupling through a detached configuration. [2e] Figure G18: Coupling through a detached configuration.
 [2e] Figure G19: Coupling through a semi-attached configuration. [2e] Figure G19: Coupling through a semi-attached configuration.
 [2e] Figure G20: Force interactions acting in Magnocraft. [2e] Figure G20: Force interactions acting in Magnocraft.
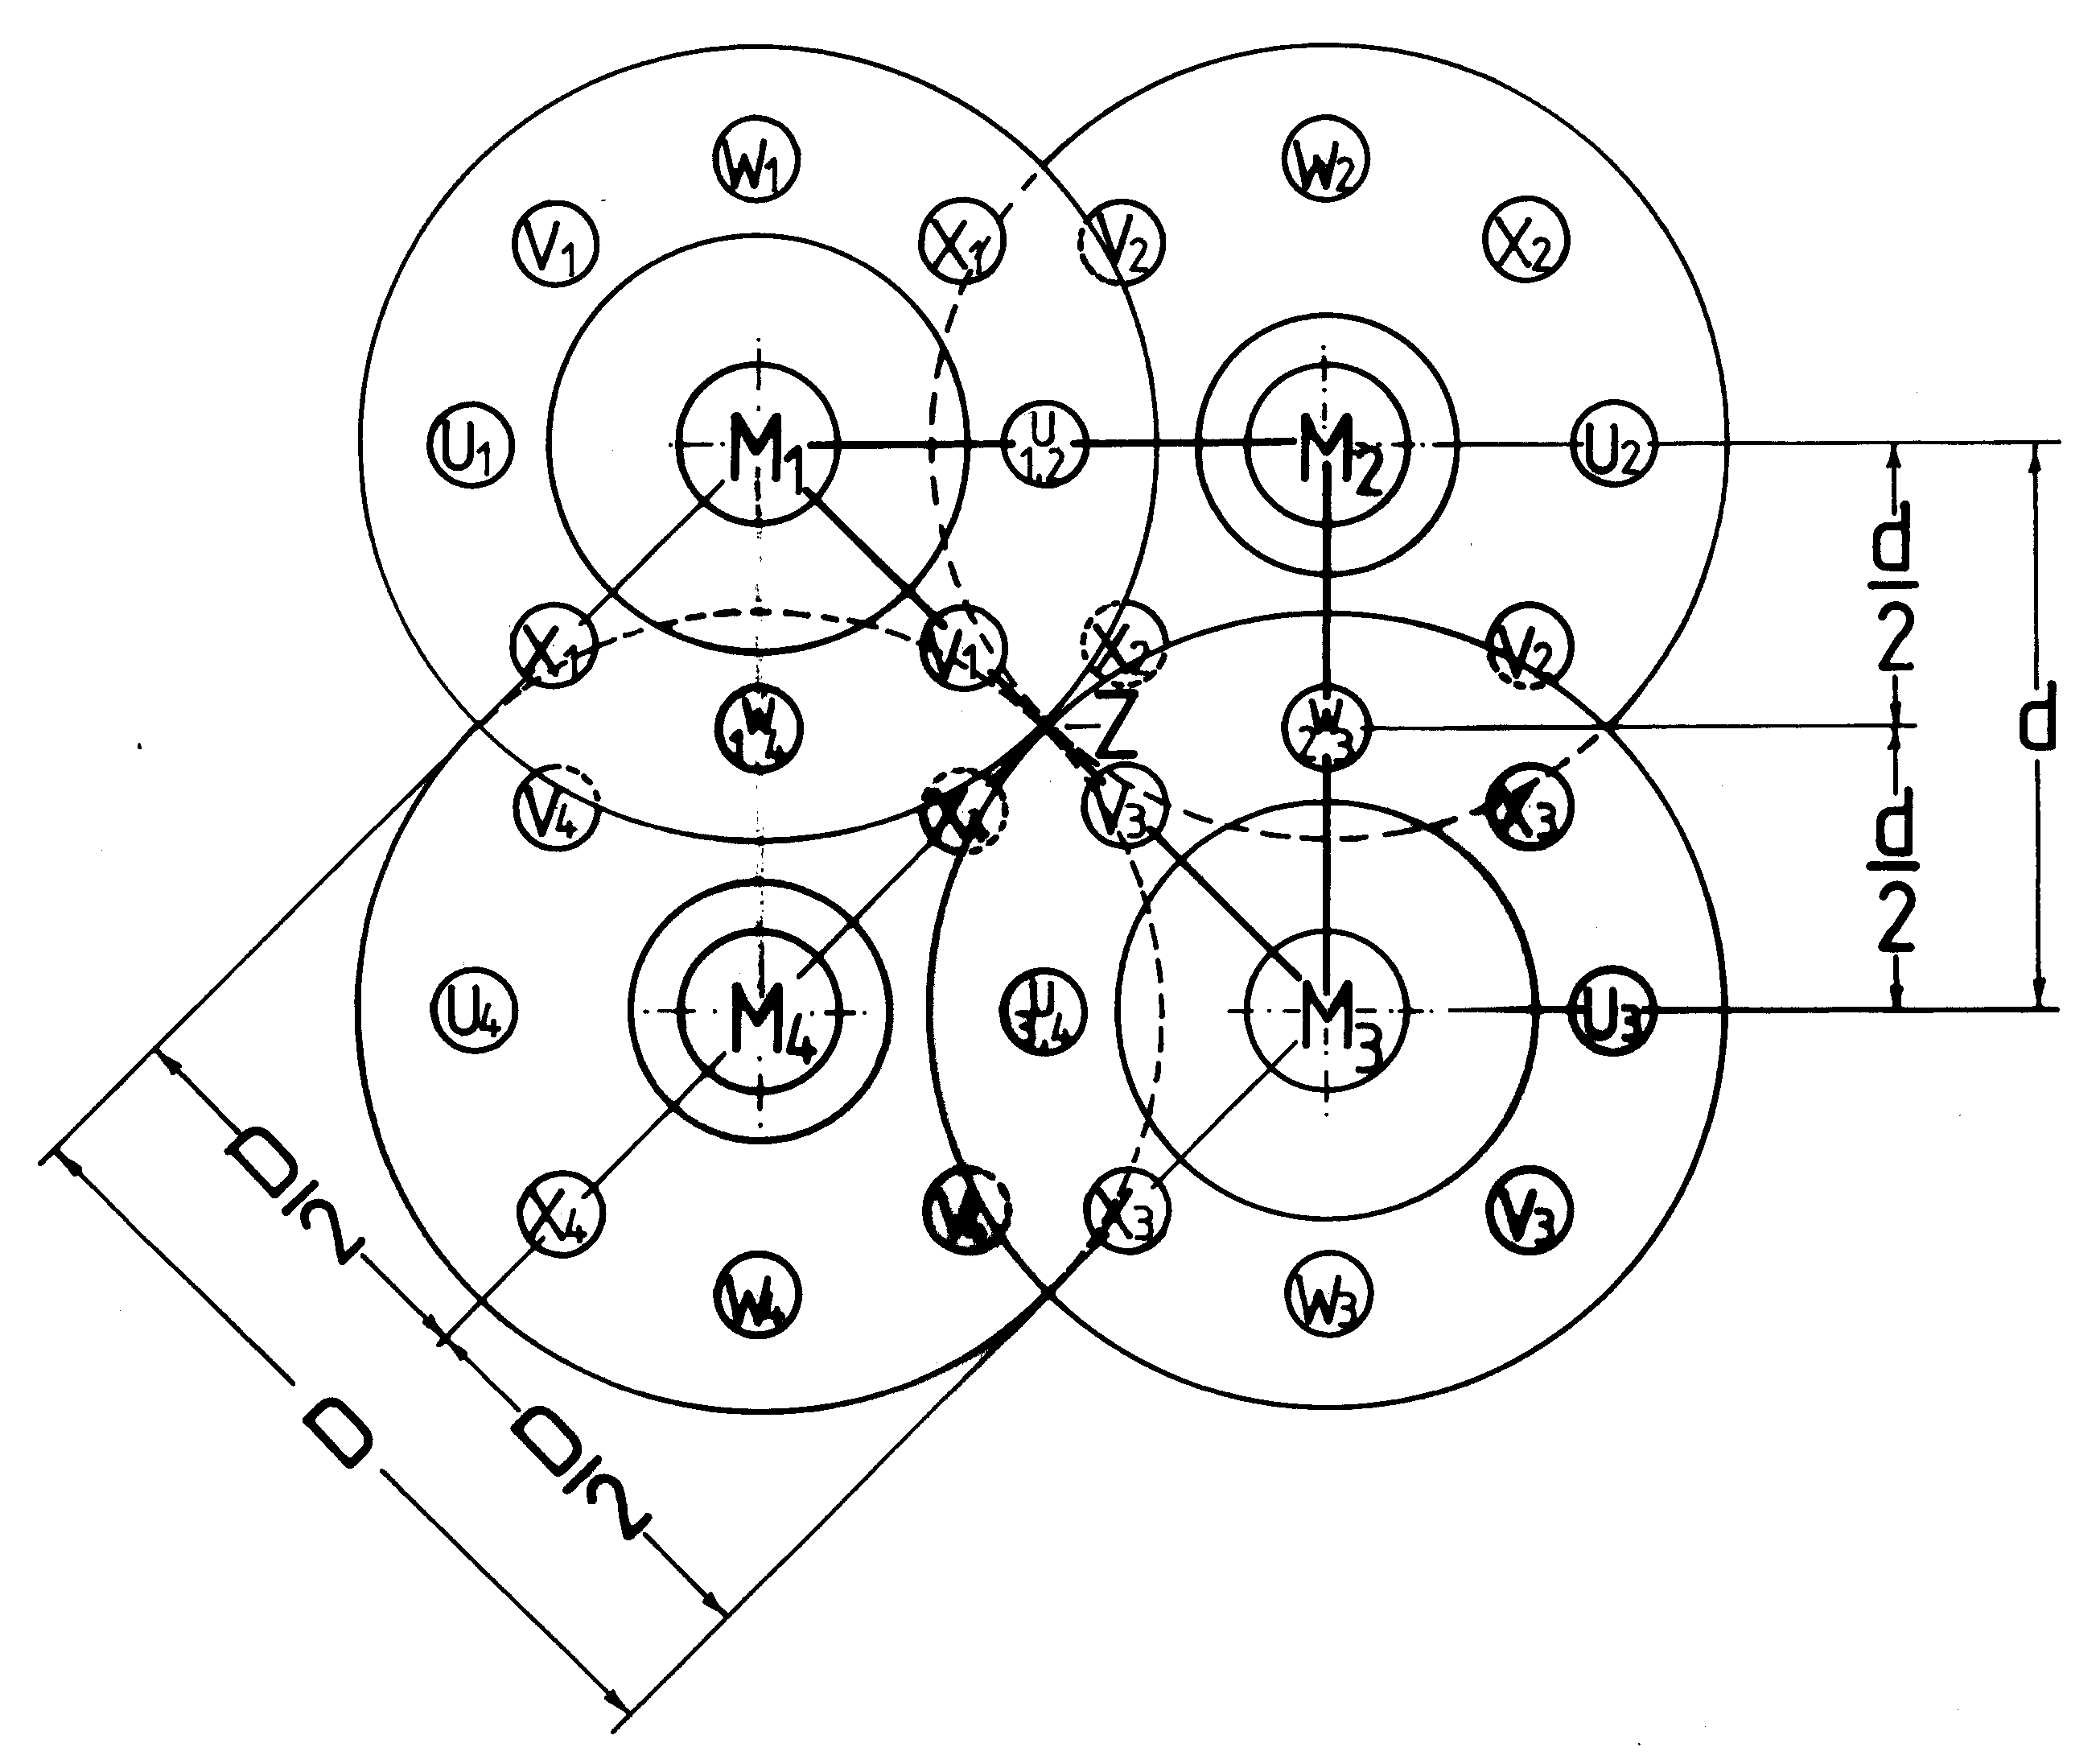 [2e] Figure G21: A top view of one cell of flying systems. [2e] Figure G21: A top view of one cell of flying systems.
 [2e] Figure G22 (a): Meshing of flanges in flying systems. (a) K3 type Magnocraft. [2e] Figure G22 (a): Meshing of flanges in flying systems. (a) K3 type Magnocraft.
 [2e] Figure G22 (b): Two cigar of K6 type mutually mesched. [2e] Figure G22 (b): Two cigar of K6 type mutually mesched.
 [2e] Figure G22 (c): two cigar of K7 type mutually mesched. [2e] Figure G22 (c): two cigar of K7 type mutually mesched.
 [2e] Figure G23: Equations describing shape and dimensions of the Magnocraft. [2e] Figure G23: Equations describing shape and dimensions of the Magnocraft.
 [2e] Figure G24 (a-K3): Side outlines of eight types of Magnocraft. (a) K3 type. [2e] Figure G24 (a-K3): Side outlines of eight types of Magnocraft. (a) K3 type.
 [2e] Figure G24 (a-K4): K4 type. [2e] Figure G24 (a-K4): K4 type.
 [2e] Figure G24 (a-K5): K5 type. [2e] Figure G24 (a-K5): K5 type.
 [2e] Figure G24 (a-K6): K6 type. [2e] Figure G24 (a-K6): K6 type.
 [2e] Figure G24 (b-K7): K7 type. [2e] Figure G24 (b-K7): K7 type.
 [2e] Figure G24 (b-K8): K8 type. [2e] Figure G24 (b-K8): K8 type.
 [2e] Figure G24 (b-K9): K9 type. [2e] Figure G24 (b-K9): K9 type.
 [2e] Figure G24 (b-K10): K10 type. [2e] Figure G24 (b-K10): K10 type.
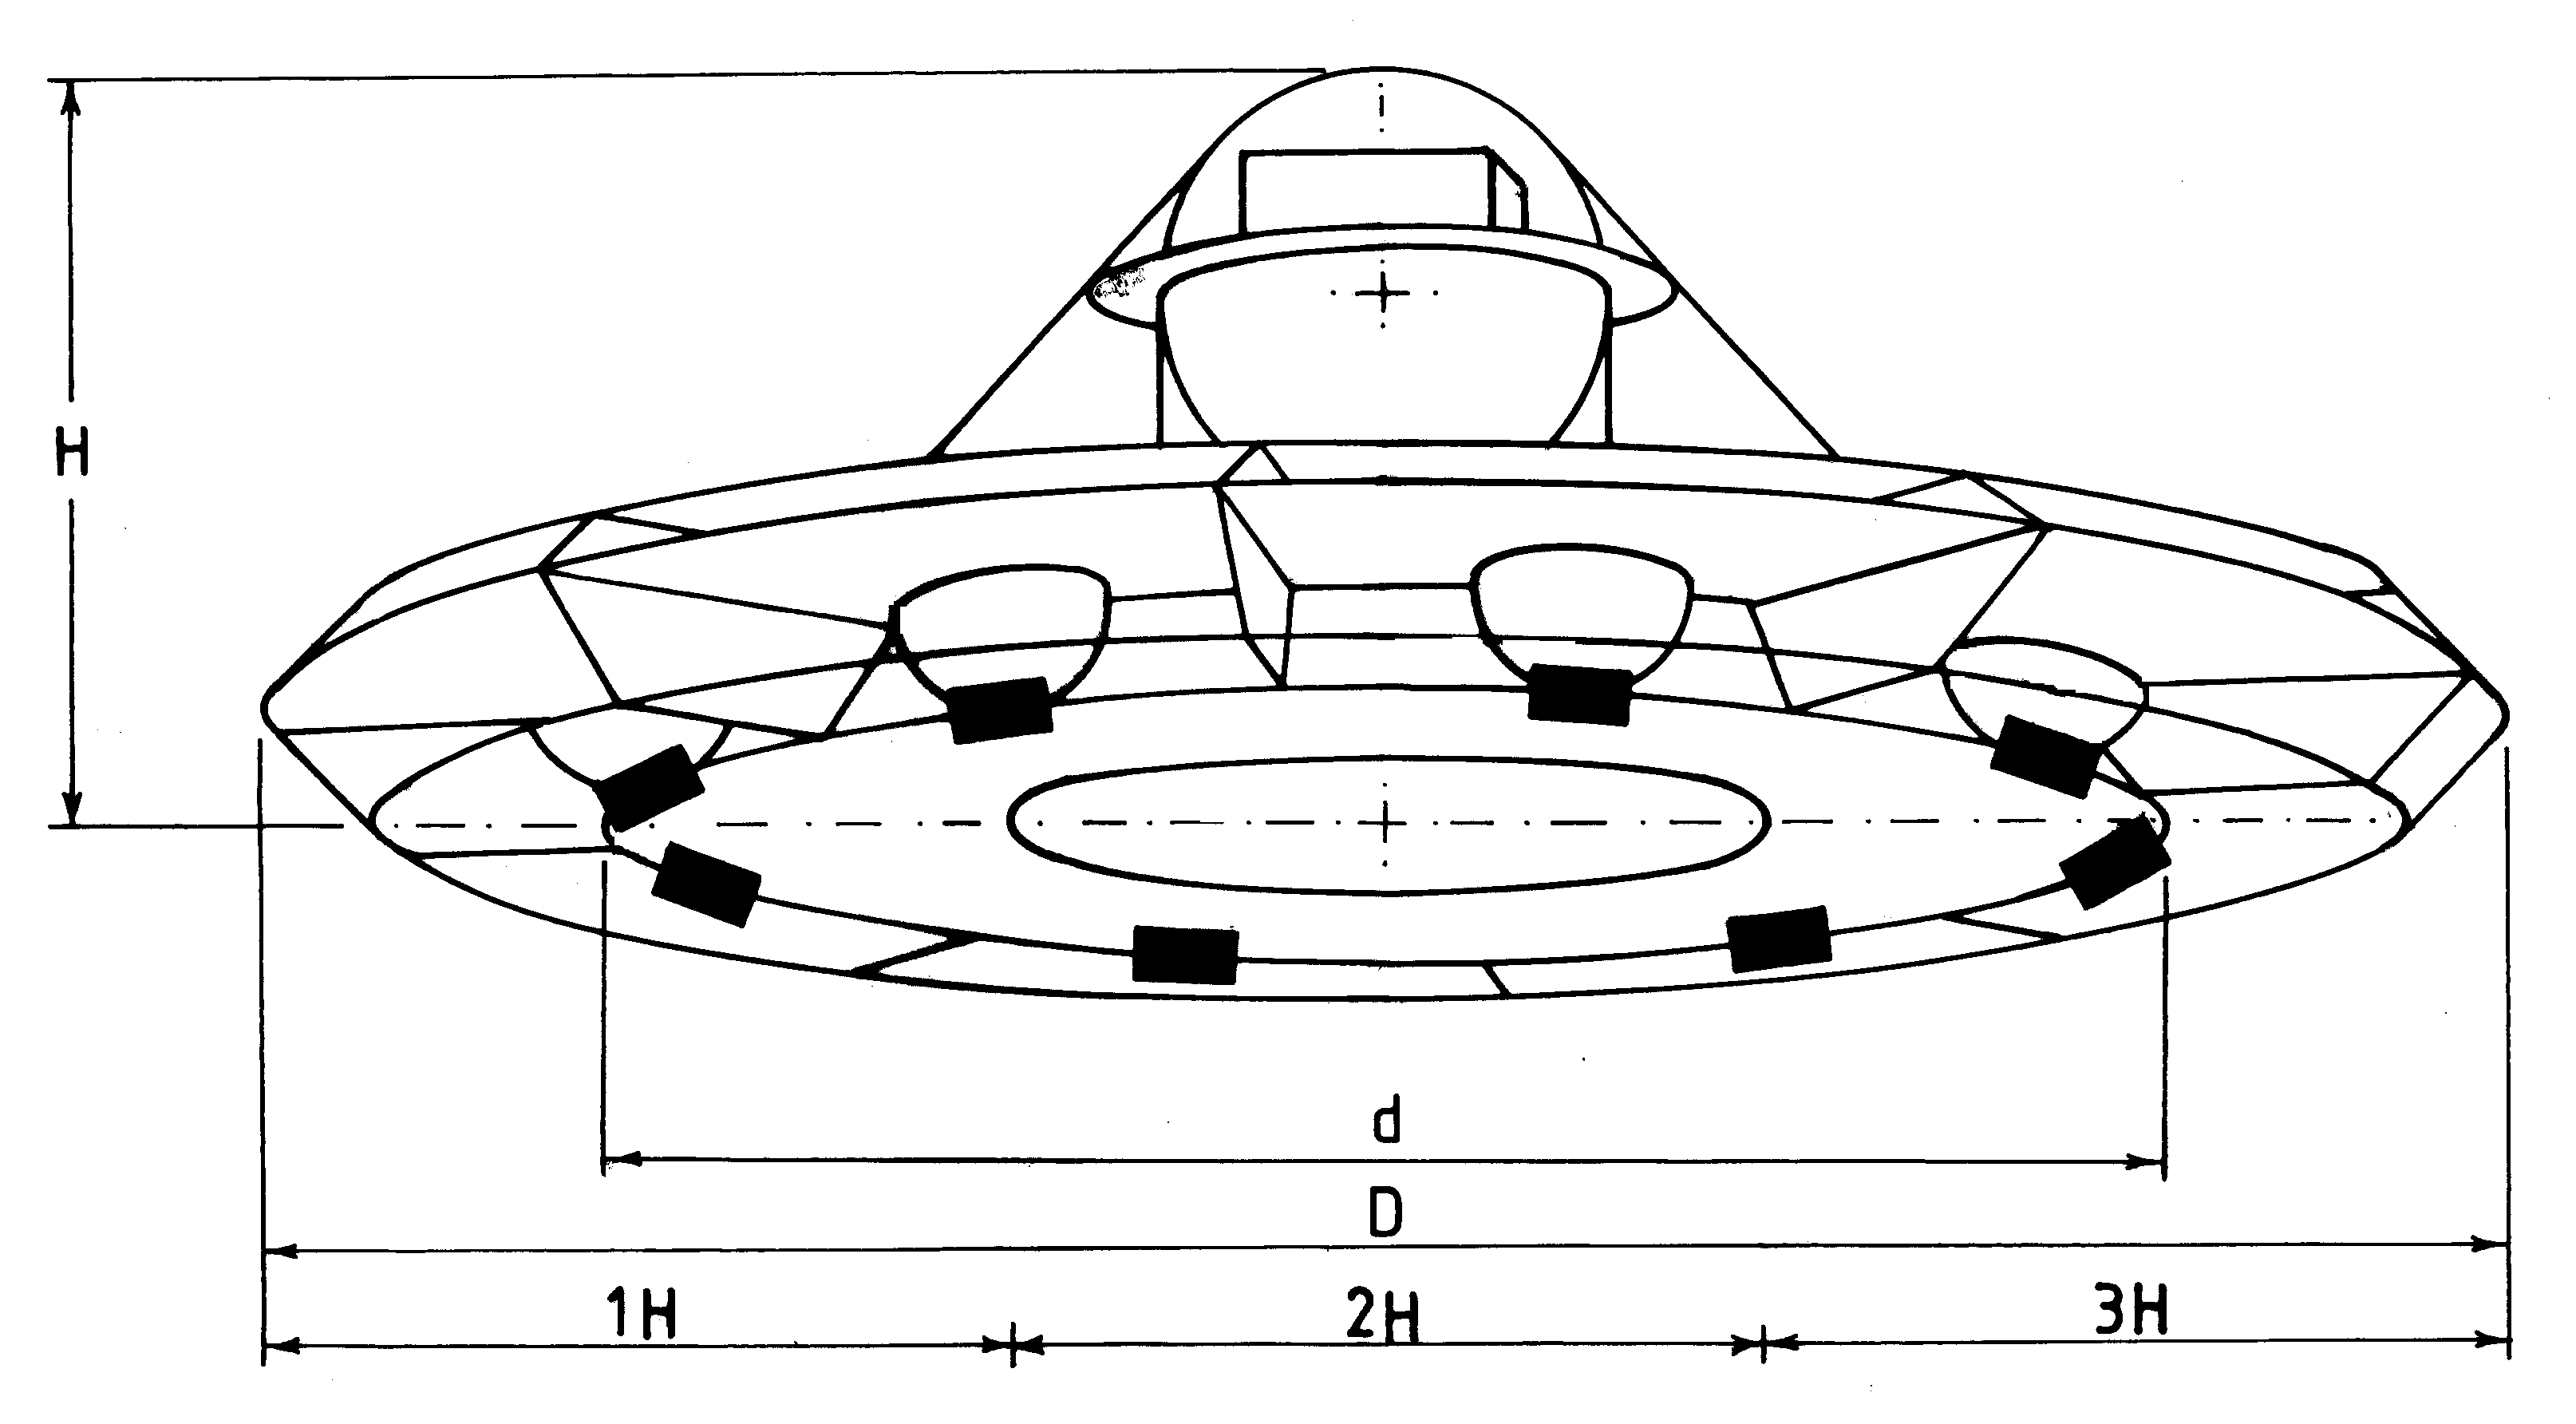 [2e] Figure G25: Methods of identifying the magnocraft's type. [2e] Figure G25: Methods of identifying the magnocraft's type.
 [2e] Figure G26: The creation of latitudinal thrust force. [2e] Figure G26: The creation of latitudinal thrust force.
 [2e] Figure G27: The "rolling sphere rule" for determing the flight direction. [2e] Figure G27: The "rolling sphere rule" for determing the flight direction.
 [2e] Figure G28: The counteracting of the magnetic whirl. [2e] Figure G28: The counteracting of the magnetic whirl.
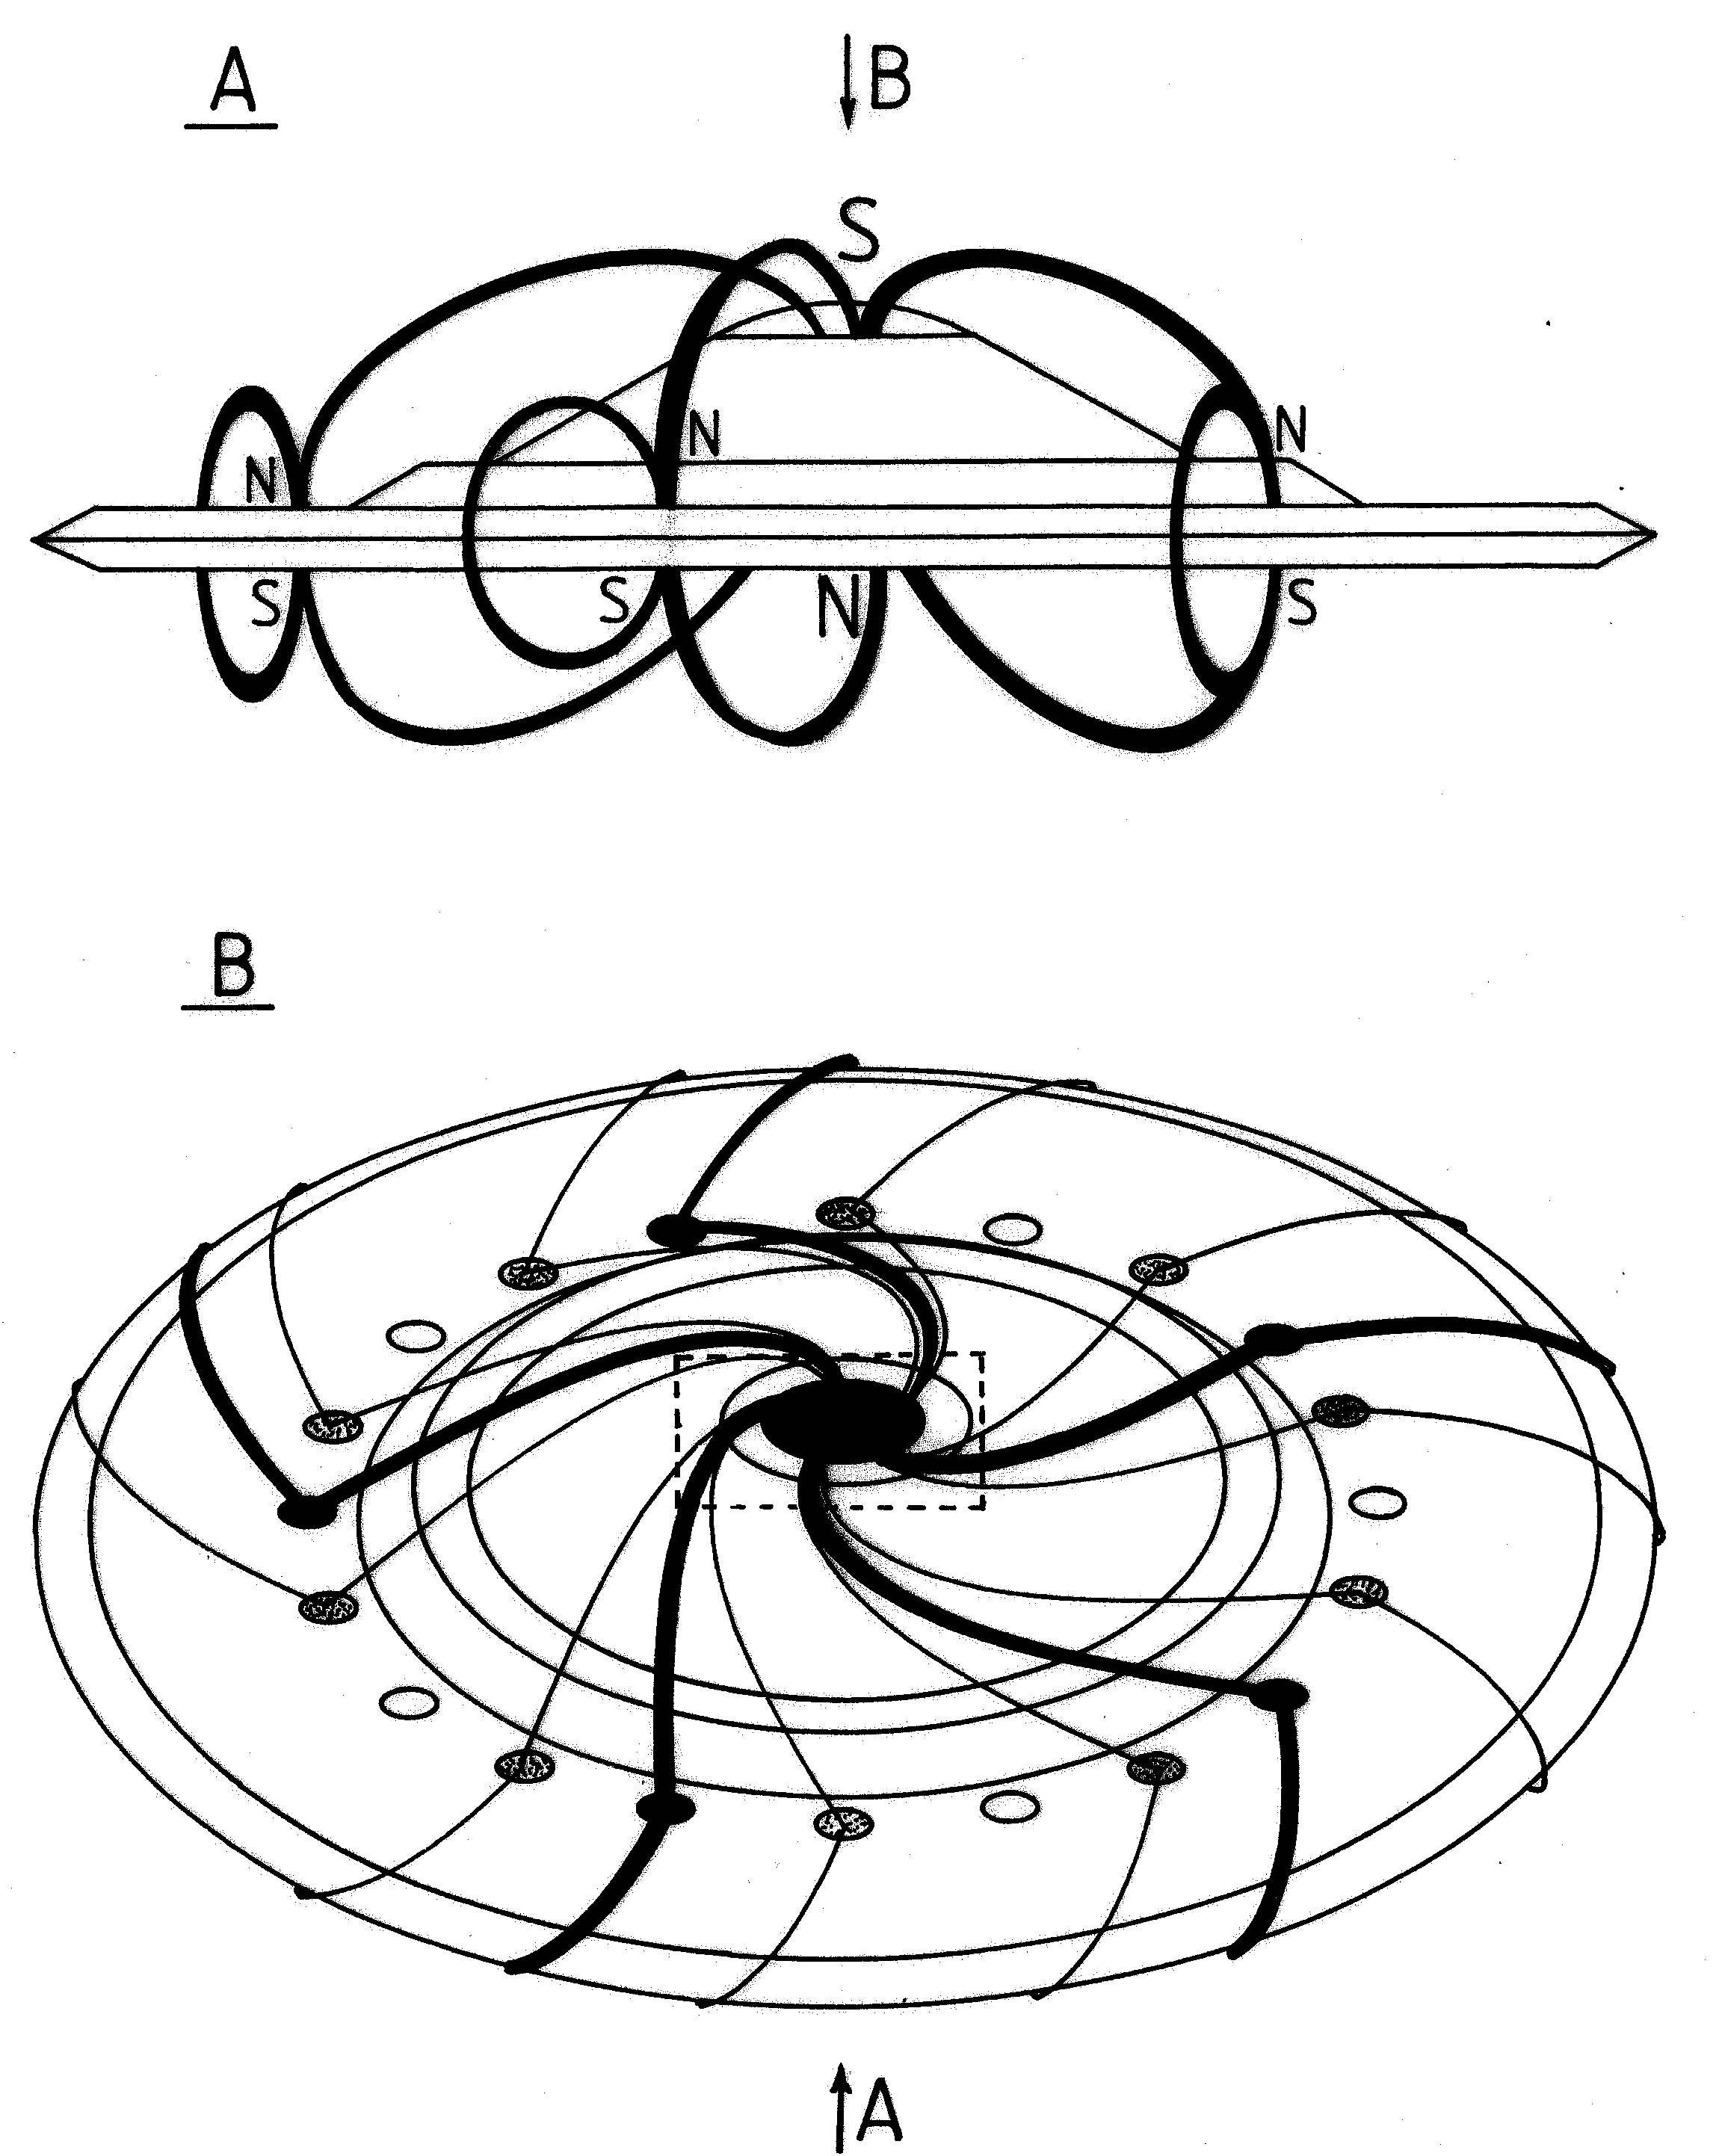 [2e] Figure G29: Magnetic circuits and magnetic whirl. The formation of magnetic circuits by propulsion system of Magnocraft. [2e] Figure G29: Magnetic circuits and magnetic whirl. The formation of magnetic circuits by propulsion system of Magnocraft.
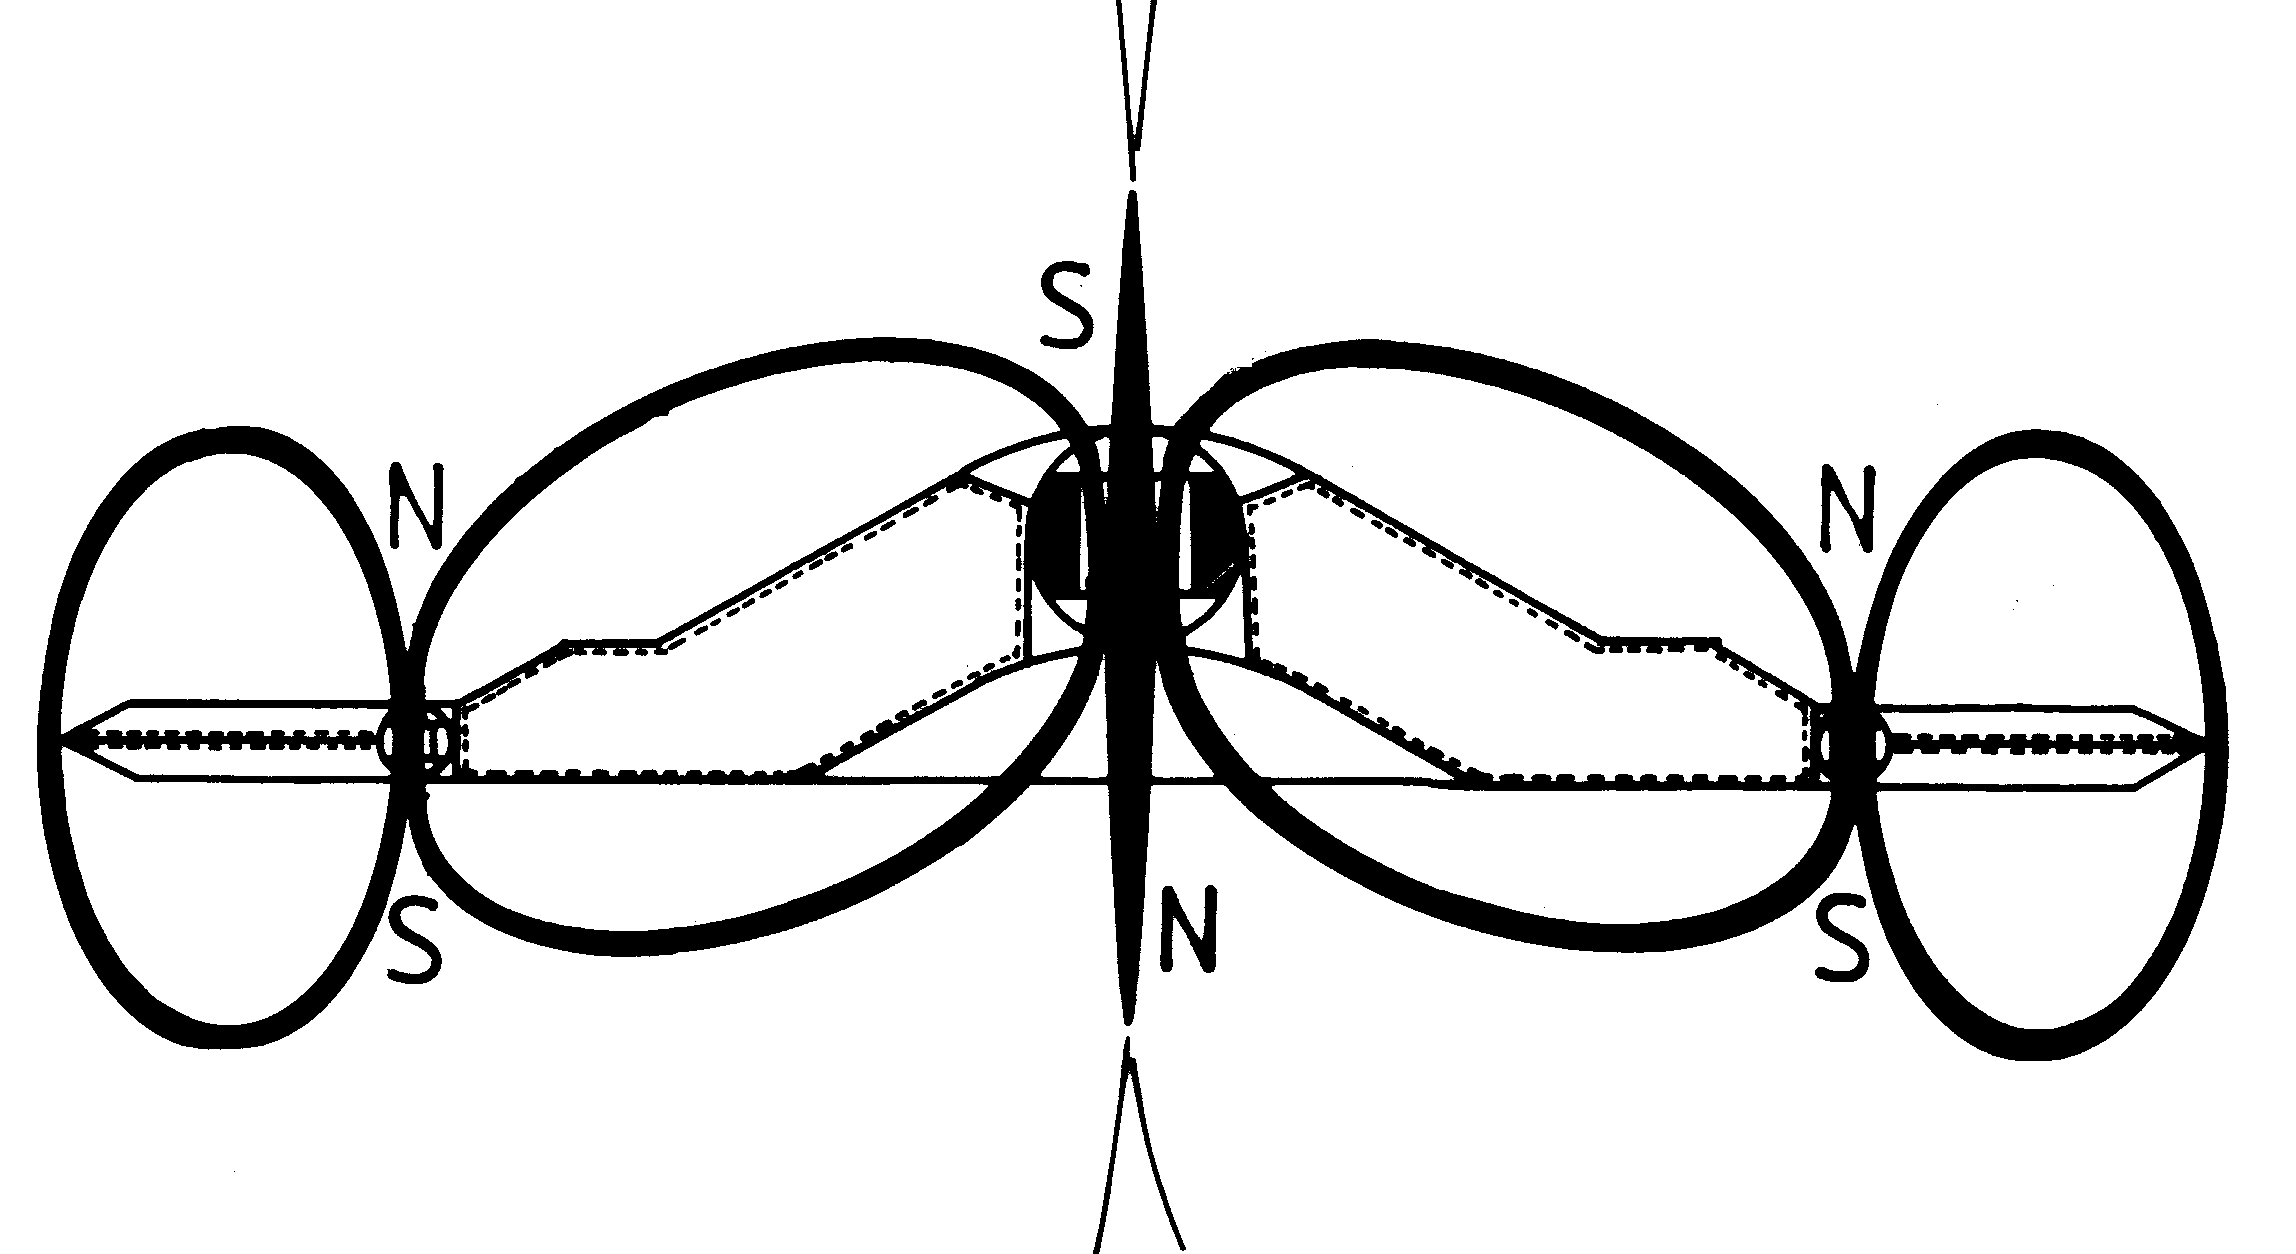 [2e] Figure G30 (a): The spinning circuits of K6 type Magnocraft. (a) The vertical cross-section. [2e] Figure G30 (a): The spinning circuits of K6 type Magnocraft. (a) The vertical cross-section.
 [2e] Figure G30 (bc): Side view showing magnetic circuits. [2e] Figure G30 (bc): Side view showing magnetic circuits.
 [2e] Figure G31: principles involved in converting field pulses from side propulsors into a Magnetic whirl. [2e] Figure G31: principles involved in converting field pulses from side propulsors into a Magnetic whirl.
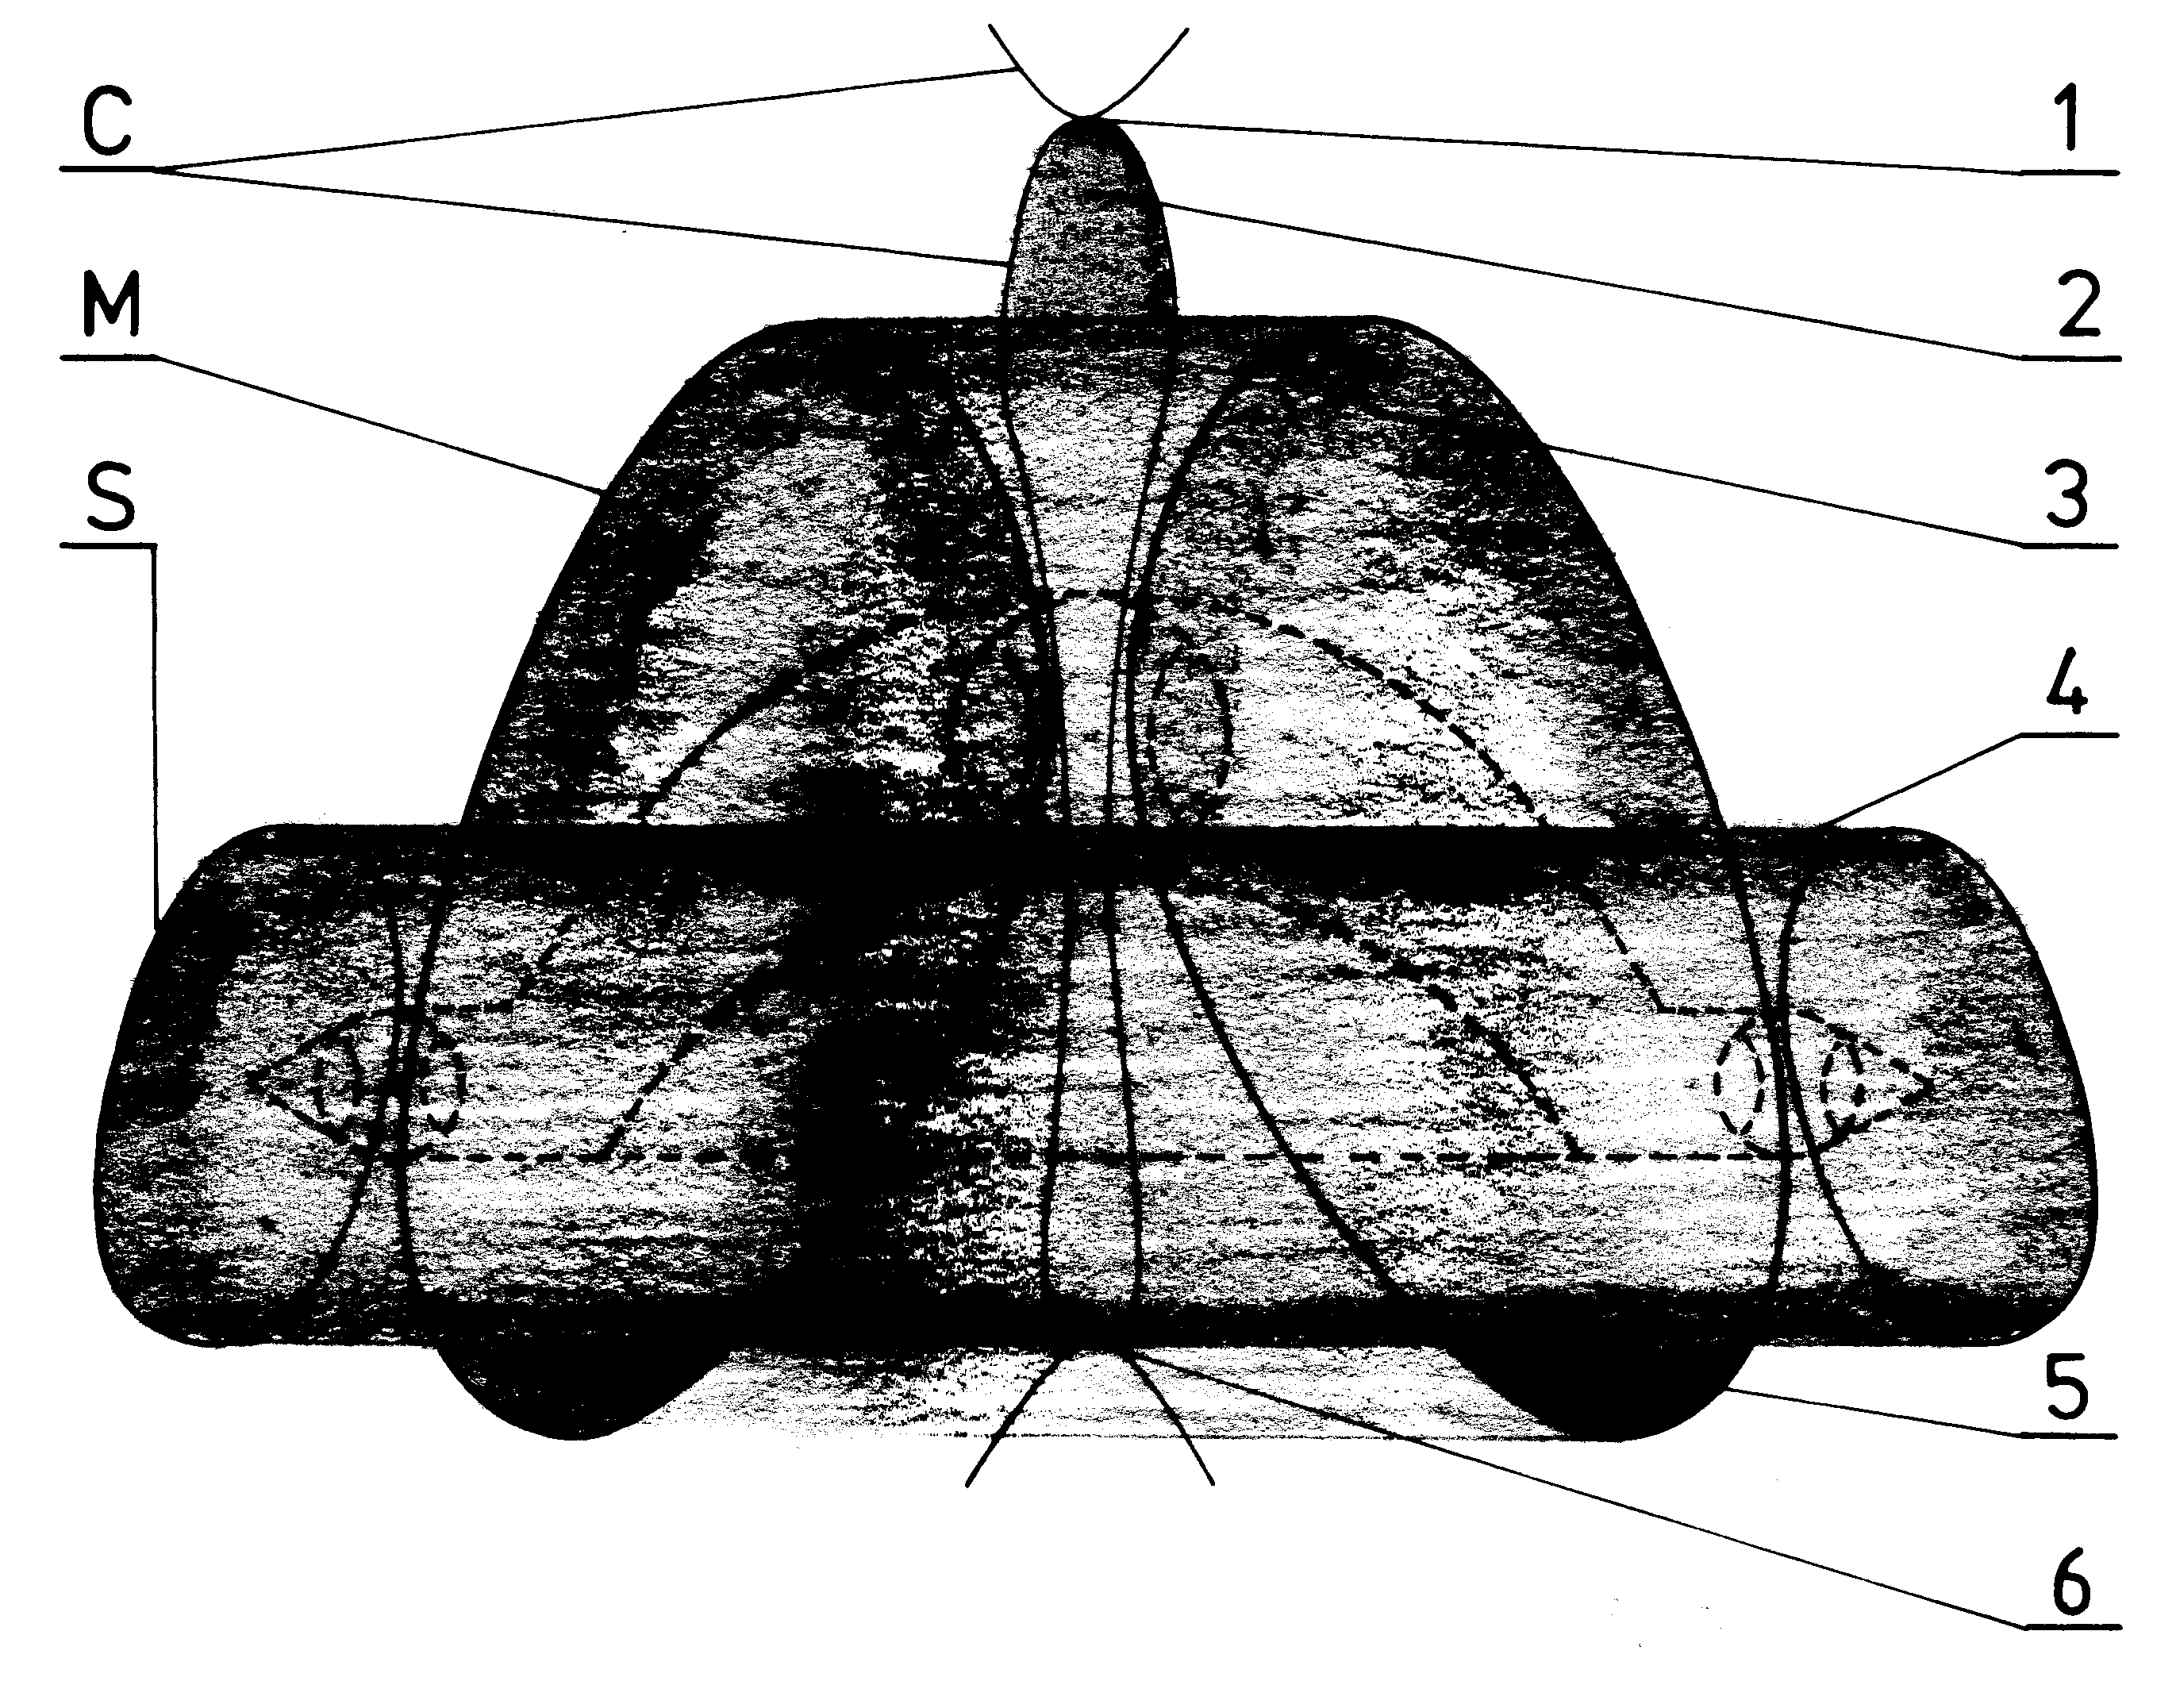 [2e] Figure G32: An example of the "ionic picture of a whirl". [2e] Figure G32: An example of the "ionic picture of a whirl".
 [2e] Figure G33 (a): Visibility of propulsors in K3 type Magnocraft. (a) The upward view. [2e] Figure G33 (a): Visibility of propulsors in K3 type Magnocraft. (a) The upward view.
 [2e] Figure G33 (b): Side view of a detached configuration. [2e] Figure G33 (b): Side view of a detached configuration.
 [2e] Figure G34: Multiple images of glowing magnetic circuits formed by a fast moving Magnocraft. [2e] Figure G34: Multiple images of glowing magnetic circuits formed by a fast moving Magnocraft.
 [2e] Figure G35: The SUB system of position lamps in the Magnocraft. [2e] Figure G35: The SUB system of position lamps in the Magnocraft.
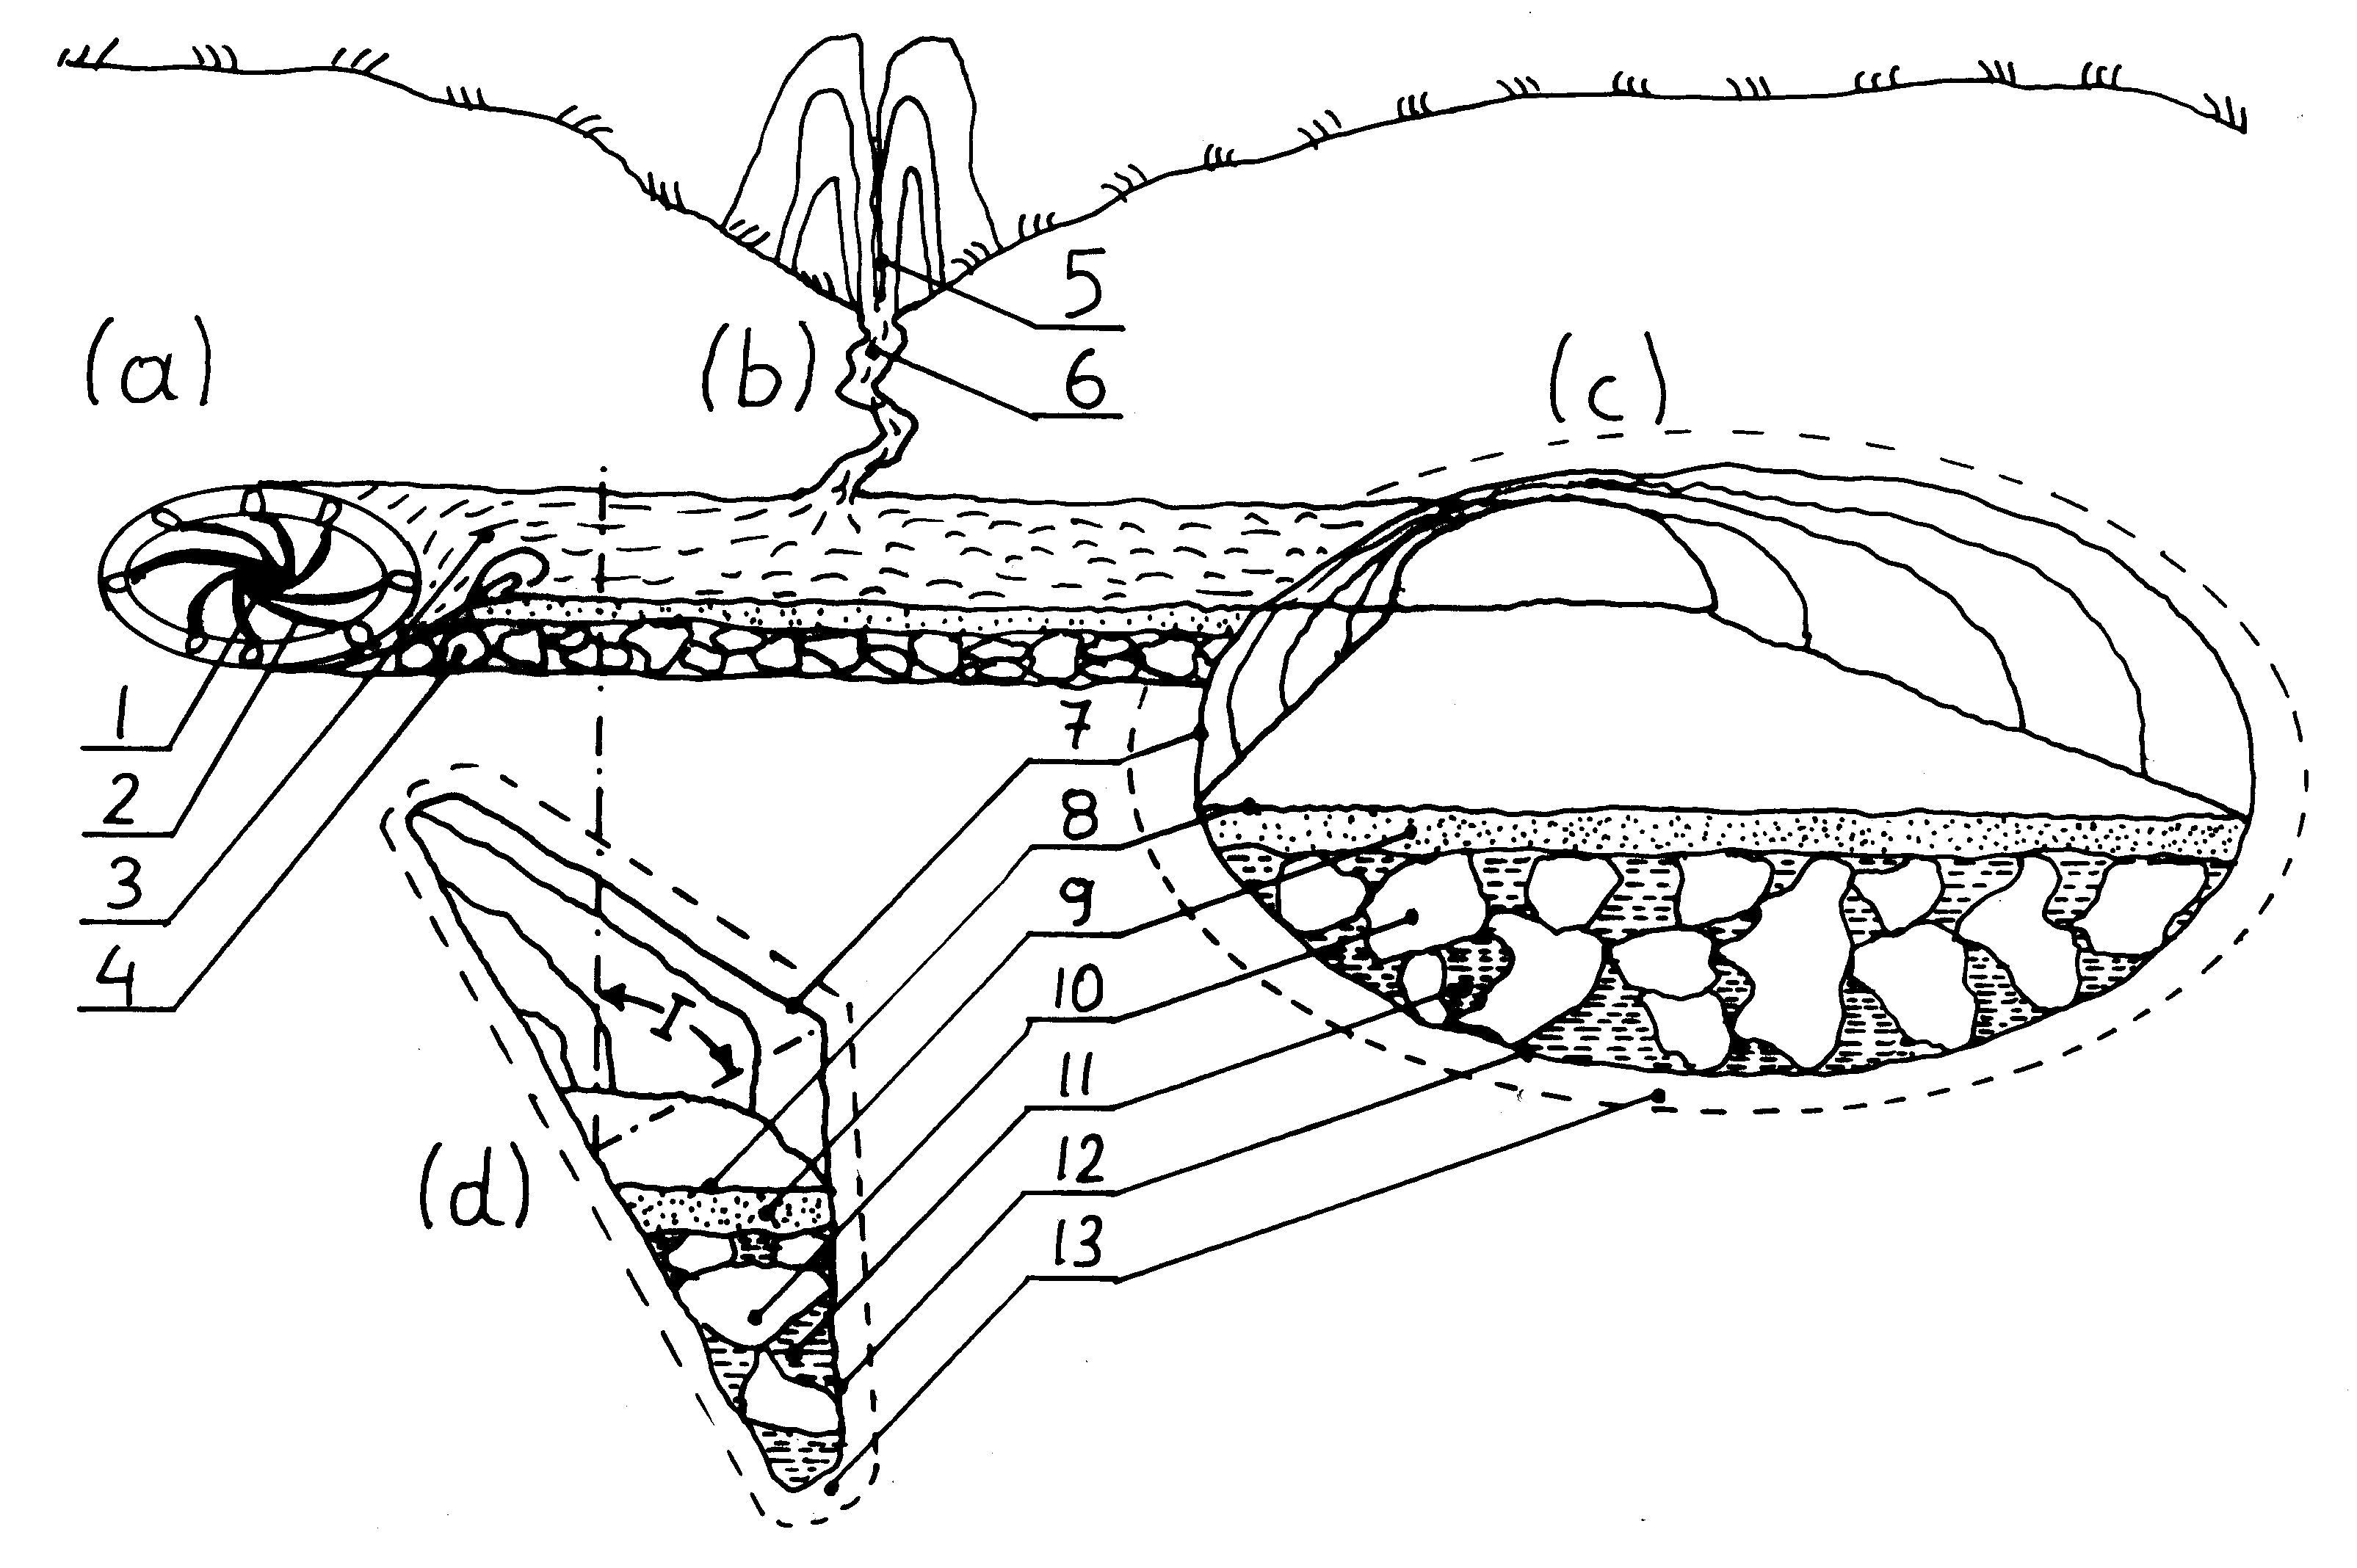 [2e] Figure G36: The illustration of pinciples of forming underground tunnels by UFOs. [2e] Figure G36: The illustration of pinciples of forming underground tunnels by UFOs.
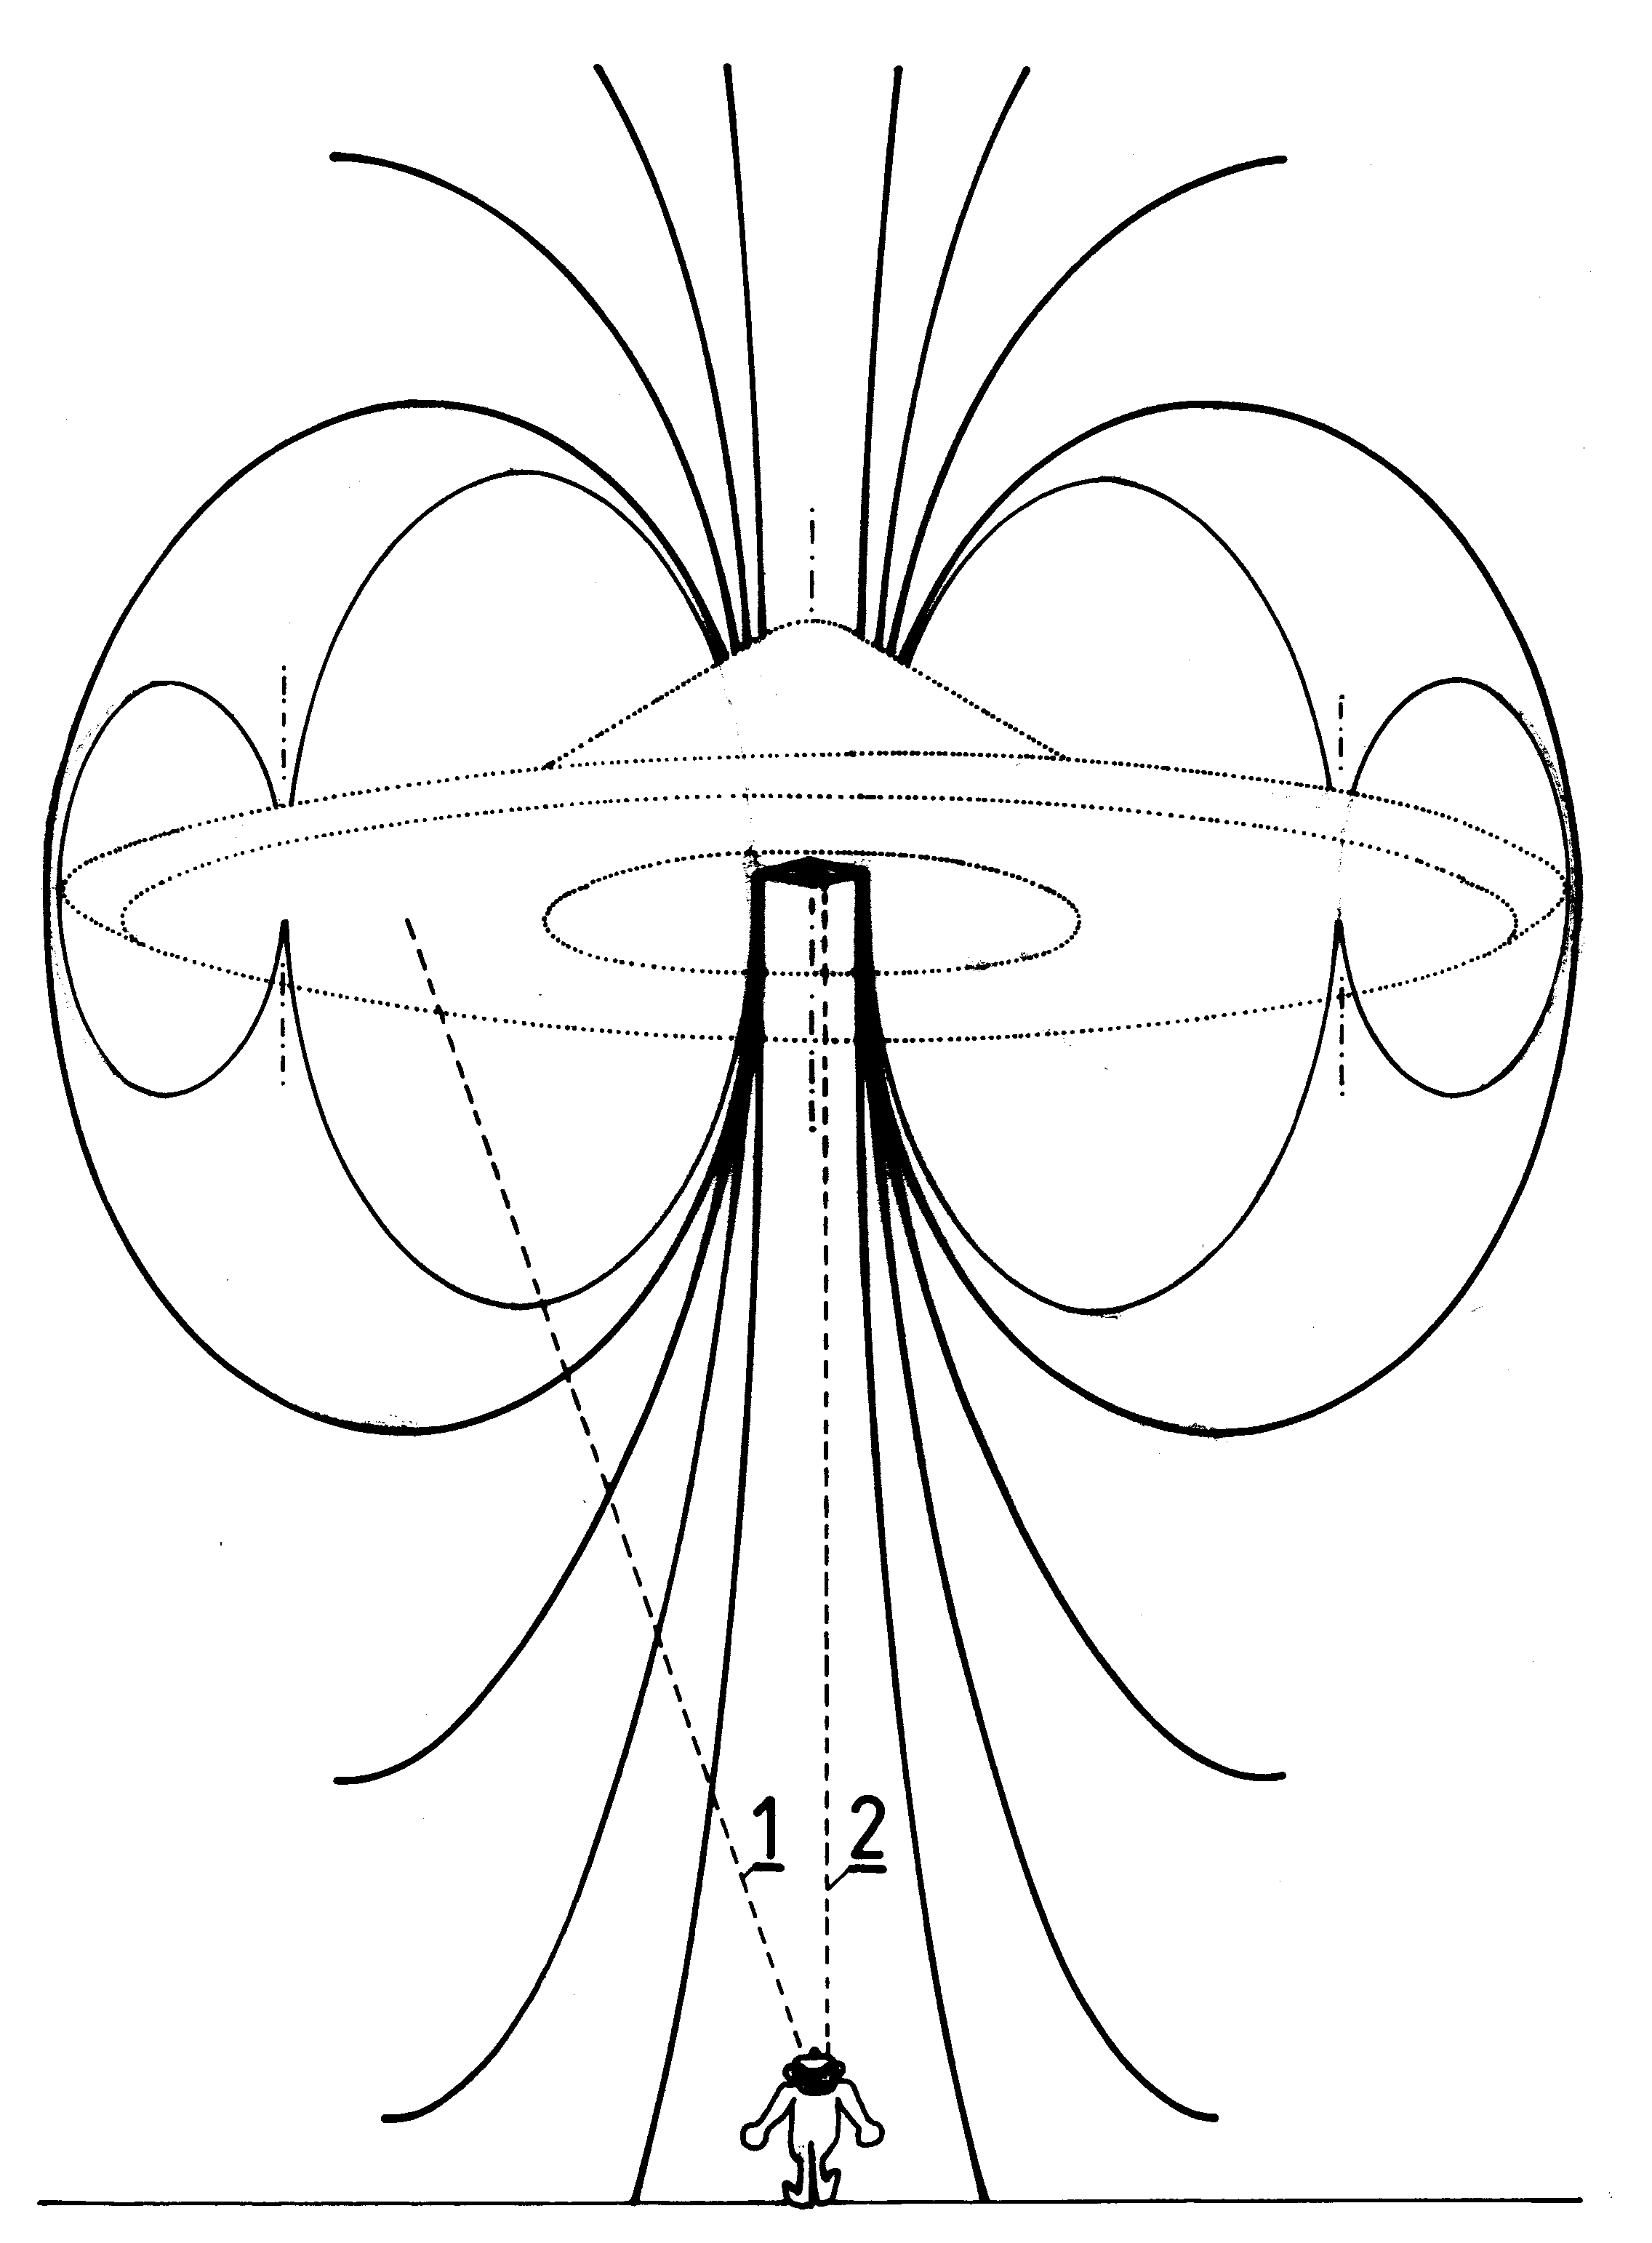 [2e] Figure G37: The explanation for the magnetic lens effect in ascending Magnocraft/UFOs. It explains why only the outlet from main "twin-chamber capsule" is visible as shown in [2e] Figure L5. [2e] Figure G37: The explanation for the magnetic lens effect in ascending Magnocraft/UFOs. It explains why only the outlet from main "twin-chamber capsule" is visible as shown in [2e] Figure L5.
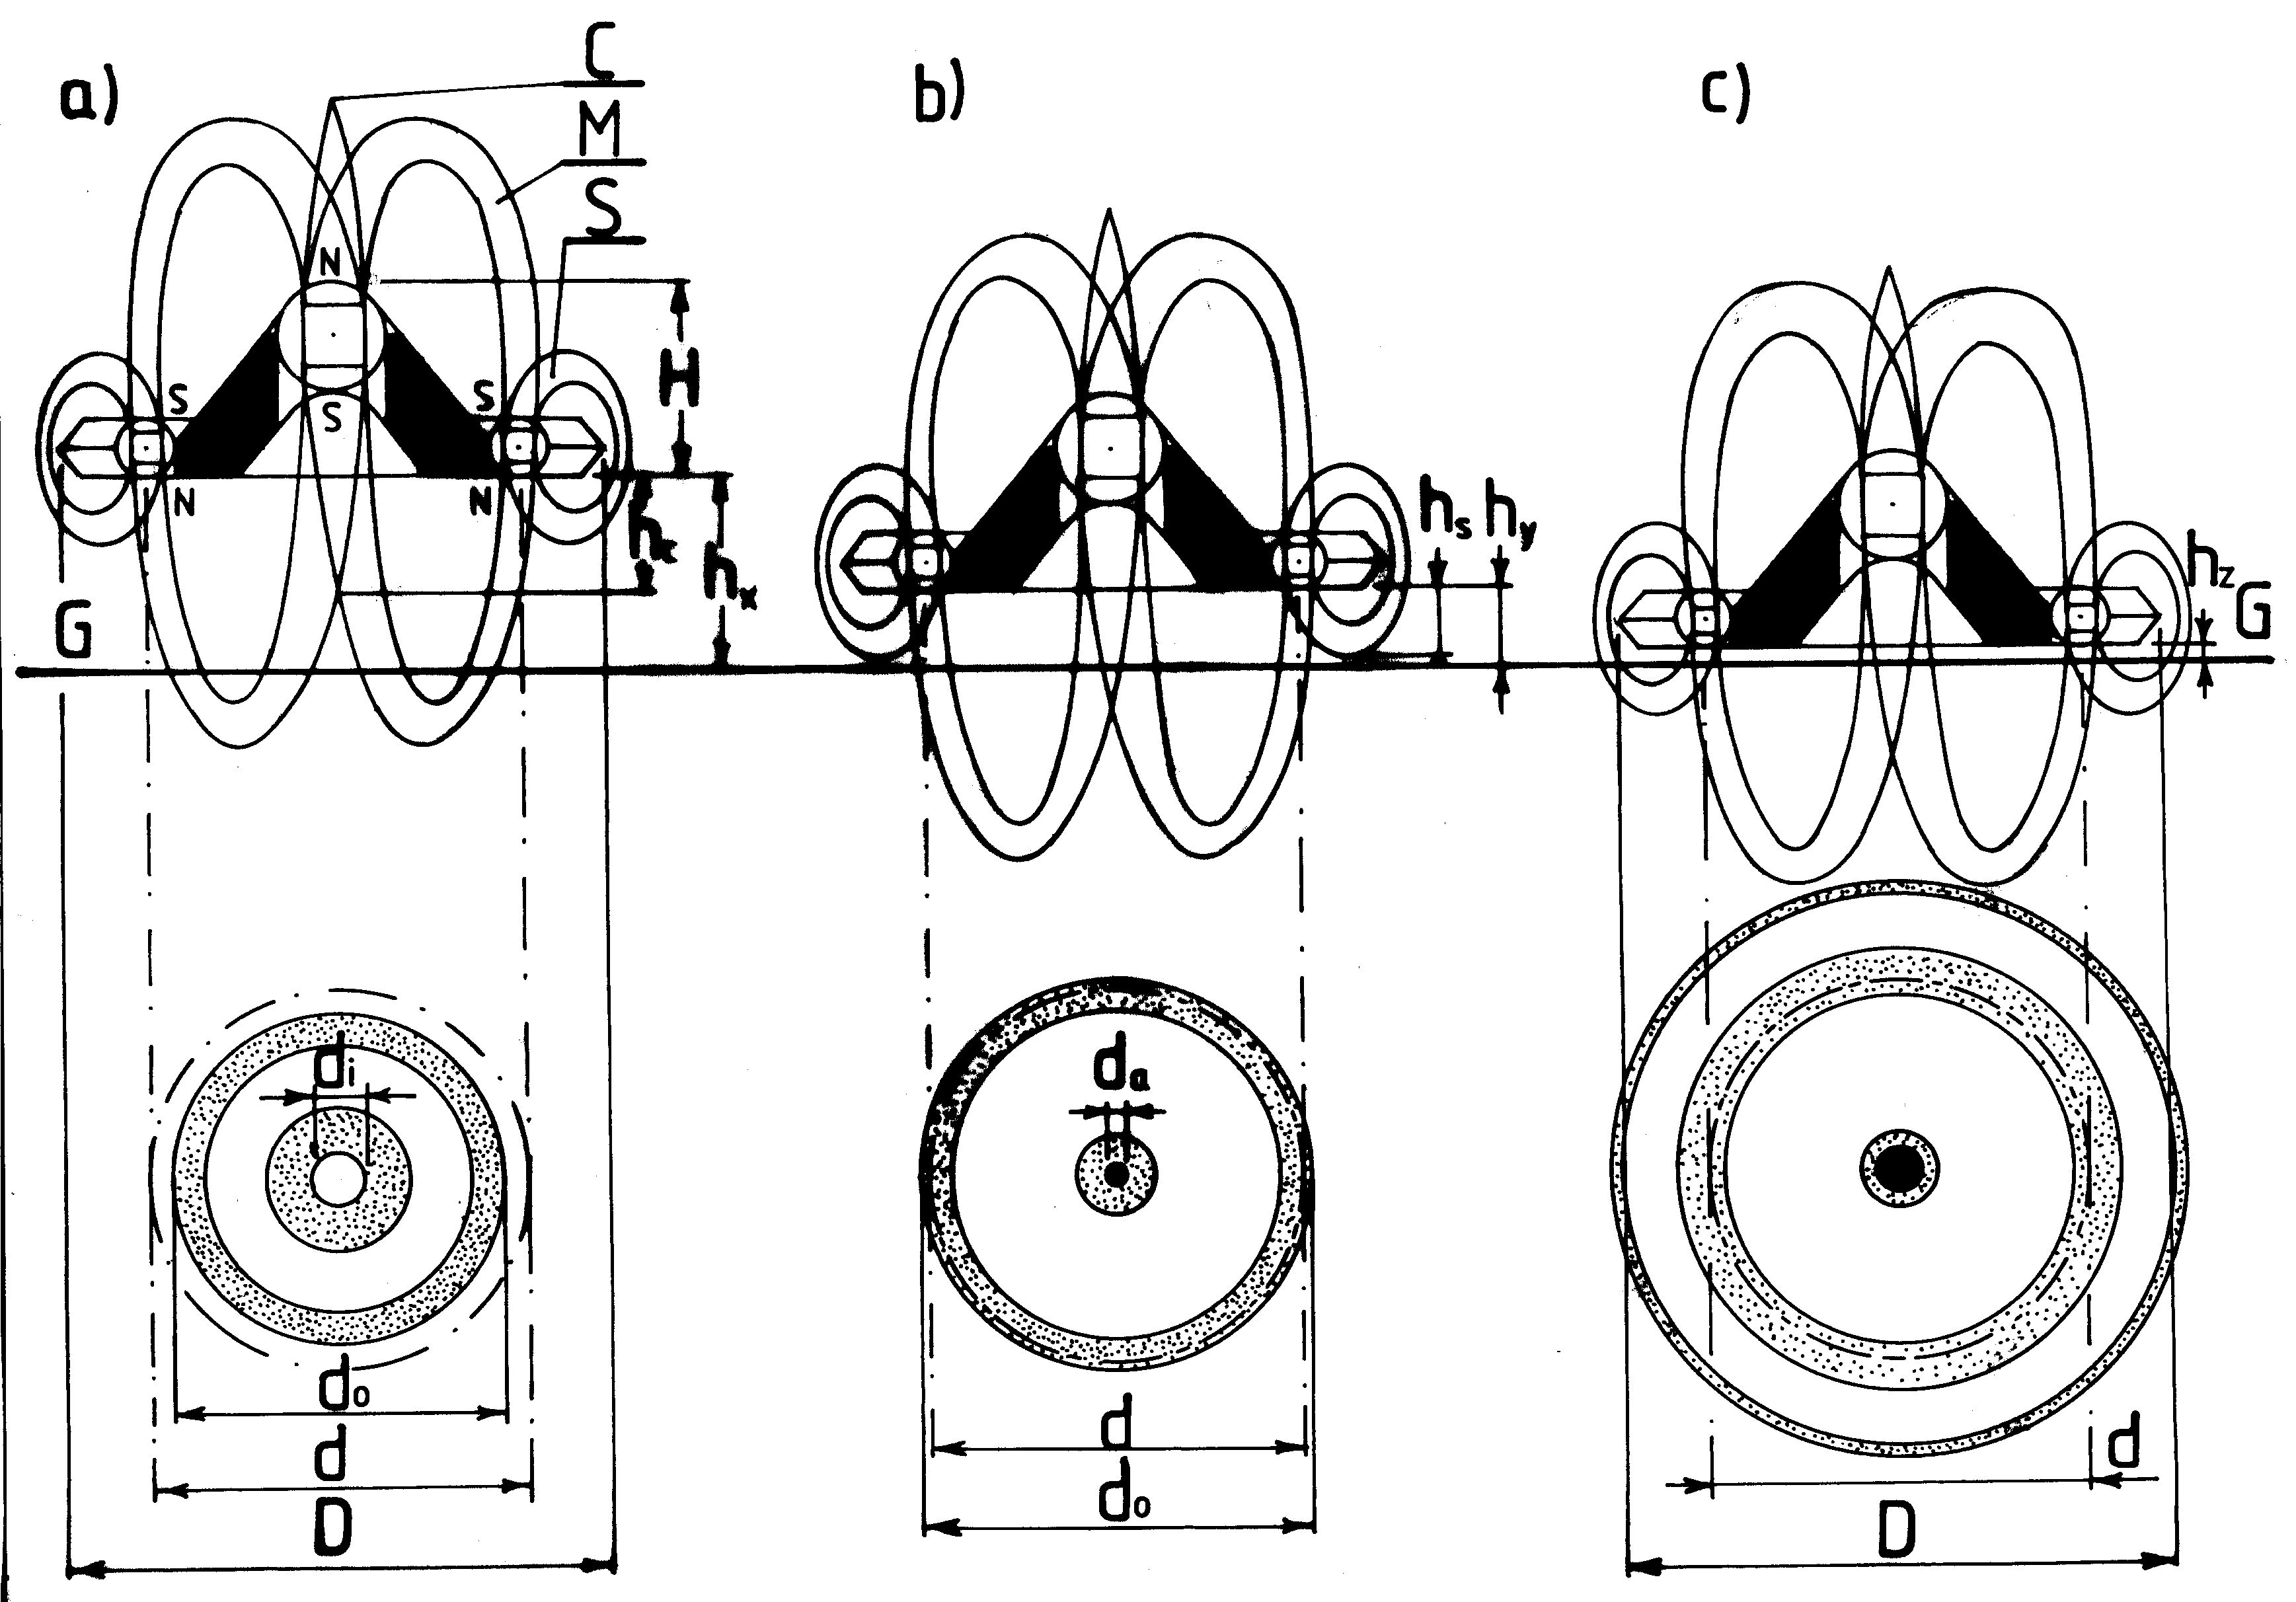 [2e] Figure G38: Shapes of marks left by a single Magnocraft (depending on the height of hovering). [2e] Figure G38: Shapes of marks left by a single Magnocraft (depending on the height of hovering).
 [2e] Figure G39: Typical marks in hovering close to the ground. [2e] Figure G39: Typical marks in hovering close to the ground.
 [2e] Figure G40: Landings scorched by an inverted Magnocraft. [2e] Figure G40: Landings scorched by an inverted Magnocraft.
 [2e] Figure G41: Plants swirled by circuits wehirling in the air. [2e] Figure G41: Plants swirled by circuits wehirling in the air.
 [2e] Figure G42 (a): Examples of landings formed by flying systems. (a) Landing of a single cell of a flying system. [2e] Figure G42 (a): Examples of landings formed by flying systems. (a) Landing of a single cell of a flying system.
 [2e] Figure G42 (b): Landing of a "platform" flying system. [2e] Figure G42 (b): Landing of a "platform" flying system.
 [2e] Figure G42 (c): Landing of a circular flying system. [2e] Figure G42 (c): Landing of a circular flying system.
 [2e] Table G2: The relationship of dimensions in flying complexes of Magnocraft (K versus D/H). [2e] Table G2: The relationship of dimensions in flying complexes of Magnocraft (K versus D/H).
Instructions:
Part G: How to
replicate
this web page in your own computer:
For some readers that work
on problems addressed on this web page, it would be highly
beneficial to have a replica of this web page together with
all the illustrations, texts, links, etc., in their own
computer. After all, in case of having such a replica, one
can later view this web page, or print it, directly from
his/her own computer, not from the Internet. Thus one becomes
independent from the access to Internet in each situation
when he/she wishes to have a good look at this web page or
at illustrations that this page displays. Waiting for
opening a web page is then also incomparably shorter
than waiting for opening an Internet page. It is then
also not needed to put up with all these subtle obstructions
which seem to plague my web pages almost as it these are
purposely sabotaged by "little green UFOnauts" of some sort.
So for these readers, who wish to make a "source replica"
of this web page in their own computer, below I am describing
step-by-step how to accomplish this. This description reveals
thoroughloy how to prepare the so-called "source replica" of
the web page, means a replica prepared in the programming
language called "HTML" in which this web page was originally
coded. Note that such a "source replica" is much better than
an "image replica" that almost every browser allows to make
in quite a simple way. For example it allows to gradually
complete all missing components of a given web page (e.g.
missing illustrations or text files) from other servers.
It alows to update separately each selected component of
the web page as soon as we meet in Internet their better
versions. It also allows us to learn principles of web
page programming, thus it can be for us a first step towards
later making our own web pages. Here is the instruction
of producing such a "source replica":
#0. Ready-made source replica?
(without advertising banners). One brief information before in items
#1 to #8 below I explain the exact procedure of preparing for yourself
a source replica of this web page. Namely, under some addresses listed
in "Menu 3", such a source replica of this web page, together with
all folders, source codes of web pages, samples of texts and illustration,
etc., but without advertising banners, already awaits in the ZIP format,
ready for downloading to your own computer. So all what you need to
do in order to download it to your own computer, is to click in
"Menu 1" on the menu item marked
"Source replica of this page".
So try to click, because this source replica may be available here
(i.e. at this address) and it would be handy to have it in your
own computer. In turn, when such a ZIPped source replica downloads
to your computer, all what you need to do is UNZIP it onto your
hard disk. After UNZIPing, it forms a separate folder in which
you will find a folder named "a_pajak" with all source files,
subfolders and samples of text and illustration inside, ready for
the running, testing, displaying, and checking how all these work
on your own computer. All what you later need to do in your spare
time is to download to text folders remaining volumes of monograph
[1/4], while to folder 14 download the remaining illustrations,
which could not be included to the ready-made source replica
because of their volume. (Note that in case you already have on your
hard disk a folder named "c:\a_pajak" with
my other source web pages, it is enough if you transfer all files and
subfolders from this new folder "a_pajak" to the already existing one
named "c:\a_pajak".) After this brief information, let us now return
to this procedure of making (all by yourself) a source replica of this
web page. Here it is:
#1. Create a folder
named "a_pajak" (or "archives_pajak") on your hard disk "c:".
This folder is to hold this web page (and possibly also any
other my web pages). To create such a folder, run a utility
program named "Windows Explorer" or "My Computer", choose
"Local Disk (C:)" for the "Address" in this utility program,
then click on "File" in the pull-down menu from this "Windows
Explorer", then click "New", finally choose the command "folder".
Type the name "a_pajak" to the new folder that you created
on you hard disk. Later you are to use this folder "a_pajak"
for storing all my web pages, monographs, and illustrations
that you wish to keep in you own computer.
#2. Create sub-folders
inside of this main folder named "a_pajak". These sub-folders are
to contain subsequent kinds of texts and illustrations displayed
or accessed through this web page. Here is the list of sub-folders
that are used by this web page:
14 - it contains all the illustrations which are used by
monograph [1e] (and thus also by this web page), and also are used
in monograph [1/4].
54 - it contains all the illustrations which are used by
monograph [1e] (and thus also this web page), and also are used
in monograph [5/4].
1e - it contains all illustrations unique to monograph [1e].
flags - it contains images of flags (i.e. German, Spanish,
French, Italian, Polish, and English) used in my web pages. These
images of flags are contained in files named de_flag.gif, es_flag.gif,
fr_flag.gif, it_flag.gif, pl_flag.gif, uk_flag.gif. Any flags
scanned into "*.gif" files with the above names, can be used for
this purpose.
2e - it contains the source text of monograph [2e] in English,
plus all illustrations unique to this monograph [2e].
In order to create such sub-folders, again it is enough to shift
the "Windows Explorer" inside of the folder "a_pajak" and then
generate them one by one.
#3. Save the source code of this web page
in your folder "a_pajak". For this, "right click" on your mouse while pointing
it any text area of this web page (e.g. pointing right here). A small menu
should appear, which is to have the option "View Source". Click on this menu
option, and the source code of complete this web page appears in your text
editor named "Notepad". Click on the "File" pull-down menu from this "Notepad"
and choose the option "Save As...". Save the source code from your "Notepad"
using the name "figs_2e_1.htm" for the "File name" of this code, while for
the "Save in" pointing at the folder "c:\a_pajak" that you created earlier.
Notice that pages called via links from this page, should be saved
under slightly different names, namely:
"figs_2e_1.htm" for the page with illustrations (1),
"figs_2e_2.htm" for the page with illustrations (2),
"figs_2e_3.htm" for the page with illustrations (3).
In order to save the text of (scrollable) "Menu 4", you need to firstly
display it on the screen, by clicking on it from either "Menu 1" or "Menu 2",
and only then you can save the source code of it under the name "menu.htm"
in a manner identical as you save the source code of this web page.
Also all pages called from this page via links in "Menu 1" or "Menu 2", should
be saved almost identically as you save this web page, only that you use
slightly different names assigned to them, e.g names: "oscillatory_chamber.htm"
for the web page on the "Oscillatory Chamber", "magnocraft.htm" for the web
page on "Magnocraft", "tekst_1_4.htm" for the Polish version of this web
page, etc.
#4. Save illustrations. Right click
separately on each illustration from this web page, then choose the option
"Save Picture As". The majority of illustrations you need to save in the
subfolder "14". Remaining in subfolders [54] and [1e]. Notice that each
illustration indicates at the bottom of the screen the subfolder in which
it is to be saved.
#5. Run this web page in your computer.
After you save this web page, you can run it in your own computer whenever
you wish, by simple pointing at the file "figs_2e_1.htm" (i.e. the one with
the source code of this web page) using the "Windows Explorer" for this pointing,
and then double clicking at this file. (You can also run this file by pointing
the "Windows Explorer" at it, and then pressing "Enter".) Pages linked with this
one via hyperlinks can also be displayed through clicking on these hyperlinks
while viewing this page, or can be displayed through clicking via the "Windows
Explorer" at their names, means e.g. at "figs_2e.htm", "figs_2e_1.htm",
"figs_2e_2.htm", "figs_2e_3.htm", "oscillatory_chamber.htm", "magnocraft.htm",
"pajak_jan_uk.htm", etc.
#6. (Optionally) remove banners. Free
servers on which for the understandable reasons I display all my web sites,
usually insert codes of banners to the source code of web pages that are
displayed on them (frequently codes of these banners contain various irritating
errors which try to make viewing my web pages quite difficult). If these banners
irritate you, you can optionally cut them out from
the source code of this web page, after you save this code in your own computer.
To cut the banners out you need to identify their code (either by addresses
referred in this code and starting from "http://...", or by seeking the
comment type "banner insertion ..." which appears at the beginning and
at the end of the banners' code).
#7. (Optionally) update your replica of this
web page. If someone is especially interested in descriptions contained on this
web page, then it would be desirable to check in Internet every let say couple of
months, whether description from this web page are updated and improved. If so, then
it is worth to replace the old version of this web page with this improved version.
For this, it is enough to rename the old replica kept in your computer by adding
the word "old_" in front of it, and then copy from the internet a new version
to store it under the original name that it has.
#8. In case of any doubt regarding the making
of such a replica of this web page, it is worth to see a separate web page that is
entirely devoted to the explaination of the replication procedure of my internet
pages in your own computer. This additional web page is run from
"Menu 2",
where it is listed under the name
Replicate".
Links to illustrations and related texts:
Labels: The label "E" marks the web page with text of English-language version of this monograph.
The label "1st, 2nd, 3rd Figures" mark the web pages with illustrations for subsequent volumes and chapters.
The label "P" marks the web page with text of a Polish-language equivalent of this monograph.
The label "X" marks the web page with the text of English-language version of this monograph
which is designed so as to load much faster because it does NOT show graphics at the loading
stage but only after the user clicks on subsequent Figures to display them.
|